
Ghost CMS provides a range of beautifully designed themes out of the box, but sometimes you may want to make specific modifications to align the theme with your unique vision or branding. For example, you can personalize your blog to add reading time to your Ghost theme for reading time estimates and other things that are necessary to organize the blog well.
Also when customizing your Ghost theme, you might want to ensure that external links open in a new tab for a better user experience. Here’s a simple guide on how to open external links in a new tab in Ghost using the code editor. To achieve this, you can edit or customize your Ghost theme code using a code editor.
In this article, we'll walk you through the process of editing and customizing your Ghost theme code to create a personalized website.
Overview of the blog, You will Learn from this Blog:
- Introduction
- Benefits of Customizing a Ghost Theme
- How to Customize the ghost Theme files
- Additional Tips for Customization.
- Summary of the blog.
- FAQs
Understanding Ghost Themes #1
Ghost themes are the foundation of your website's design and layout. Before customizing a theme, it's important to familiarize yourself with the basic structure and components of a Ghost theme. This will enable you to make informed decisions during the customization process.
Choosing the Right Theme #2
Selecting a theme that aligns with your website's goals and aesthetics is crucial. There are many Ghost themes available, both free and premium. Take your time to explore different options, considering factors such as responsiveness, design flexibility, and compatibility with plugins and extensions.
Customizing the Theme #3
Once you have chosen a theme, it's time to customize it to reflect your brand identity and vision. There are two ways to customize a Ghost theme:
- Using the Ghost Admin Panel: The Ghost Admin Panel allows you to customize some aspects of your theme, such as the colors, fonts, and layout. Not comfortable with code? You can easily change Ghost themes without code and adjust settings in Ghost CMS for simple, non-technical customization.
- Editing the theme files: If you want to make more extensive changes to your theme, you can edit the theme files. This requires some knowledge of HTML, CSS, and JavaScript.
Today we discuss how to customize a ghost theme file in the code editor. Here are some key steps to follow:
Step 1: Set Up a Local Development Environment
If you prefer to customize the theme locally on your computer, set up a local development environment, install Ghost on localhost, and install a code editor. You can use various code editors to customize your theme. Popular options include Visual Studio Code, Sublime Text, and Atom.
Step 2: Back-Up Your Theme
Before making any changes, it's essential to back up your existing Ghost theme. This ensures you can restore your original theme if something goes wrong. You can do this by exporting your theme or creating a copy of your theme's directory on your local computer.
Step 3: Access Your Theme Files
To customize your Ghost theme, you need access to the theme files. You can do this in two ways:
- Accessing a Local Development Environment: If you're developing locally, navigate to your Ghost theme folder. This is typically located in the
content/themesdirectory of your Ghost installation. - Using a Code Editor for Remote Servers: If your Ghost site is hosted remotely, use an FTP client or the control panel provided by your hosting provider to access your theme files. Download the theme folder to your local computer.
Step 4: Open the Theme Folder in the Code Editor
To start customizing your Ghost theme, open the theme files in the code editor. Before opening the theme folder make a backup copy before proceeding with any modifications. You can use any code editor that you prefer, such as Visual Studio Code or Sublime Text.
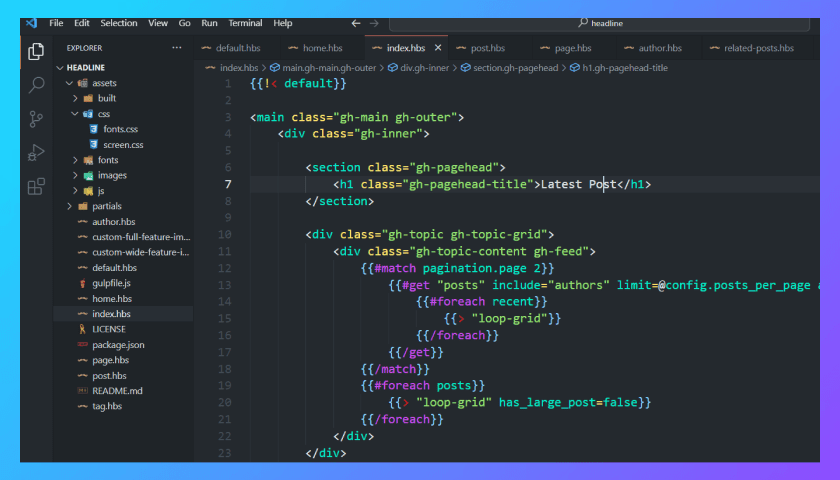
Step 5: Start Customizing the Theme Files
Now you can start editing the code. The main files you'll be working with are usually located in the theme's root directory and include files like default.hbs, post.hbs, index.hbs, and partials folder.
These files typically use Handlebars, a templating language. Handlebars allow you to dynamically render content and make use of variables, conditionals, and loops.
To customize your theme, you can modify the HTML, CSS, and JavaScript code. You can change the layout, typography, and colors, add or remove sections, and more, depending on your needs and coding skills, you can customize various aspects of your Ghost theme:
- HTML: You can edit the HTML files to modify the structure of your pages, add or remove elements, or adjust the layout.
- CSS: Customize the CSS files to change the styling of your theme. You can modify colors, fonts, spacing, and more.
- JavaScript: To add new features or enhance the existing ones, edit JavaScript files.
- Handlebars: Ghost themes often use Handlebars templates for dynamic content. Customize these templates to change how posts, pages, and other content are displayed.
Step 6: Save your changes
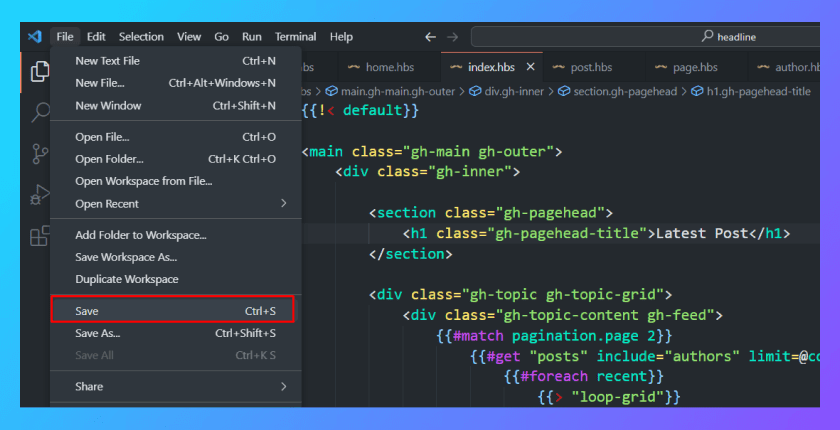
After changing your Ghost theme files, you should save all changes and update the theme files to your Ghost Admin panel.
Step 7: Test Your Changes
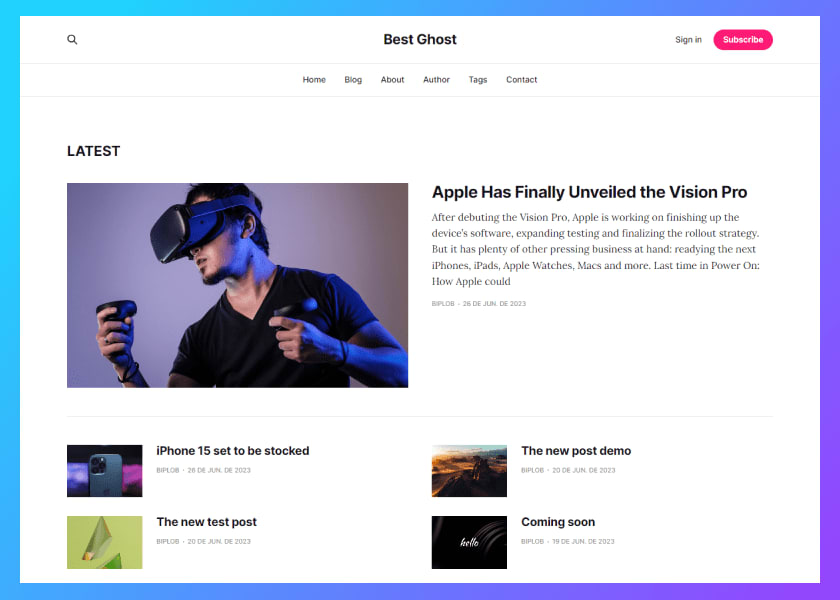
After making changes, test your themes locally before deploying them to your live site. This allows you to catch any errors or issues before they impact your visitors.
By following these steps and investing time and effort into customizing your Ghost theme, you can create a visually stunning and unique website that sets you apart.
Tips for customizing the Ghost theme
Here are some tips for customizing your Ghost theme using a code editor:
- Start by making small changes: It is better to start by making small changes to the theme's files and then previewing your changes. This will help you to avoid making a mistake that breaks the theme.
- Use the theme's documentation: The theme's documentation may provide instructions on how to customize the theme.
- Make backups of the theme's files: It is always a good idea to make backups of the theme's files before you make any changes. This way, you can always restore the theme to its original state if you make a mistake.
- Ask for help if you need it: If you are stuck or need help customizing your Ghost theme, you can post a question on the Ghost Forum or contact the Ghost support team.
Here are some common things that you can customize in your Ghost theme using a code editor:
- The theme's layout. You can customize the theme's layout by changing the HTML and CSS files.
- The theme's typography. You can customize the theme's typography by changing the CSS file.
- The theme's colors. You can customize the theme's colors by changing the CSS file.
- The theme's images. You can customize the theme's images by changing the theme's HTML and CSS files.
- The theme's functionality. You can customize the theme's functionality by changing the theme's JavaScript file. Want to add comment functionality? Learn how to set up Cove Comments for Ghost for seamless integration into your customized Ghost theme.
By following these tips, you can customize your Ghost theme using a code editor to create a unique and stylish blog.
Benefits of Customizing a Ghost Theme
Ghost allows you to customize your theme to match your brand and your needs. There are many benefits to customizing your Ghost theme.
Here are some benefits of customizing a Ghost theme:
- Uniqueness: You can create a unique and eye-catching website that stands out from the crowd.
- Branding: You can use your theme to reinforce your brand identity and make your website more memorable.
- Functionality: You can add custom features and functionality to your website that meet your specific needs. For instance, you can customize Ghost posts with social sharing buttons to make your content more shareable and increase its reach.
- Control: You have complete control over the look and feel of your website.
If you're looking to create a truly unique and memorable website, then customizing your Ghost theme is the way to go.
Conclusion
In conclusion, customizing a Ghost theme is a great way to make your site unique and reflect your own personal style. Remember that customizing a Ghost theme using a code editor requires some coding knowledge.
If you're not familiar with web development, it's a good idea to start with basic changes and gradually work your way up to more advanced modifications. Additionally, always test your changes to ensure they work as expected and don't break your website.
FAQs
Do you have any questions about the customization of the Ghosts theme? We have answers to some frequently asked questions on the topic.
Can I customize any Ghost theme?
Yes, you can customize any Ghost theme if you have access to the theme files. However, keep in mind that some themes may have specific limitations or require advanced coding knowledge for certain modifications.
Do I need to know how to code to customize my Ghost theme?
To personalize your Ghost theme, you don't need to be an expert, however, having some coding experience can be useful. Even if you're a newbie, the Ghost manual offers instructions and resources to help you with adjustments.
How do I customize a Ghost theme?
There are two ways to customize a Ghost theme:
- Using the Ghost Admin Panel: The Ghost Admin Panel allows you to customize some aspects of your theme, such as the colors, fonts, and layout.
- Editing the theme files: If you want to make more extensive changes to your theme, you can edit the theme files directly. This requires some knowledge of HTML, CSS, and JavaScript.
What are some of the things I can customize in a Ghost theme?
Here are some of the things you can customize in a Ghost theme:
- Colors: You can change the colors of your website's background, text, and links.
- Fonts: You can change the fonts that are used on your website.
- Layout: You can change the layout of your website's pages.
- Content: You can add custom content to your website, such as a footer or a sidebar.
- Behavior: You can change the behavior of your website, such as how the menus work or how the search function works.
You may like it!

CEO and Founder
Enamul Haque is the CEO & Founder of ElectronThemes and a seasoned professional in web development. He is a top-rated freelancer on Upwork and Fiverr and an exclusive author in the ThemeForest.
See all Articles