Are you ready to take your Ghost blog to the next level? One of the most exciting things about Ghost is its unmatched flexibility and customization capabilities. Whether you're a seasoned designer or a passionate blogger just starting, you can personalize your site to perfectly reflect your unique voice and brand.
In this blog, we'll delve into the world of ghost theme changes and setting adjustments in Ghost CMS. We'll walk you through the step-by-step process, from browsing and installing a stunning ghost theme to fine-tuning the details that make your site truly yours.
You will learn from this Blog:
- Introduction
- How to Change Ghost Theme
- How to adjust settings
- Additional customization tips
- Summary
- FAQs
Changing Ghost Theme: Revamping the Visual Appeal
Theme plays a crucial role in shaping the overall look and feel of your Ghost blog website. They determine the arrangement of elements, color schemes, typography, and other visual aspects. Ghost offers a variety of themes, both free and premium themes, catering to diverse styles and preferences.
1. To change the theme for your Ghost blog:
Step 1.1: Access the Ghost Admin: Log in to your Ghost blog's admin panel using your credentials.
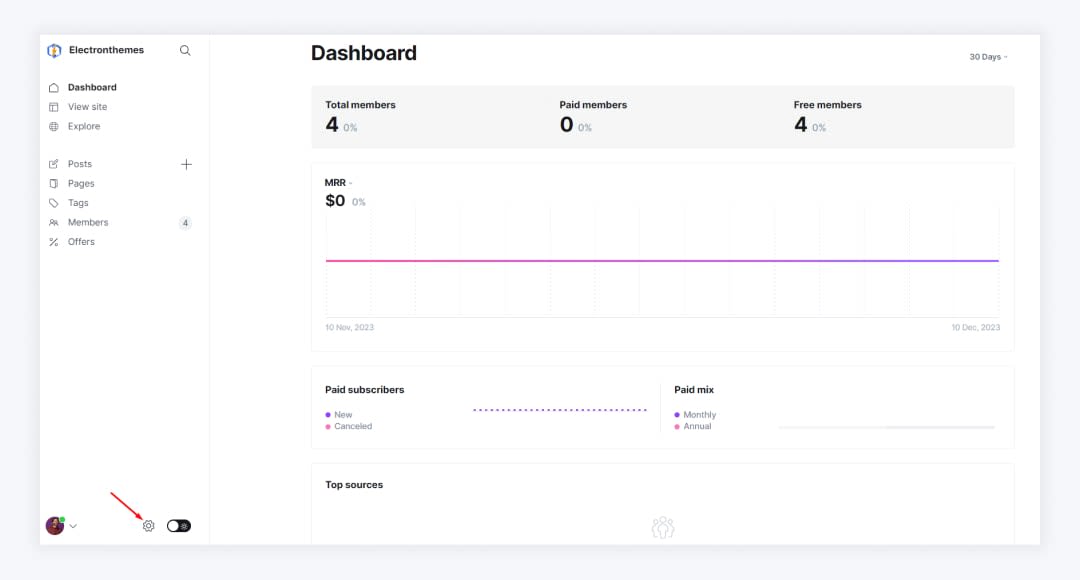
Step 1.2: Navigate to Dashboard Settings: Click on the gear icon in the bottom left corner to open the Settings menu.
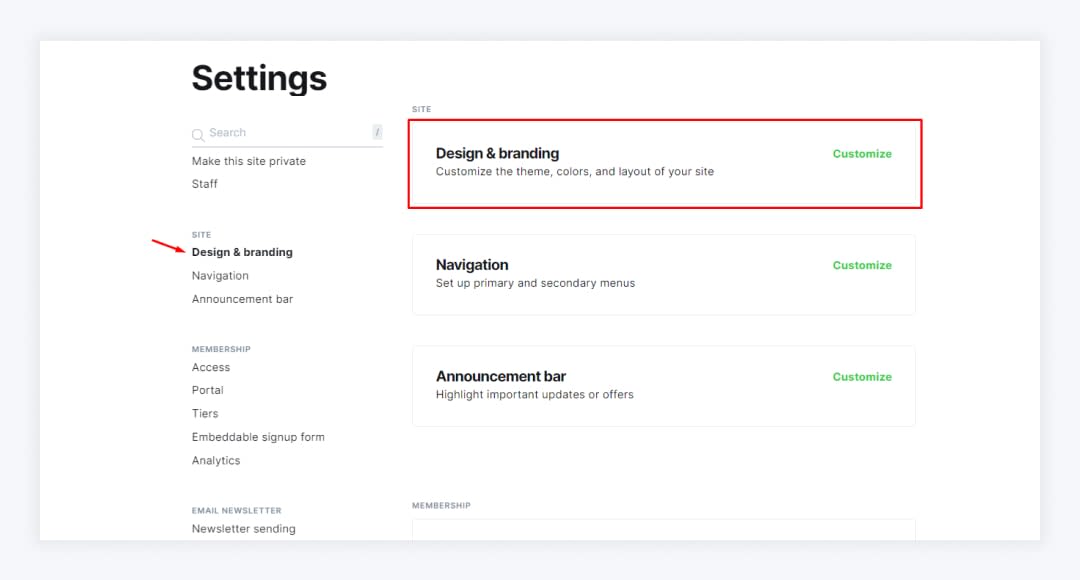
Step 1.3: Access Design & Branding Section: Select "Design & Branding" from the site options and click on the customize on the right corner. Click on the "Change theme" in the bottom right corner.
Step 1.4: Install your theme.
You can install your theme in two ways:
- Install from Ghost Marketplace: After clicking on the change theme you will see the "Themes" section, you can browse the Ghost Marketplace themes. Select the theme you want to use from the list of available themes. Once you've chosen your preferred theme, click on the "Install" button.
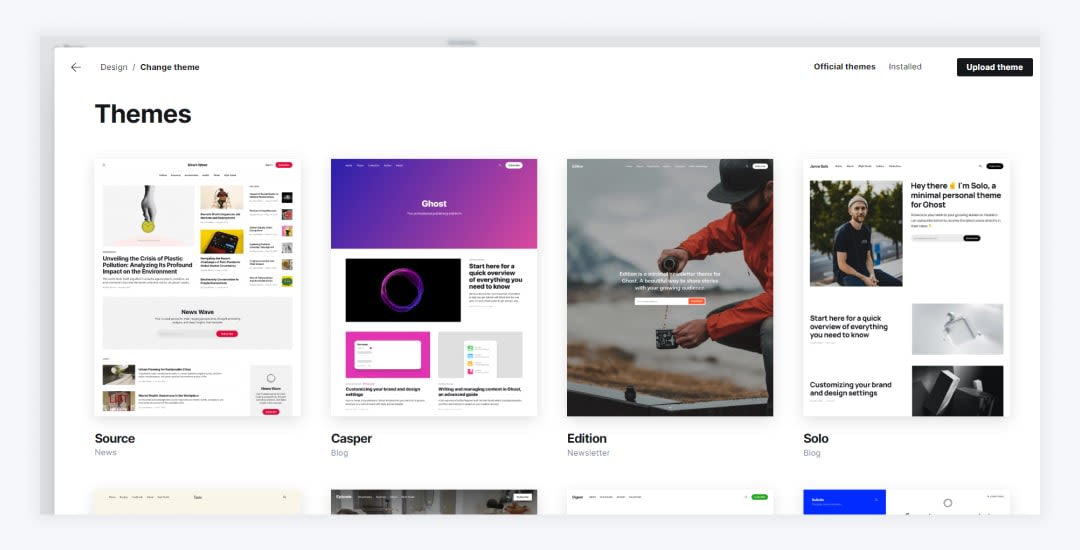
- Install from other marketplaces: You can upload a theme file (.zip) that you have downloaded. To upload a theme click on the "Upload theme" button in the top right corner. Once you have found a theme that you like, click on "Install theme".

Step 1.5: Once the theme has been installed, click on "Activate" to make it the default theme for your blog.
2. To adjust settings in your Ghost blog
- Log in to your Ghost Admin dashboard.
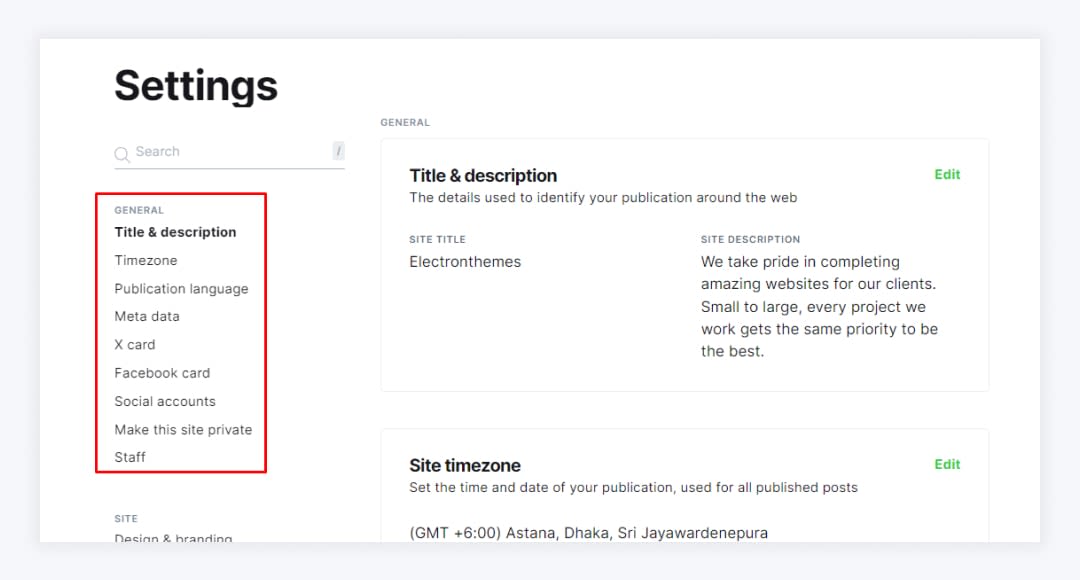
- Click on the "Settings" tab.
- Select the setting you want to adjust from the left-hand menu.
- Make the desired changes to the setting.
- Click on the "Save" button.
There are many different settings that you can adjust to customize your Ghost blog. Some of the most common settings include:
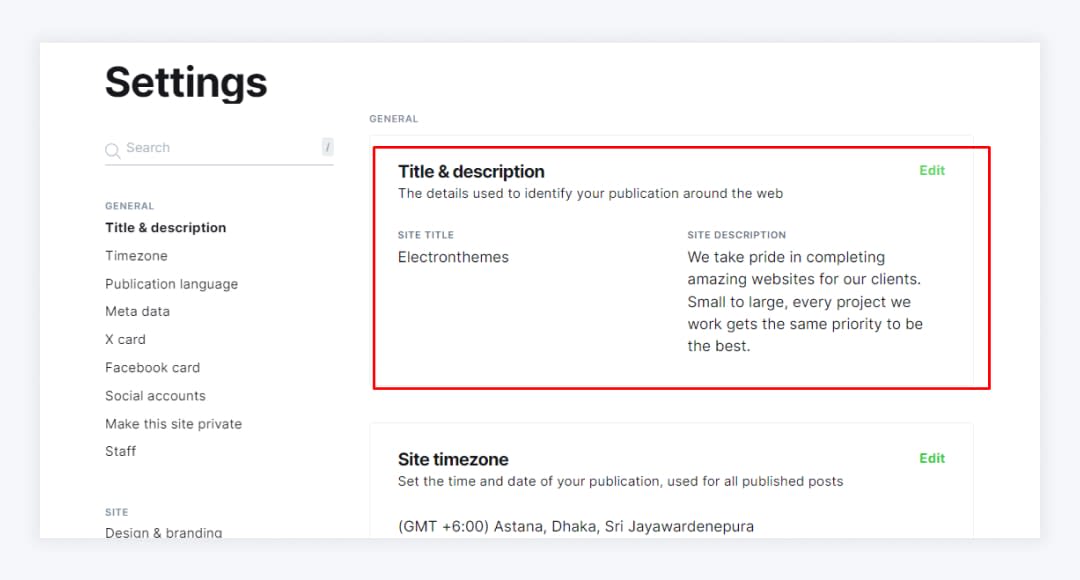
General settings: These settings include the title and description of your blog, the URL of your blog, and the language of your blog.
Site title and description: These settings are used to define the title and description of your blog, which will be displayed in search engine results and other places.
Design settings: These settings include the theme of your blog, the logo of your blog, and the font for your blog.
Logo and cover image: These settings allow you to upload a logo and cover image for your blog.
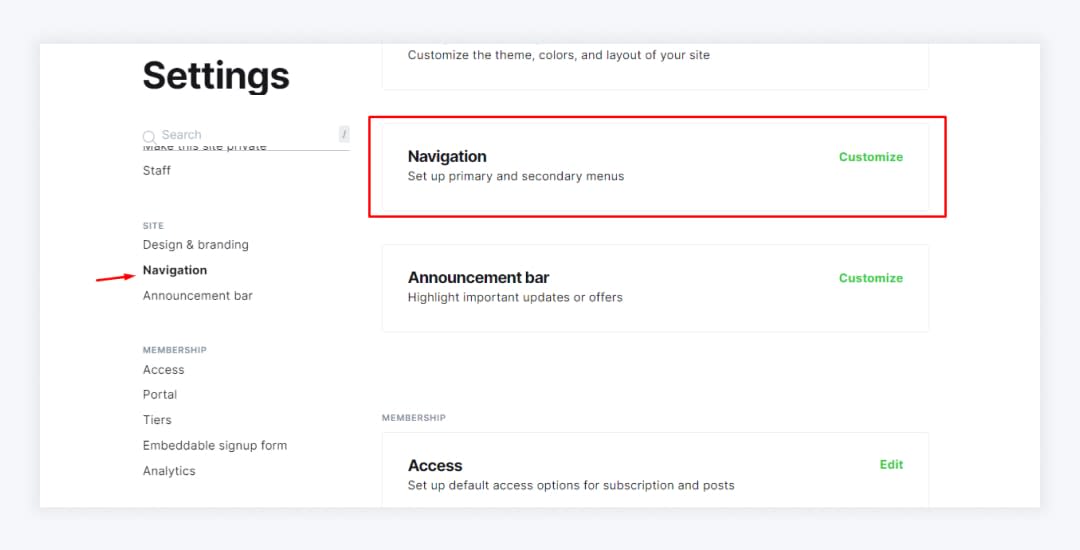
Navigation menu: This setting allows you to create a custom navigation menu for your blog.
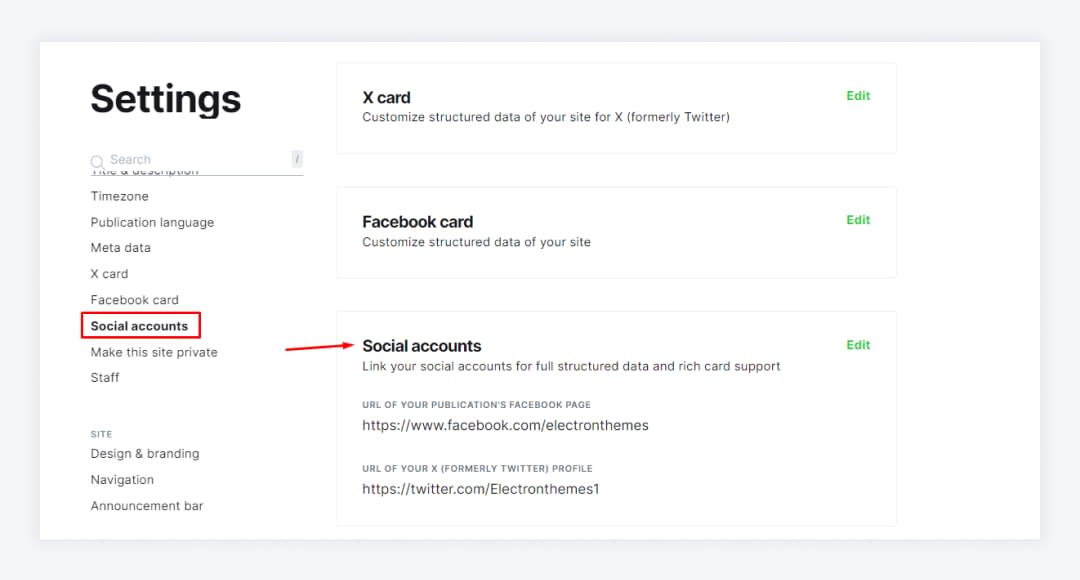
Social media links: This setting allows you to add links to your social media profiles.
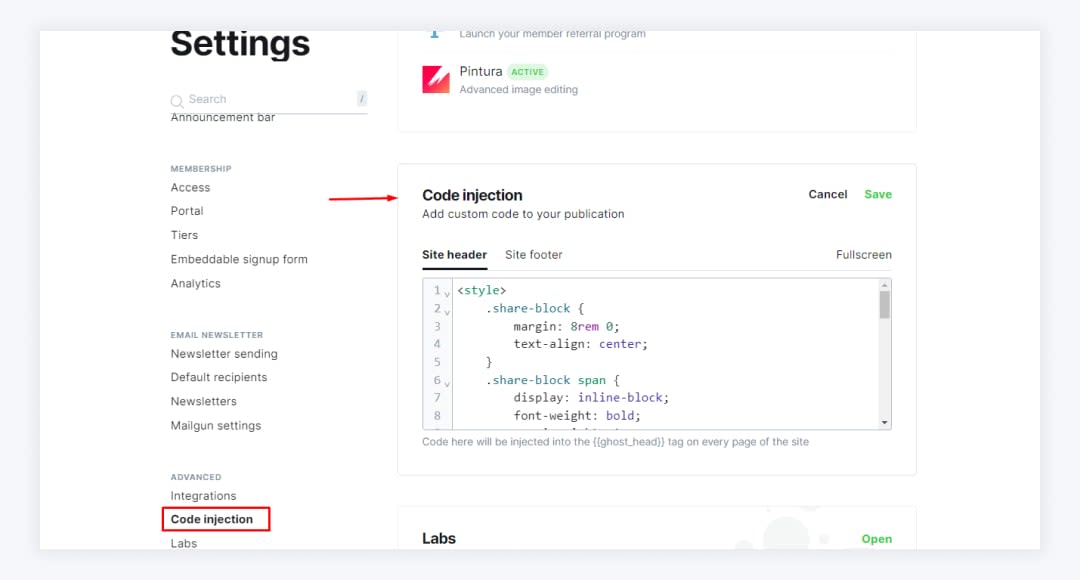
Code injection settings: These settings allow you to inject custom code into your blog, such as Google Analytics code or Facebook Pixel code.
Additional Customization Tips: Unleashing Your Creativity
In addition to changing the theme and adjusting settings, you can also customize your Ghost blog by editing the theme files directly. This is a more advanced option, and it is not recommended for beginners. However, if you are comfortable with HTML, CSS, and JavaScript, you can use this method to make more drastic changes to the look and feel of your blog.
- Custom Theme Development: For experienced developers, Ghost offers the ability to create custom themes, providing complete control over the blog's design and functionality.
- Theme integrations: Explore a wide range of theme integrations or plugins that extend the capabilities of your chosen theme, adding new features and enhancing the blog's functionality.
- Code Injection: Utilize code injection techniques to implement custom CSS or JavaScript code, making precise modifications to the blog's appearance and behavior.
- Preview your changes: Before you activate a new theme or save your settings changes, be sure to preview your changes to make sure you are happy with the way your blog looks and behaves.
- Back up your theme files: Before you make any changes to your theme files, be sure to back them up in case you need to revert to the original theme.
Summary
By mastering the art of changing themes and adjusting settings, you can transform your Ghost blog into a visually appealing and functionally exceptional online space that teflects your brand and resonates with your audience. Embrace the power of customization and let your creativity shine through your blog. I hope this blog post has helped you learn how to change themes and adjust settings in Ghost.
FAQs
Do you have any questions about how to change themes and adjust settings in Ghost? We have answers to some frequently asked questions on the topic.
What are custom settings in Ghost themes?
Custom settings are a powerful feature that allows ghost themes developers to expose specific configuration options to site owners directly through the Ghost Admin interface. This enables users to easily customize aspects of the theme without needing to edit code.
How do I manage navigation menus in Ghost CMS?
To manage navigation menus, go to the "Navigation" section in the Ghost Admin Dashboard. Under "Navigation," you can add, remove, or rearrange menu items to structure your site's navigation according to your preferences.
What should I do if I make a mistake while editing my theme?
If you make a mistake while editing your theme, you can always revert back to the default settings. You can also try deleting the theme file and uploading it again.
You may also like it!
- Image Optimization: Ghost Blog Website– Learn how to optimize images for your Ghost blog website to improve loading times and enhance overall site performance.
- What is Code Injection in Ghost CMS and how to use it?– Discover how to use code injection in Ghost CMS to add custom features and functionality to your website without altering the theme files.
- How to Set Up Disqus Comments on Ghost Website– Protect your website’s comment section by integrating secure comment systems like Disqus, allowing for better moderation and engagement.
- How to Customize Portal settings in Ghost CMS– Explore how to customize your Ghost portal settings for a personalized and seamless user experience on your website.
- Future of Blogging: Latest Trends with Ghost CMS– Stay updated on the latest blogging trends and how Ghost CMS can help you create future-proof, engaging content for your audience.

CEO and Founder
Enamul Haque is the CEO & Founder of ElectronThemes and a seasoned professional in web development. He is a top-rated freelancer on Upwork and Fiverr and an exclusive author in the ThemeForest.
See all Articles