
If you're looking to engage with your audience and encourage discussions on your Ghost website, adding a comment system can be a valuable addition. Cove is a popular comment system that integrates seamlessly with Ghost, allowing you to create a space for your readers to leave their thoughts and interact with your content.
It is known for its clean design, ease of use, and moderation tools. Cove Comment also offers a number of features that are not available in Ghost's built-in commenting system, such as comment reactions, nested comments, and comment moderation tools. In this blog, I will guide you through the steps to set up Cove comments on your Ghost website.
Overview: You will learn from this Blog-
- Introduction
- How to Create Custom Integration in Ghost.
- How to Create Cove account.
- How to Set Ghost integration credentials in Cove.
- How to set up a cove comment account with Ghost.
- Updating your Ghost theme
- Summary of the Blog
- FAQs
Benefits of using Cove Comment on your Ghost website
Cove Comment offers a number of benefits over Ghost's built-in commenting system, including:
- A clean and modern design
- Easy of use
- A variety of moderation tools
- Comment reactions
- Nested comments
- The ability to translate the comment section into any language
While Cove is an excellent choice, if you prefer other options, you can learn how to set up Disqus comments on a Ghost website for a feature-rich and widely recognized alternative.
To set up Cove Comment on your Ghost website, you will need to:
- Enable Members in Ghost, including setting up the email system
- Create a new custom integration in Ghost Admin.
- Create a Cove account.
- Set your Ghost integration credentials in the Cove account.
- Download and edit your current Ghost theme
- Add the Cove Comment code to your Ghost theme.
- Re-upload your Ghost theme.
This is a simple overview of installing Cove. In your Cove account, you will find detailed steps, with code to copy and paste.
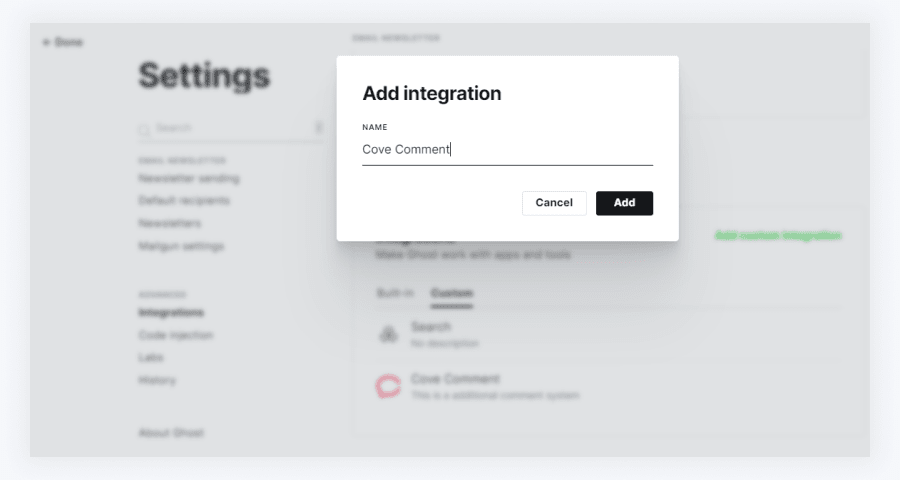
Step 1: Creating a new custom integration in Ghost
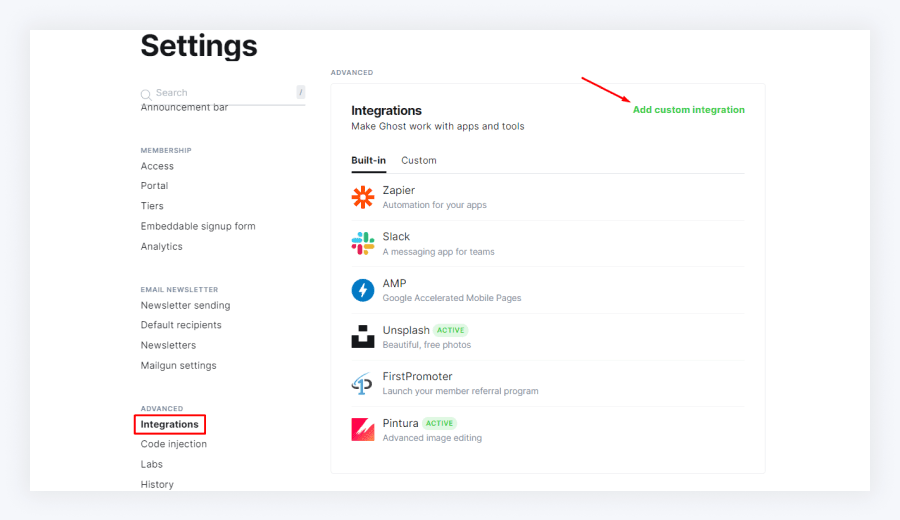
To create a new custom integration in Ghost, Go to Settings > Integrations then click on the Add custom integration button in the Ghost dashboard.
Step 2: Creating a Cove account
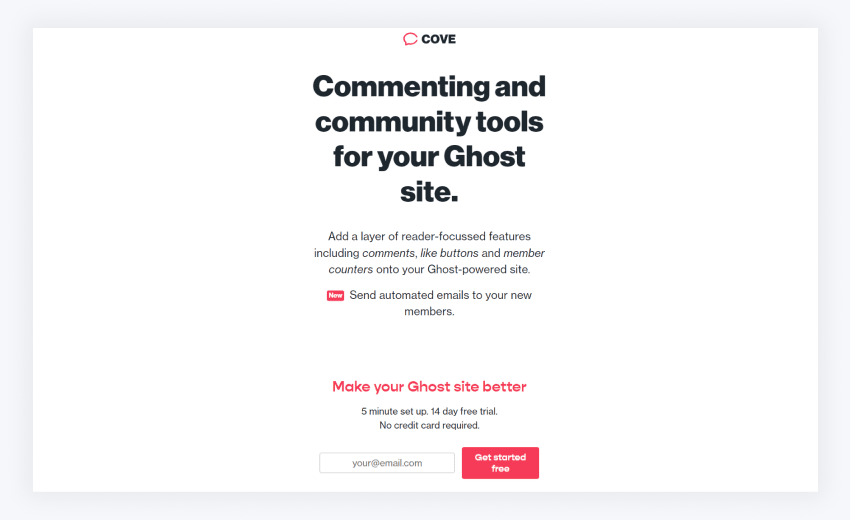
To create a Cove account, visit the Cove website and enter your email address to get started Sign up.
Once you have created an account, you will need to verify your email address and then you will provide some information.
Step 3: Setting your Ghost integration credentials in Cove
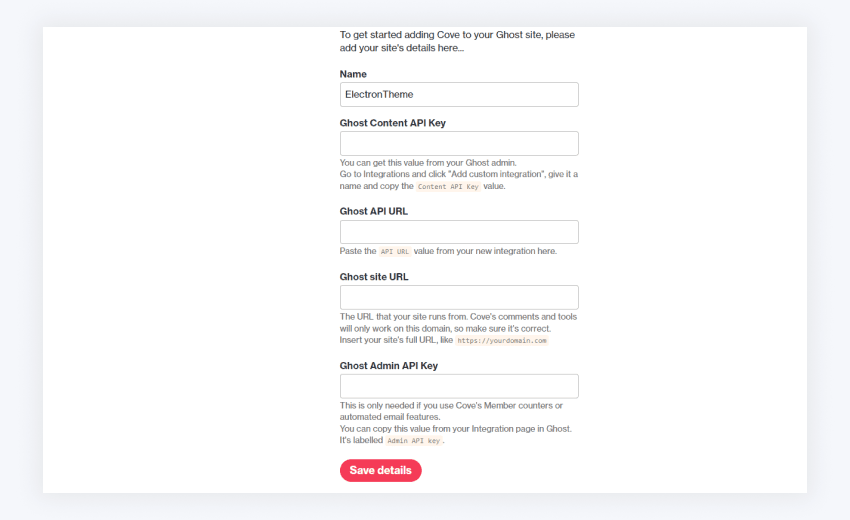
Once you have created a new custom integration in Ghost, you will need to set your Ghost integration credentials in your Cove account.
Enter the following details in the fields:
- Name- Give your site name in the name field.
- Ghost content API Key - Enter your Ghost content API key that you find in your created cove integration in the ghost dashboard.
- Ghost Admin API Key - Enter your Ghost admin API key that you find in your created cove integration.
- Ghost API URL and Site URL - You also find this URL in your cove integration.
You can copy this information from your cove comment integration in ghost admin. To do this Go to Integration > Custom the option then click on the integration to see all the information.
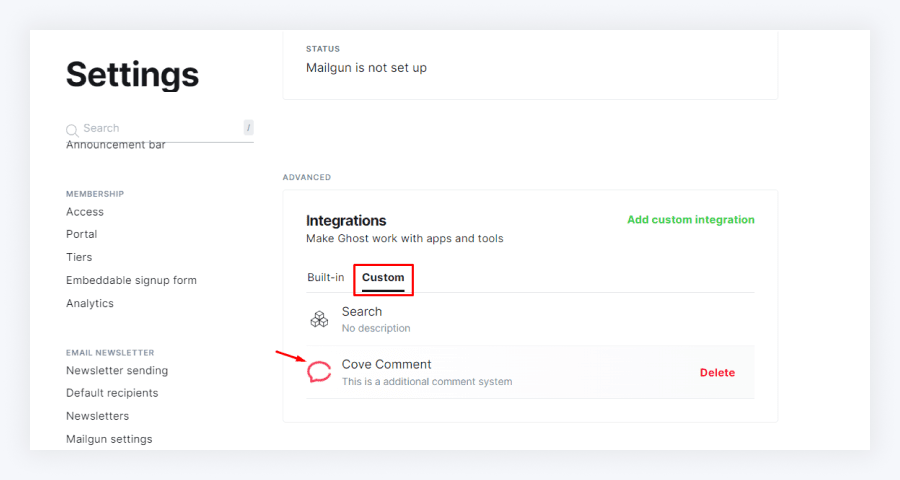
On the next page, you will see a list of your Ghost integration credentials.

Step 4: Adding the Cove Comment code to your Ghost theme
First Download your theme then open it with the code editor to add this code to the theme.
4.1. Add Cove's Javascript file to your theme
You need to add a comment.js file cdn link above the {{ghost_foot}} tag in the default.hbs file.
You will find this line of code in your Cove comment account. To copy your Cove’s javascript file go to your Cove account Click on the comment tab > Installation instructions > Comments you will find it in step 2 in the installation guide.
<script src="<https://cdn.cove.chat/comments.js>" data-cove-id="add_your_cove_id_here" async></script>

4.2. Add the comments code to your template
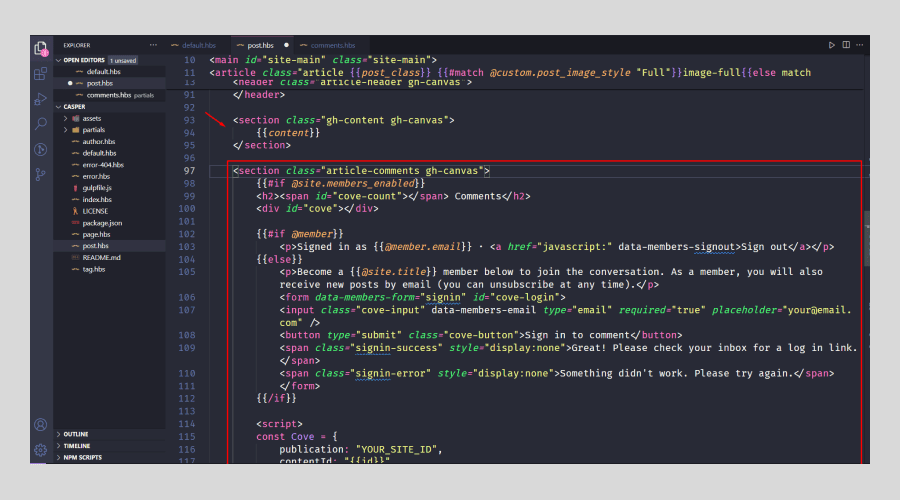
To add the Cove Comment code to your Ghost theme, you will need to locate the template file where you want to insert comments on your site.
This is usually inside post.hbs , right after the content section of your posts.
<section class="article-comments gh-canvas">
{{#if @site.members_enabled}}
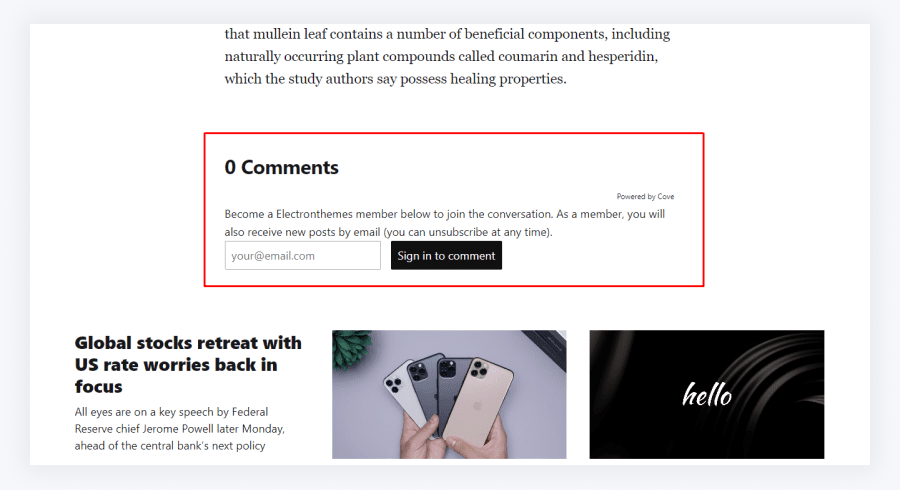
<h2><span id="cove-count"></span> Comments</h2>
<div id="cove"></div>
{{#if @member}}
<p>Signed in as {{@member.email}} · <a href="javascript:" data-members-signout>Sign out</a></p>
{{else}}
<p>Become a {{@site.title}} member below to join the conversation. As a member, you will also receive new posts by email (you can unsubscribe at any time).</p>
<form data-members-form="signin" id="cove-login">
<input class="cove-input" data-members-email type="email" required="true" placeholder="your@email.com" />
<button type="submit" class="cove-button">Sign in to comment</button>
<span class="signin-success" style="display:none">Great! Please check your inbox for a log in link.</span>
<span class="signin-error" style="display:none">Something didn't work. Please try again.</span>
</form>
{{/if}}
<script>
const Cove = {
publication: "YOUR_SITE_ID",
contentId: "{{id}}",
memberId: "{{@member.uuid}}",
memberEmail: "{{@member.email}}"
}
</script>
{{/if}}
</section>
On the other way, In your theme partials folder, you can make a new file called comments.hbs.
Copy and paste the following code snippets into your new comments.hbs file.
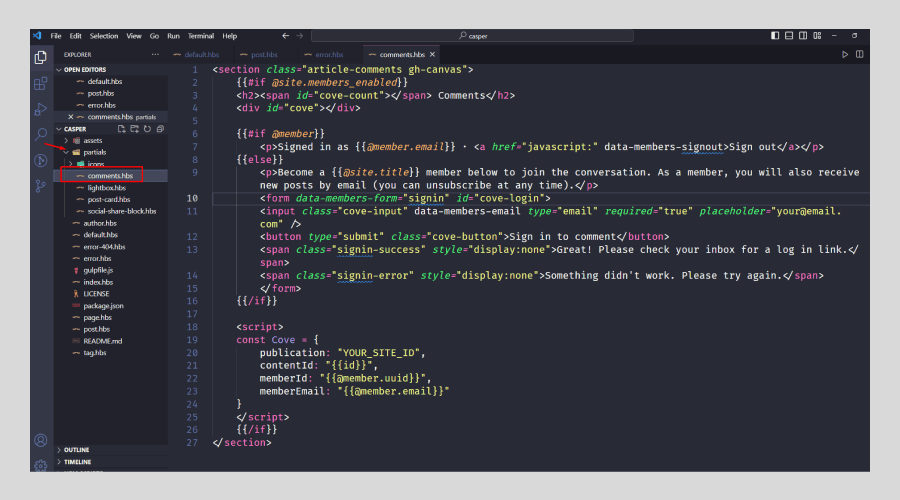
Now add the following code to your post.hbs templates. Paste it where you want to show in your post.
{{> comments}}

{{#post}} and {{/post}} tags on your post template, otherwise Cove will not work.4.3. Show comment counts in your post lists
If you want to show how many comments each post has when people are browsing your homepage or post archives then follow the instructions below.
To add comment counters, simply add the following code in your post loop, which is typically found post.hbs file in the theme folder.
You can add this code in the post meta section or any other place you want to like.
<span data-cove-count-comments="{{id}}"></span>
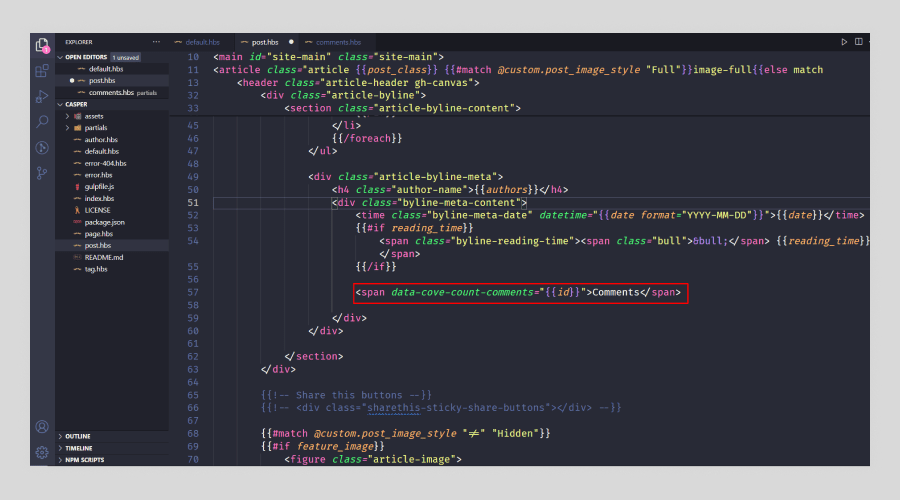
After adding this will display something like 3 comments for each post in your post list.
Step 5: Updating your Ghost theme
Once you have added the Cove Comment code to your theme, you will need to update your theme.
To do this, go to Settings > Design & Branding > Change Theme in the Ghost Admin dashboard, click on the "Upload theme" button, and upload your updated theme file.
Once your theme has been updated, Cove Comment will be enabled on your website. You can now start accepting comments from your visitors!
Summary of this blog
In summary, Cove Comments is a powerful and easy-to-use commenting platform that can help you build a community around your Ghost website.
By following the steps above, you can set up Cove comments on your Ghost website in minutes.
Embrace Cove and make your website a hub for meaningful discussions and feedback. Start the conversation today!
FAQs
Do you have any questions about how to set up Cove's comment on the Ghost Website? We have answers to some frequently asked questions on the topic.
Is Cove mobile-friendly?
Yes, Cove comments are optimized for mobile devices, ensuring that your readers can easily engage with your content on various platforms.
Is Cove free to use, or does it have a pricing structure?
Cove offers different pricing plans, including a free tier with basic features and premium plans with additional functionalities. You can choose the plan that best suits your needs and budget.
Is Cove Comment secure?
Yes, Cove Comment is secure. Cove Comment uses industry-standard security practices to protect your data.
Post You May Like
- How to Set Up Disqus Comments on Ghost Website– Learn how to integrate Disqus comments into your Ghost website for a better user engagement and an enhanced commenting experience.
- How to Create Pages in Your Ghost Website from Ghost Dashboard– Discover how to easily create and manage pages for your Ghost website directly from the Ghost dashboard, simplifying content management.
- How to install a ghost theme in your ghost admin panel– Follow this guide to install a new Ghost theme through your Ghost admin panel, allowing for a quick and simple design update.
- How to customize a ghost theme from a ghost CMS dashboard– Explore the customization options available within the Ghost CMS dashboard to modify and personalize your Ghost theme to match your brand.
- Step-by-Step Guide: Installing Ghost on Your Local Computer– Step-by-step instructions for installing Ghost CMS on your local computer, allowing you to develop and test your website before going live.

CEO and Founder
Enamul Haque is the CEO & Founder of ElectronThemes and a seasoned professional in web development. He is a top-rated freelancer on Upwork and Fiverr and an exclusive author in the ThemeForest.
See all Articles