
Disqus is a popular third-party commenting platform that can be seamlessly integrated with your Ghost blog. Disqus offers a user-friendly and feature-rich commenting system that can enhance your website's interactivity.
Adding a commenting system to your Ghost website is a valuable way to engage with your readers and build a sense of community around your content. In this guide, we will show you how to set up Disqus comments on your Ghost website.
Before Starting We Need
Before implementing Disqus integration, We’ll first need to take care of a few basic steps:
- Create a Disqus account using the link: https://disqus.com/profile/signup/
- Create a new site and using the link: https://disqus.com/admin/create/
- Collect your Disqus Shortname – we’ll need this later.
Step 1: Create a Disqus Account
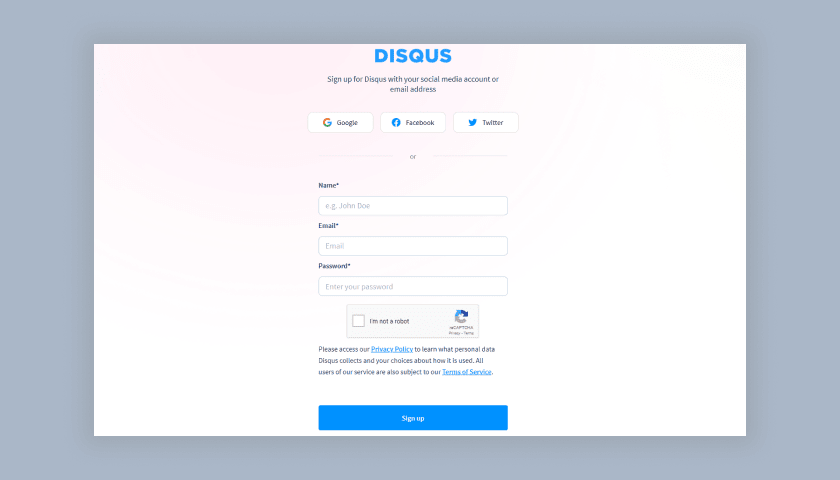
If you don't have a Disqus account, first you need to sign up for one. To create a Disqus account visit Disqus Signup and follow the registration process.
Step 2: Set Up Your Disqus Website
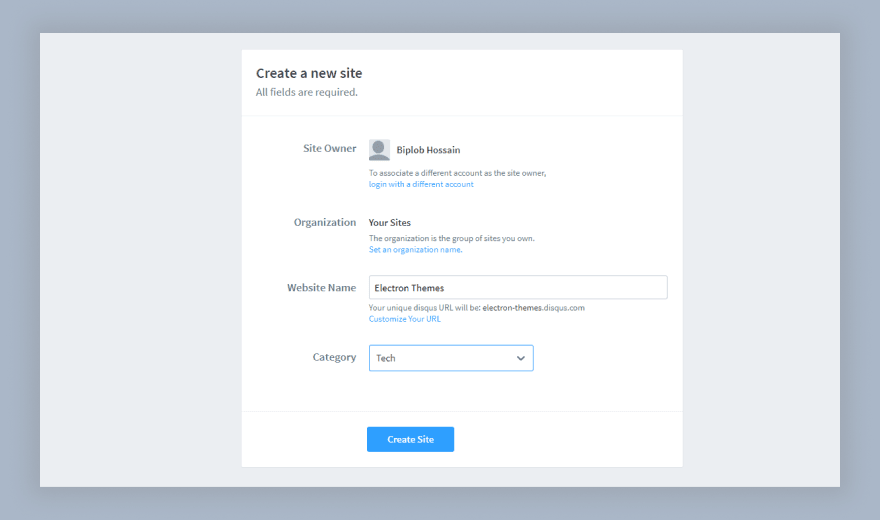
After creating your Disqus account, Now login.
- Choose the option "I want to install Disqus on my site"
- Add Website name. It is just your website name, not the website URL. This name will be used as a short name for the Disqus comment.
- Choose a category from the select option
- Next, subscribe to the basic or premium plan
- Follow the next steps to configure your website URL with Disqus
Step 3: Copy the Disqus Universal Comment code
First, copy this code onto your clipboard. You will also find this universal code on the Disqus website.
But, This is not the same as the Disqus Universal Code, It is specially customized for easy use in Ghost themes:
<div id="disqus_thread"></div>
<script>
    var disqus_config = function () {
        this.page.url = "{{url absolute="true"}}";
        this.page.identifier = "ghost-{{comment_id}}"
    };
    (function() {
    var d = document, s = d.createElement('script');
    s.src = '<https://example-short-name.disqus.com/embed.js>';
    s.setAttribute('data-timestamp', +new Date());
    (d.head || d.body).appendChild(s);
    })();
</script
Step 4: Insert the Comment Code into your theme
Open the post.hbs file in your ghost theme, where you want to insert the code. The best place to insert the code is after the content section in the template file. I use Ghost's official Casper theme for writing this blog, if you want to use Ghost's official free theme then you’ll see a comment section after the content area. Now remove the {{#if comments}} block and replace the {{comments}} helper with your Disqus code.
{{#post}} and closing{{/post}} helpers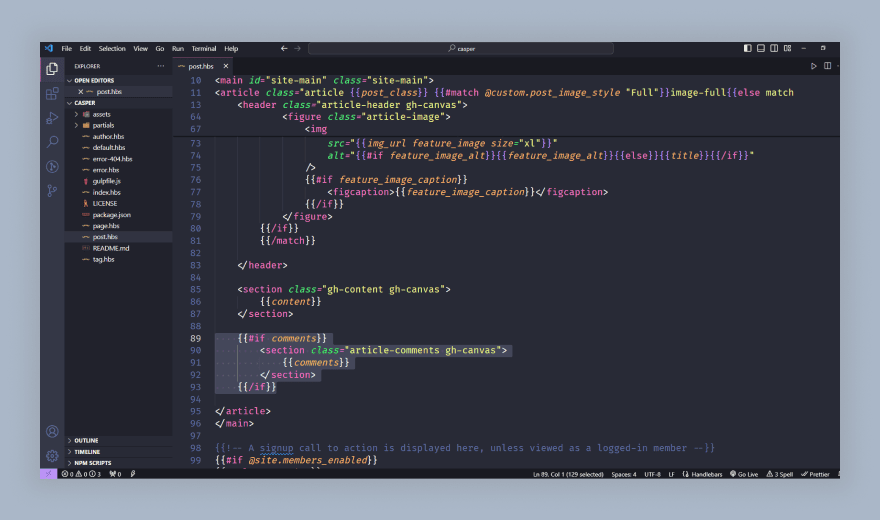
Remove the comments block and paste your code
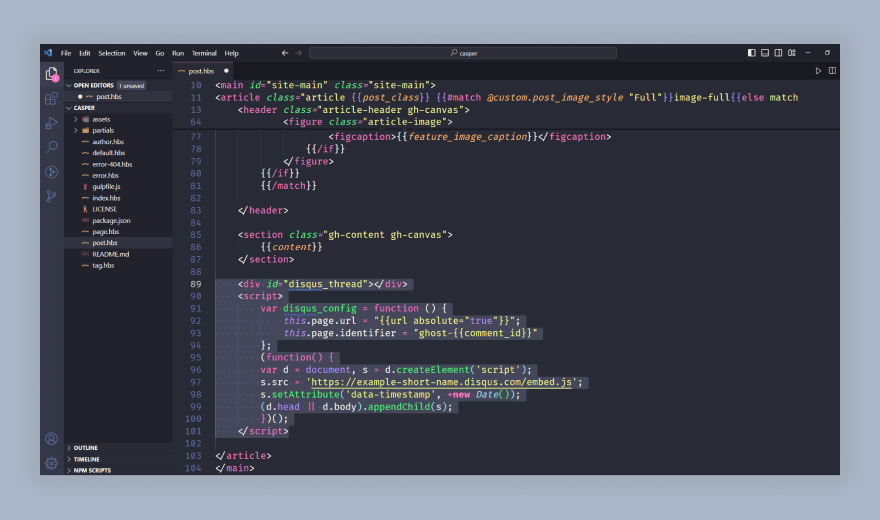
Step 5: Insert your Disqus short name into the comment code
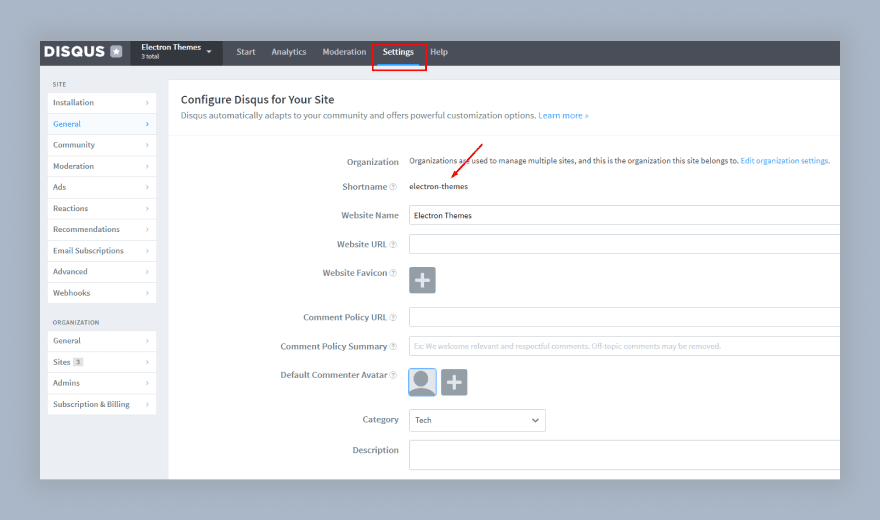
Next, you’ll need to visit Disqus Admin, and find your Disqus shortname that you created in step 2. From the site’s settings area, you will find the shortname and copy it.
Now find this line below in the Disqus comment code and replace example-short-name with the shorname from the link https://example-short-name.disqus.com/embed.js. Then save the file, make it zip to upload a fresh copy of your theme, and restart Ghost.
s.src = '<https://example-short-name.disqus.com/embed.js>';Now, the Disqus Comments are loading on your post pages.

How to display comment count
To display the comment count on your post follow these steps:
Step 1: First, you need to place the following code in default.hbs file before your site's closing </body> tag, and make sure to add your short name to the code. You can also find this code line on the universal code page.
<script id="dsq-count-scr" src="//your_shortname.disqus.com/count.js" async></script>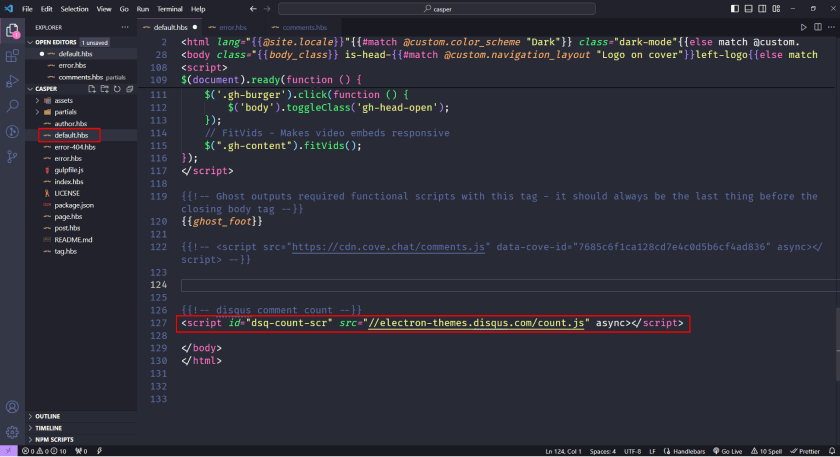
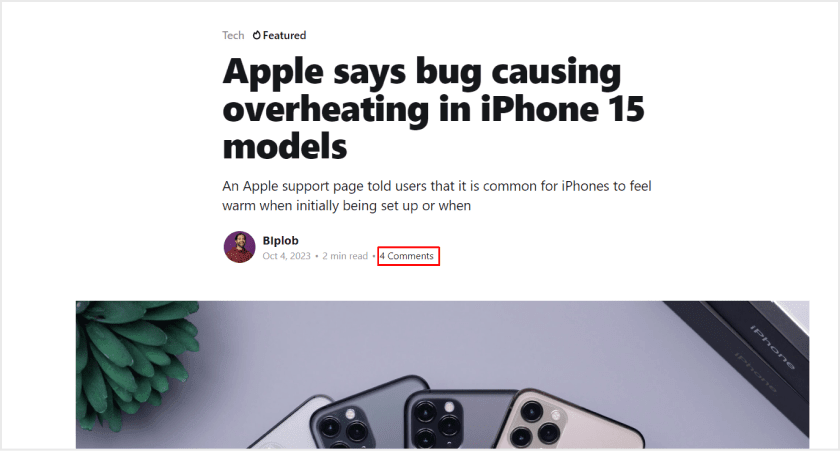
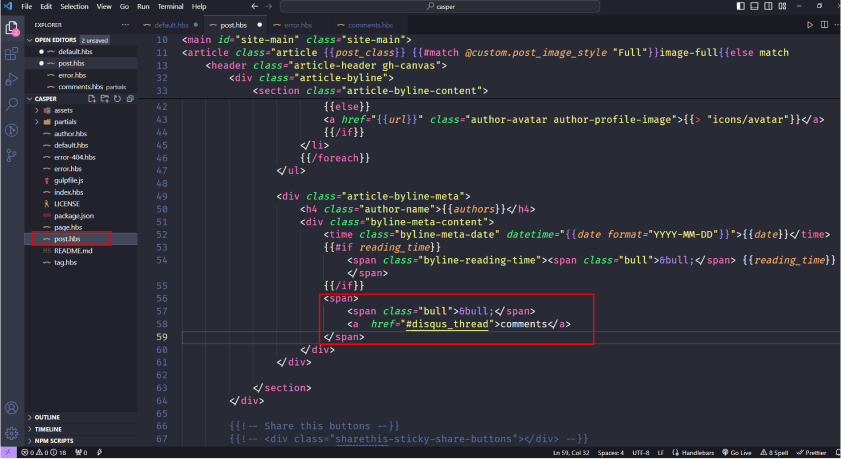
Step 2: Now add this ID #disqus_thread to the href attribute in your links in the post.hbs file in the post meta section to show the comments count.
For example: I use this code <a href="#disqus_thread">comments</a> in the post.hbs files post meta section.
I hope you have successfully completed all steps to integrate Disqus comments on your post. Let's Check it out in your post.
Summary
In summary, integrating Disqus comments into your Ghost website offers a valuable opportunity to engage with your audience and build a sense of community.
By following the steps in this guide, you're well on your way to enhancing your website's interactivity and fostering meaningful discussions.
Embrace Disqus, and watch your online community thrive! Looking for alternatives? Check out our guide on how to set up Cove Comments, another excellent option for Ghost websites.
FAQs
Do you have more questions about integrating Disqus comments with ghosts? We have answers to some frequently asked questions on the topic.
What is Disqus, and why should I use it on my Ghost website?
Disqus is a popular comment system that allows you to add interactive comments to your website. It's beneficial because it enhances user engagement, encourages discussions, and provides a user-friendly commenting platform.
Is setting up Disqus on my Ghost website complicated or time-consuming?
Not at all. Integrating Disqus comments on a Ghost website is a straightforward process that can be completed relatively quickly. Our step-by-step guide makes it easy, even for beginners.
Are there any costs associated with using Disqus for comments?
Disqus offers both free and paid plans. You can start with their free plan, which provides basic commenting functionality. If you require more advanced features, there are paid options available.
Post You May Like

CEO and Founder
Enamul Haque is the CEO & Founder of ElectronThemes and a seasoned professional in web development. He is a top-rated freelancer on Upwork and Fiverr and an exclusive author in the ThemeForest.
See all Articles