Ghost gives you the freedom to upload pre-made or custom themes to your publication, letting you customize your site's appearance in any way you can imagine. Whether you're looking to customize an existing theme or upload one you've created, this blog will show you how to download and upload Ghost themes.
One of the great things about Ghost is that it allows you to customize the look and feel of your blog with a variety of themes. There are many different Ghost themes available, like news, magazines, blogs, food, publishing, and newsletters, both free and premium. You can find themes that match your personal style or that are designed for a specific niche.
In this article, we will show you how to install a Ghost theme. We will walk you through the step-by-step process, and we will provide some tips and tricks along the way.
Install
- How to Install the Ghost Theme
- What is a Ghost CMS Dashboard?
- How to install a ghost theme.
- Ghost CMS Dashboard introduction.
- How to create a post page and tags.
- Summary of the post.
- FAQs
Installing the Ghost theme
There are several ways to install the Ghost theme, Today we will discuss how to install the theme from the Ghost admin panel. Here are some step-by-step instructions for installing a theme inside Ghost. By following these steps, you can easily install a theme.
Install ghost theme step-by-step
Step 1: Choose a Ghost Theme
Before you begin the installation process, you need to select a theme for your Ghost blog. There are a lot of websites where you can find both free and premium themes. Browse through the options and choose a theme that suits your blog's style and content.
Step 2: Download the Theme
Once you have chosen a theme, if it is a premium theme, you need to first purchase it and then download it; if it is a free theme, you can just download the theme package to your computer. Themes are usually available in a compressed file format theme.zip Make sure to remember the location where you saved the downloaded file.
remember
After downloading the theme, you will need to log in to your Ghost admin panel to install a new theme. Open your preferred web browser and enter the URL of your Ghost blog. Sign in using your admin credentials to access the Ghost admin panel.
If you don't Log-in to your ghost admin panel, you can't install a ghost theme. So, remember you need to Log-in go to your Ghost Admin panel.
Step 4: Navigate to the Themes Section
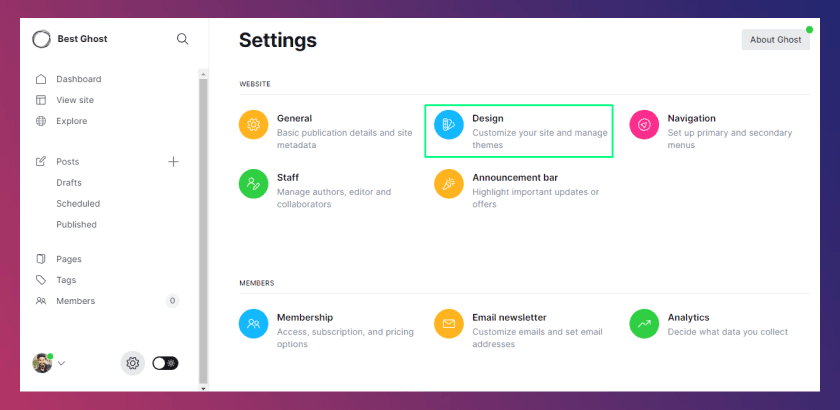
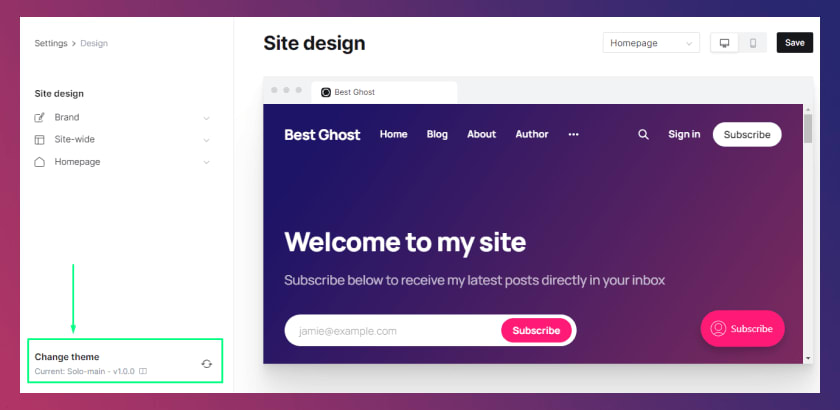
After you're logged in to the Ghost admin panel, Go to Settings > Design and click on the Change theme option to access the theme management page.

- Click on the
Designoptions
- Now click on the
Change Themebutton.
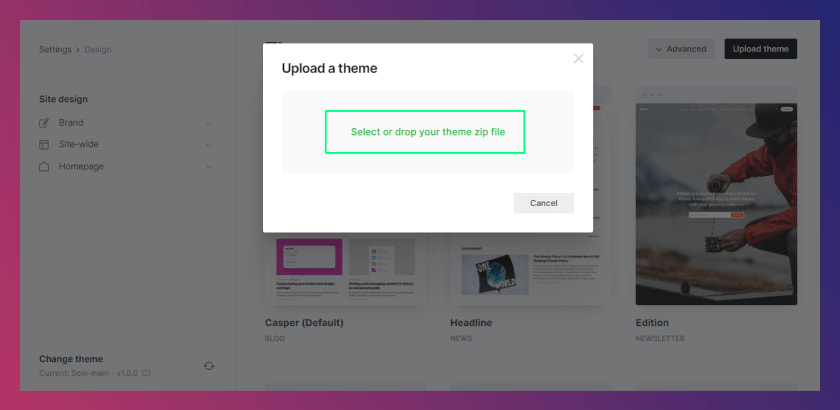
Step 5: Upload the Theme
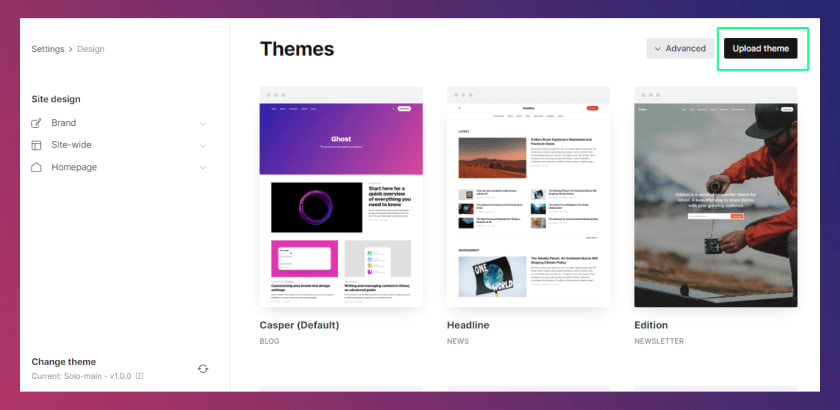
On the theme management page, you will see the Upload theme button in the right corner beside the Advanced button. To install a new theme, click on the Upload a theme button. Select or drop your theme zip file from your computer.
If you select the theme file, then click "Open" to start the upload process. Depending on the theme's size and your internet connection speed, the upload may take a few moments.
- Select or Drop your theme file
Step 6: Activate the Theme
Once the theme has finished uploading, you will see a confirmation message. After completing the upload of your theme, click the save button. To make sure your uploaded theme is active or not click on the Advanced button.
If your uploaded theme is active, then ok; if it is not active, then you should click on the active button to activate it for your blog.
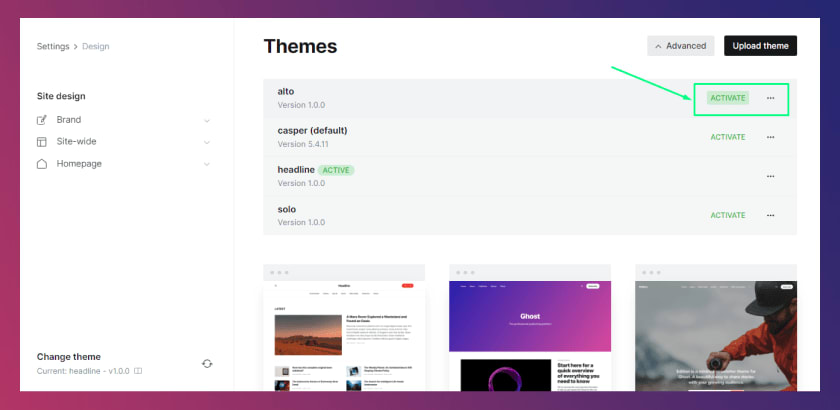
Remember: You need to be active after installing your chosen ghost theme. If you are not active in your installed theme then you can't change your website design.
Once you’ve installed your theme, you might want to tweak its settings for a personalized look. Here's a guide on customizing Ghost themes and settings in Ghost CMS to get started.
Step 7: Customize the Theme
Congratulations! You have successfully installed and activated your new Ghost theme. Now it's time to customize it to match your preferences.
The customization options may vary depending on the theme you've chosen. Typically, you can modify aspects such as colors, fonts, layouts, and logos. Experiment with the available options until you achieve the desired look and feel for your blog.
Step 8: Preview and Publish
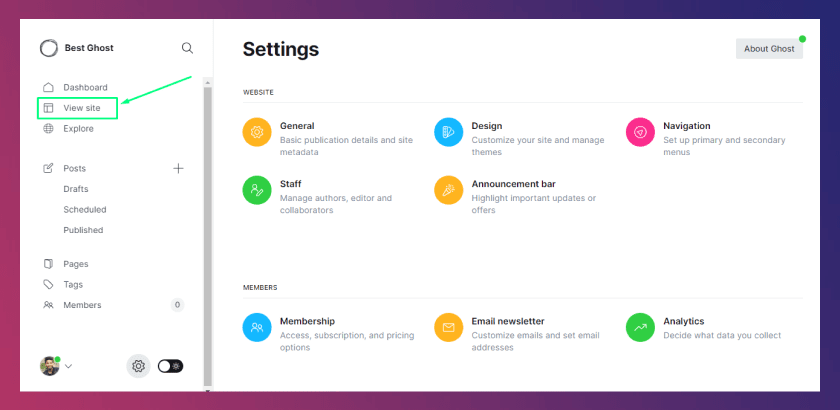
Before making your new theme live, take advantage of the preview feature to see how it will look to your visitors. Click on the View Site button to open a new browser tab and view your blog with the new theme applied.
Ensure that everything appears as expected and make any necessary adjustments. Struggling with installation? Consider hiring a professional Ghost developer instead.
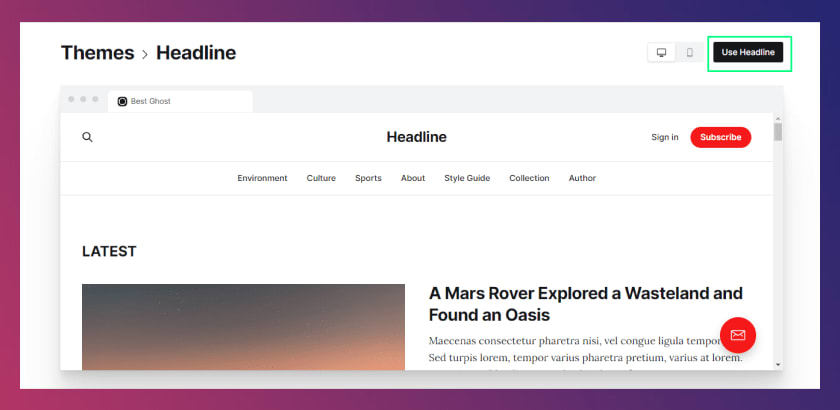
You can install some of the official free ghost themes from the admin panel
You can also install a free official Ghost theme from the admin panel. You can also change the theme directly from within the Ghost admin.
To install a free official ghost theme, Go to Settings > Design Area and click Change theme in the bottom left corner. Then you can see some free ghost themes. If you want to use them, click on the theme that you chose, then click on the Use (theme name) button.
Here are some additional things to keep in mind when downloading and uploading Ghost themes:
- Only zip files can be uploaded as themes.
- If you are downloading a theme from a third-party source, make sure that it is compatible with your version of Ghost.
- Once you have uploaded a theme, you can preview it by clicking on the Preview button.
- If you want to make changes to a theme, you can download it and unzip it locally. Once you have made the changes, you can re-zip the theme and upload it to your Ghost site.
Conclusion
Installing a Ghost theme is a straightforward process that allows you to give your blog a fresh and personalized appearance. By following the steps outlined in this guide, you can effortlessly install and activate a new theme for your Ghost blog. Remember to choose a theme that aligns with your blog's style and content and take advantage of the customization options to make it truly your own. Happy blogging!
FAQs
Do you have any questions about installing a ghost theme? We have answers to some frequently asked questions on the topic.
How can I check if a Ghost theme is compatible with my Ghost version?
It's important to verify that the theme you choose is compatible with your specific version of Ghost. Check the theme documentation or contact the theme developer for compatibility information.
How do I install a Ghost theme in my Ghost admin panel?
To install a Ghost theme, access your Ghost admin panel, navigate to the Designsection, click on it,Upload a theme select the theme file from your local machine, and upload it.
Can I switch back to a previous theme if I'm not satisfied with the newly installed one?
Yes, you can revert to a previous theme if you are unsatisfied with the newly installed one. In the Ghost admin panel, navigate to the Design section, select your desired theme, and activate it to switch back.
What should I do if a theme doesn't work properly after installation?
If you encounter issues with a theme after installation, first ensure that it is compatible with your Ghost version. Check the theme documentation for troubleshooting steps, and if needed, reach out to the theme developer or seek support from the Ghost community.
You May Like!

CEO and Founder
Enamul Haque is the CEO & Founder of ElectronThemes and a seasoned professional in web development. He is a top-rated freelancer on Upwork and Fiverr and an exclusive author in the ThemeForest.
See all Articles