Monetizing your content is a crucial step for many content creators and bloggers. Ghost, a popular publishing platform, offers a robust system for creating and managing paid tiers on your website.
Ghost allows you to create paid tiers to offer exclusive content and benefits to members who pay a subscription fee.
You can offer multiple membership products with different prices, benefits, and access levels. You can grow your business by providing different products and benefits to your audience with a tiered pricing strategy.
In this blog post, we will show you how to create paid tiers on your Ghost website. We will cover everything you need to know, from setting up memberships to making paid tiers available to visitors.
Overview of the content:
- Introduction
- Why create paid tiers for your Ghost website?
- How to set up memberships in Ghost
- How to create paid tiers
- How to make paid tiers available to visitors
- FAQs
Why create paid tiers for your Ghost website?
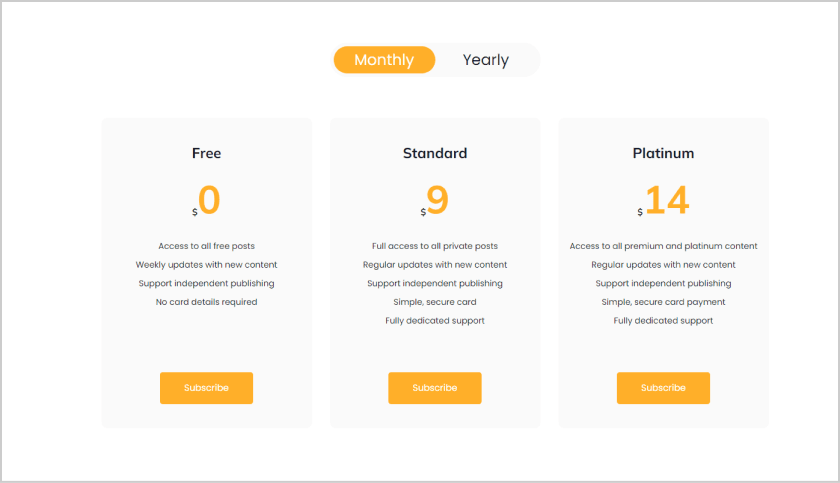
Creating paid tiers is a foundation in the process of build a successful membership website. It enables content creators to generate recurring revenue, offer exclusive content, and foster a thriving community of dedicated members.
Some of the benefits of paid tiers include:
- Generate revenue: Monetizing your content can provide you with a sustainable income, allowing you to focus more on creating quality content for your audience.
- Exclusive Content: Paid tiers enable you to offer exclusive content or features to your most dedicated followers, giving them a reason to support your work.
- Increase engagement: Paid members are more likely to be engaged with your content than free members. This is because they have invested money into your website and are therefore more likely to read your content, comment, and share it with others.
- Build a community: Paid tiers can help you build a community around your website. This is because paid members are more likely to interact with each other and with you.
Structuring your paid content effectively includes leveraging metadata to keep posts organized. Learn how to add metadata to Ghost membership posts for a seamless membership experience.
To create paid tiers in Ghost, you will need to:
- Connect your Ghost website to Stripe: Stripe is a payment processing platform that will allow you to accept payments from your members.
- Create your membership tiers: Once you have connected to Stripe, you can start creating your membership tiers. Each tier should have its own name, description, price, and benefits.
- Configure your membership settings: Once you have created your membership tiers, you need to configure your membership settings. This includes deciding which tiers are available to new members, how members can subscribe, and how they can manage their subscriptions.
How to Set Up a Stripe Account in Ghost
To set up membership tiers in Ghost, you will need to have a Stripe account. Stripe is a payment processor that allows you to accept payments from your members. Paid tiers require a Stripe account for payment processing. Follow this guide on how to create a Stripe account for paid memberships on the Ghost website to simplify the process.
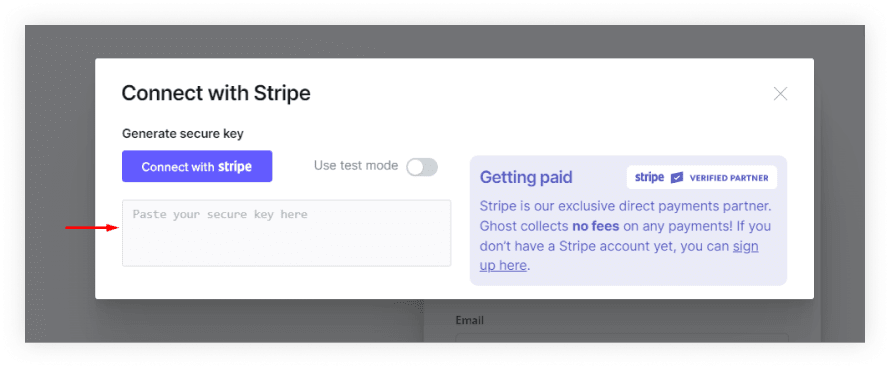
Once you have a Stripe account, you can connect it to your Ghost website. To do this, go to the Settings page in your Ghost admin and click on the Memberships tab. Then, click on the Connect with Stripe button and follow the instructions on the screen.

You will see the secure key input box, you will need to paste your stripe secure key (that you can find in your stripe account) to connect your stripe account with the site.
Go to your Stripe account. Stripe will generate a secure key. Copy the key and paste it into the Stripe secure key field in Ghost. Next, click on the Connect with Stripe button.
Your Stripe account is now connected to your Ghost website. You can now create paid membership tiers and start accepting payments from your members.
How to Create Paid Tiers
To create paid tiers,
- Go to the
Settingspage in your Ghost admin and - Click on the
Membershipstab. - Go to the Membership Tiers section and Click on the
Expandbutton from the Premium option. - Now Click on the
+Add tier.
On the Tiers page, you can create new tiers and edit existing tiers. For each tier, you can specify the following:
- Name: The name of the tier.
- Description: A description of the tier.
- Monthly price: The monthly price of the tier.
- Yearly price: The yearly price of the tier (optional).
- Benefits: A list of the benefits that members of this tier will receive.
- Free trial: Whether or not to offer a free trial for this tier.
Create Paid Tiers
How to Make Paid Tiers Available to Visitors
In Ghost CMS customizing your portal settings is a great way to highlight the unique benefits of each paid tier, helping potential members understand their value.
You need to use the Portal to make paid tiers available to visitors. To access your Portal Settings, go to Settings → Memberships → Portal settings, and click Customize.
The Portal design settings allow you to customize which tiers appear on your site and the price you want to offer—monthly, yearly, or both. This ensures a seamless and clear presentation of the options for your audience.
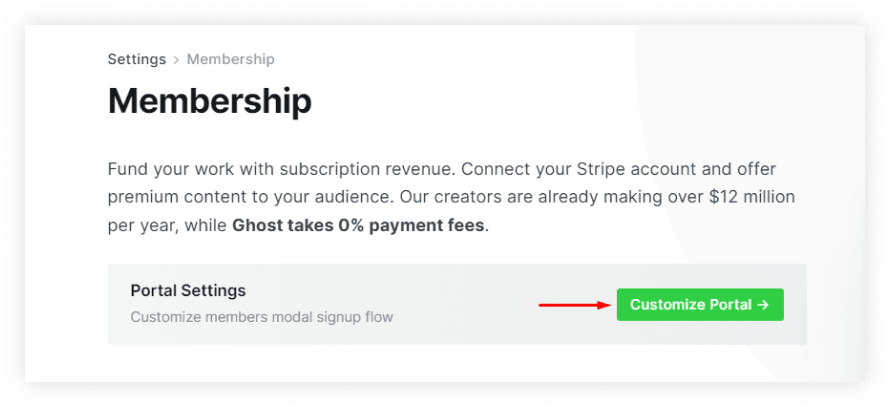
The Portal design settings allow you to customize which tiers appear on your site as well as the price you want to offer- monthly, yearly, or both.
Portal design settings
Archive tiers
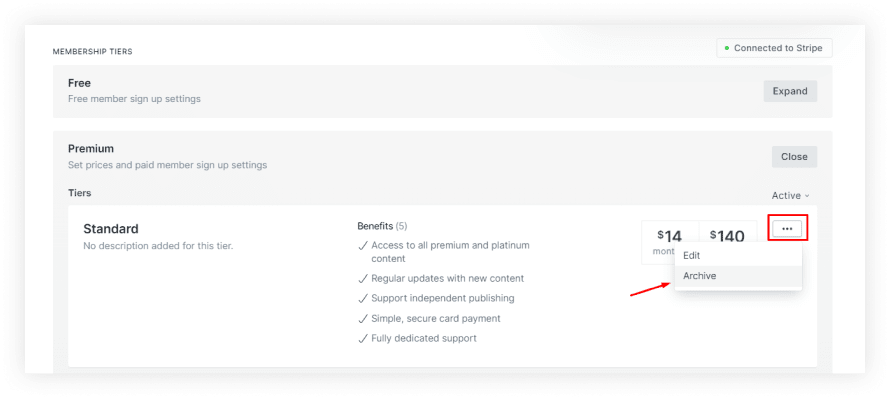
The archive function allows you to make any tier unavailable when no longer needed, removing its ability to be promoted. At any time, you can unarchive a tier if needed. The archive button can be found under tier settings.
Conclusion
Creating paid tiers in your Ghost website can be a game-changer for content creators and bloggers looking to monetize their work. It not only allows you to generate income but also fosters a dedicated community of supporters.
By following the steps outlined in this guide, from setting up your Ghost website to creating and promoting your paid tiers, you can turn your passion into a profitable endeavor while providing added value to your audience.
So, take the plunge and explore the world of paid tiers on Ghost – it might be the key to unlocking the full potential of your content.
FAQs
Do you have any questions about creating paid tiers in Ghost? We have answers to some frequently asked questions on the topic.
What is the difference between a membership tier and a subscription plan?
A membership tier is a level of membership that offers a specific set of benefits. A subscription plan is a way for members to pay for a membership tier.
How many membership tiers can I create?
There is no limit to the number of membership tiers you can create. However, it is important to offer a variety of tiers at different price points to appeal to a wider audience.
How do I restrict access to content based on membership tiers?
Ghost allows you to restrict access to posts, pages, and other content based on membership tiers. This means that you can create exclusive content for your paid members.
What happens if a paid member cancels their membership?
If a paid member cancels their membership, they will lose access to any content or benefits that are exclusive to their tier. However, they will still be able to access any public content on your website.
Post You May Like
- How to Create Pages in Your Ghost Website from Ghost Dashboard– Learn how to create and organize pages directly within your Ghost dashboard for a streamlined content management process.
- How to install a ghost theme in your ghost admin panel– Discover the easy steps to install a new Ghost theme through the Ghost admin panel, enhancing your website's design and functionality.
- How to customize a ghost theme from a ghost CMS dashboard– Explore the options available in the Ghost CMS dashboard to customize your theme, ensuring it aligns with your site's vision and branding.
- Step-by-Step Guide: Installing Ghost on Your Local Computer– Follow this detailed guide to install Ghost on your local computer, enabling you to develop and test your site before it goes live.
