In today's digital age, having an online presence is crucial for any business or individual looking to share their content, products, or services with the world. Ghost is a popular content management system (CMS) that provides a user-friendly platform for bloggers, writers, and businesses to create and manage their websites.
With Ghost CMS, you will be building a complete membership site that offers paid tiers, subscriptions, and exclusive content.
Stripe integration ensures seamless payment processing to support your monetization goals.
In this guide, we'll walk you through the steps to connect your Stripe account with your Ghost website, enabling you to sell products, offer subscriptions, or receive donations seamlessly.
Let's dive into the process of connecting Stripe with your Ghost website and start monetizing your online presence.
You will Learn From this Blog:
- Introduction
- Prerequisites
- How to Connect Stripe Account with Ghost Website
- Summary
- FAQs
Prerequisites:
- Ghost Website: You should have a Ghost website set up and running.
- Stripe Account: You should have a Stripe account or you can create a Stripe account for Ghost if you don't already have one.
- HTTPS URL: Your Ghost website should be configured with an HTTPS URL to ensure secure payment processing.
How to Connect Stripe Account with Ghost Website
To connect your Stripe account to your Ghost website, follow these steps:
- First You have to Create a Stripe account
- Go to
Settings > Memberships > Tiersyour Ghost Admin. - Click the
Connect with Stripebutton. - Log in to your Stripe account if you are not logged in.
- Select the Stripe account that you want to connect to Ghost. (if you have multiple accounts)
- Click the Authorize button.
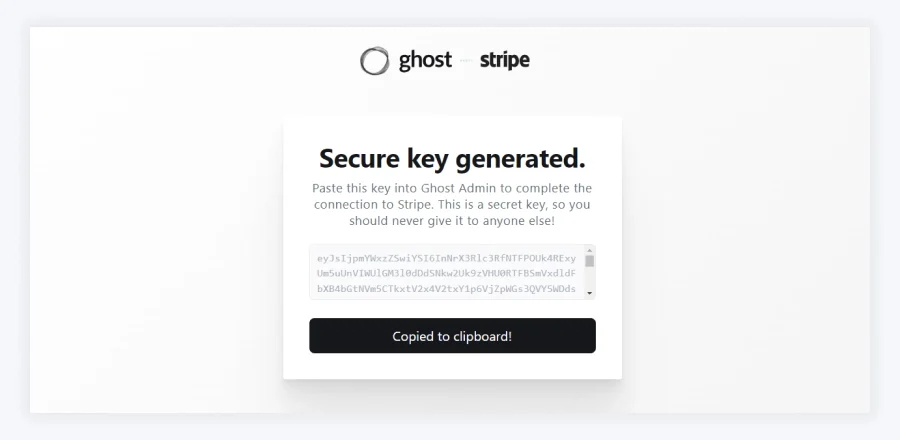
- Copy the secure key that is generated in Stripe.
- Go back to Ghost Admin and paste the secure key into the provided box.
- Click Save Stripe settings.
Step 1: Access Ghost Settings
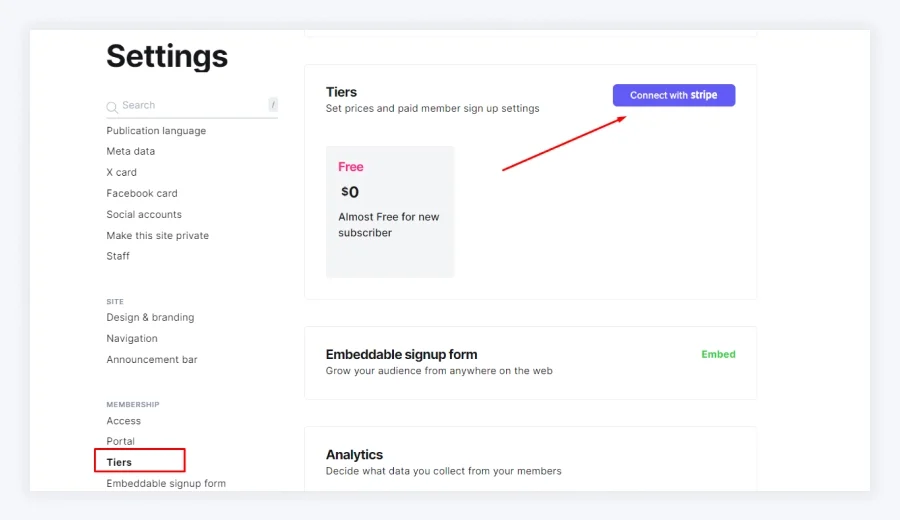
Log in to your Ghost website's admin dashboard and navigate to Settings > Memberships > Tiers. Then click the Connect with Stripe button.
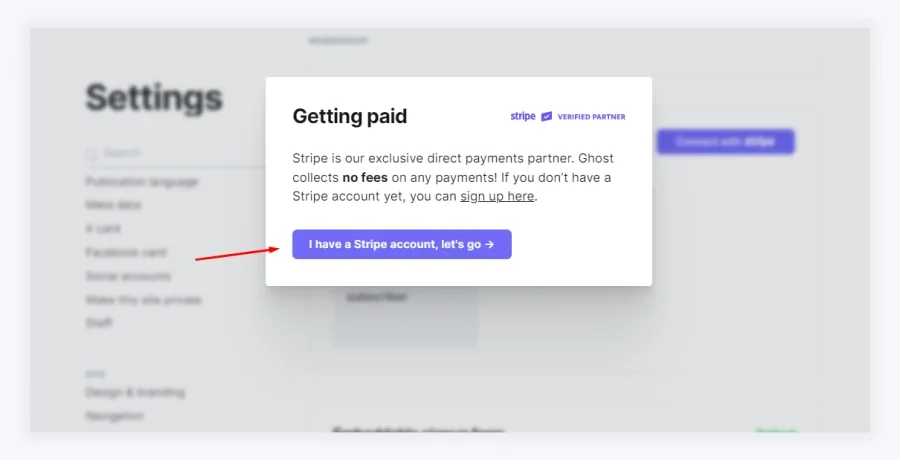
Now Click on the I have a Stripe account, Let’s Go Button.
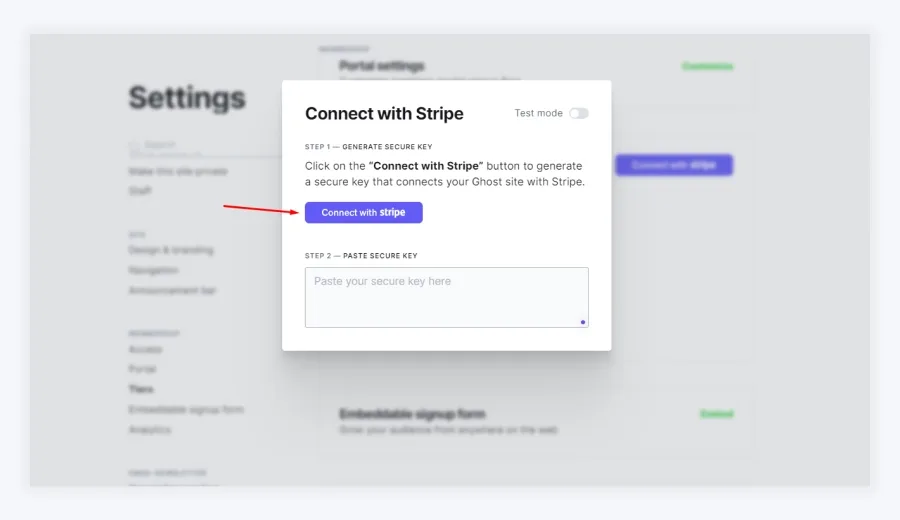
Step 2: Connect with stripe
Click on the Connect with Stripe button. to generate a secure key that connects your Ghost site with Stripe.
Step 3: Select the Stripe Account
If you have multiple Stripe accounts, select the one you want to connect to your Ghost website.

Step 4: Authorize Connection
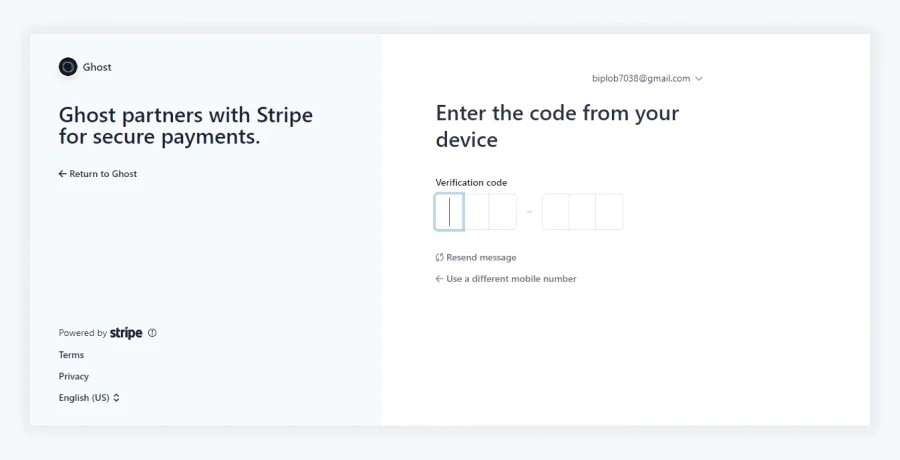
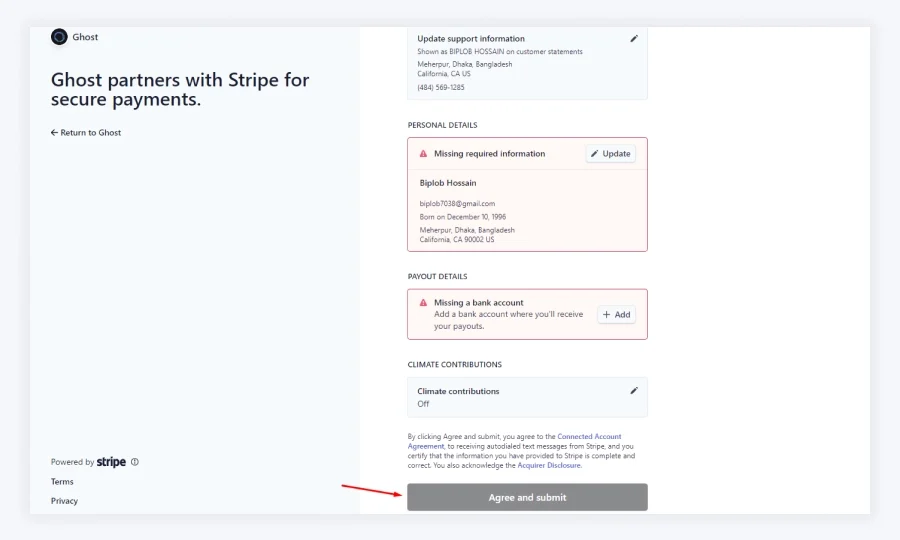
Review the authorization details. Enter your phone number to verify login to your account. After verifying take a moment to review and confirm your information.
When it finishes up click on the Agree and Submit button to generate the secure key to connect Stripe with your Ghost website.
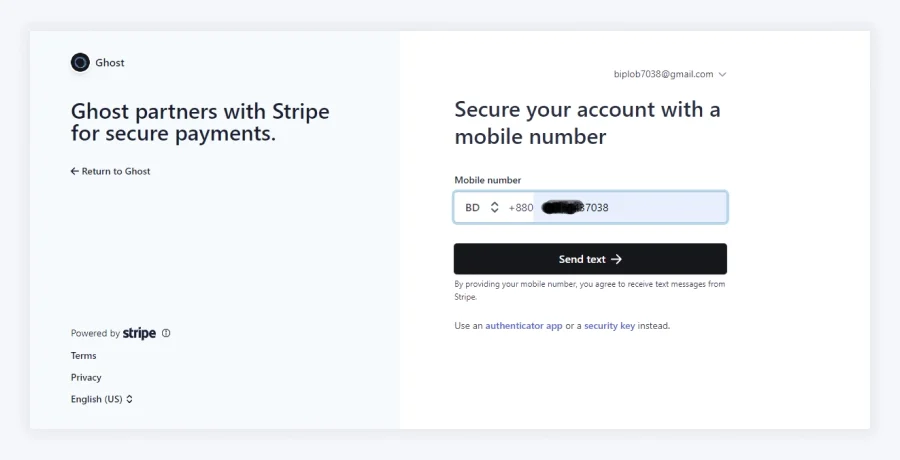
Authorize Connection
Step 5: Copy and Paste the Stripe API Key
Once connected, a secret API key will be generated. Copy this key and go back to your Ghost admin dashboard.
Step 6: Paste the API Key in Ghost
In the "Connect with Stripe" section of the Ghost admin dashboard, paste the copied API key into the provided field and click Save Stripe settings.
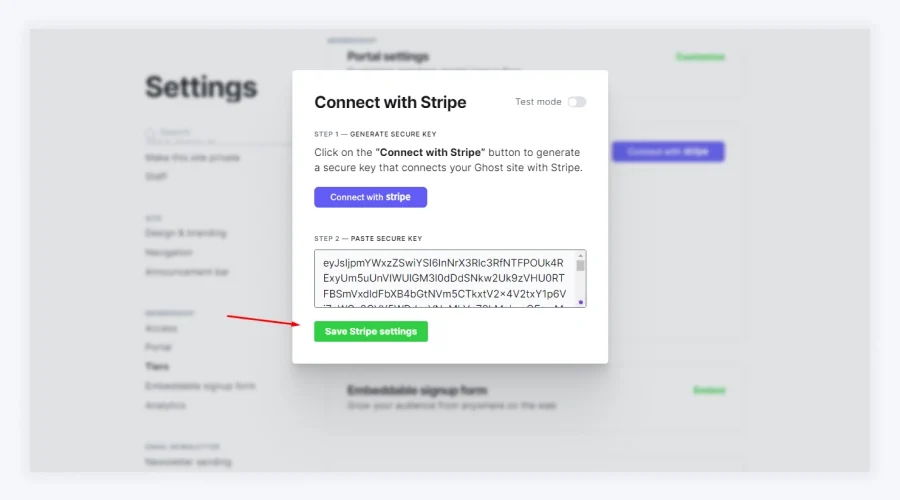
After saving you will see the connected message.
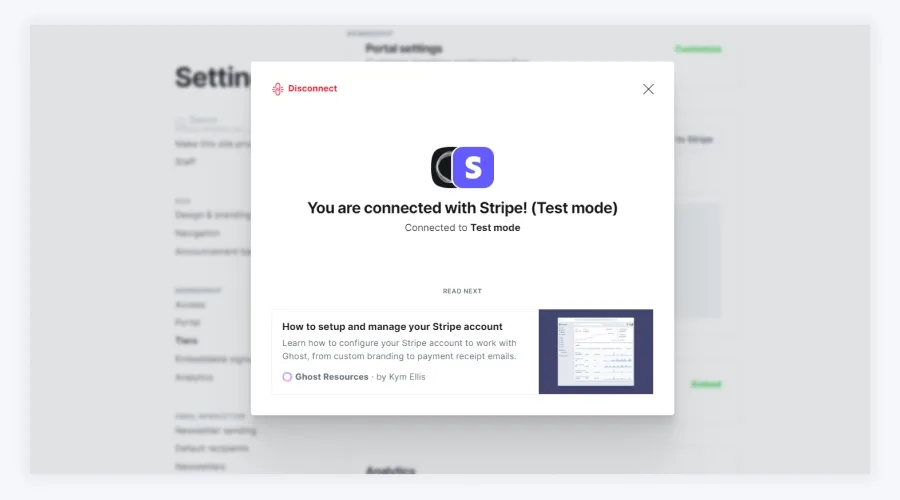
Step 7: Let’s Check Your Connection
Your Stripe account is now connected to your Ghost website. You can test the connection by creating a subscription tier and attempting to make a payment.
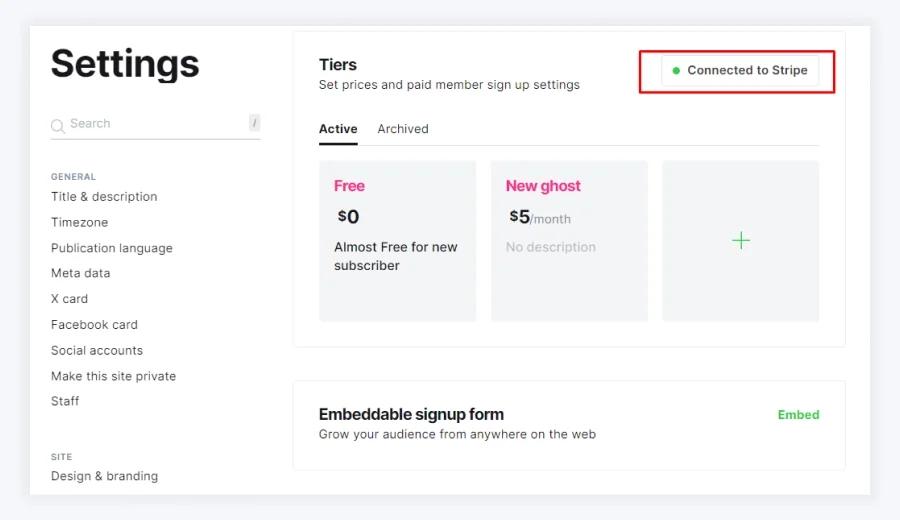
Don't forget to customize your portal settings to ensure a seamless user experience for your members.
Tailoring the portal settings will help you effectively showcase membership tiers and benefits, enhancing your audience's engagement.
You can also configure your Ghost website to accept one-time payments for things like digital downloads or paid courses to do this, see this and set up paid tiers in your Ghost membership website to monetize your content.
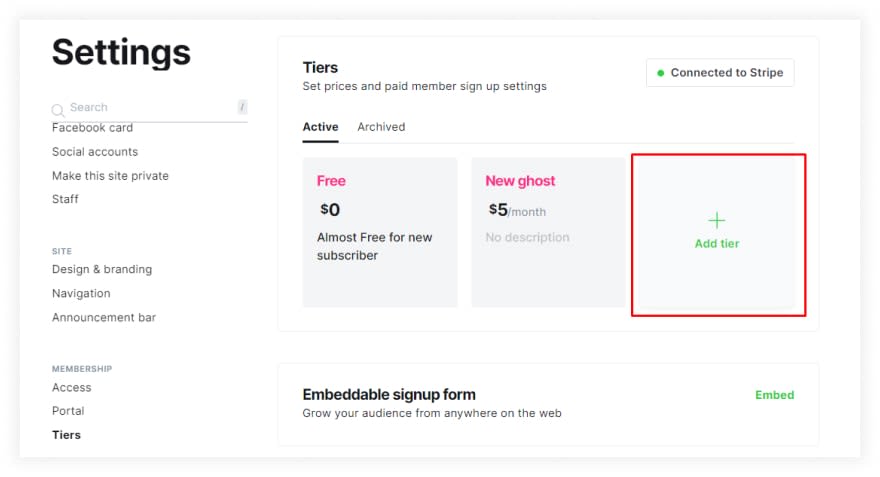
Summary
In summary of this blog, Connecting your Stripe account to your Ghost website is a great way to start accepting payments from your visitors.
By following the steps above, you can easily connect your Stripe account to Ghost and start selling your products and services.
FAQs
Do you have any questions about Connecting a stripe account with Ghost? We have answers to some frequently asked questions on the topic.
What if I'm self-hosting Ghost?
If you're self-hosting Ghost, you will need to ensure that your site is secured with SSL and configured with an HTTPS URL before connecting to Stripe. This is because Stripe requires a secure connection to process payments.
What if I have an existing Stripe account?
If you have an existing Stripe account that you use for another business, you can still connect it to your Ghost site. However, it is recommended that you create a new Stripe account for your Ghost integration. This will help to keep your business finances separate.
What if I'm migrating from another platform?
If you're migrating from another platform, such as Substack, you will need to use the same Stripe account that you used with your previous platform. This will help to preserve your customer subscription data.
Post You May Like
- How to Create Pages in Your Ghost Website from Ghost Dashboard– Learn how to create and manage pages in your Ghost website directly from the Ghost dashboard, making content creation and site management seamless.
- How to install a ghost theme in your ghost admin panel– Discover how to easily install and activate a new theme in your Ghost admin panel, giving your site a fresh look and feel.
- How to customize a ghost theme from a ghost CMS dashboard– Explore how to customize your Ghost theme directly from the CMS dashboard to personalize the design and functionality of your site.
- Step-by-Step Guide: Installing Ghost on Your Local Computer– Follow this comprehensive guide to install Ghost CMS on your local computer, enabling you to build and test your site before going live.
- How to Create a Stripe Account For a Ghost Website– Learn how to create and connect a Stripe account with your Ghost website for secure and easy payment processing.
