Are you looking to create a stunning website without the hassle of coding? Don’t worry, you are coming to the right place. Webflow is the best choice for you. Webflow is a powerful tool for creating stunning websites without needing to write a single line of code. But for those just starting out, the blank canvas of a new project can be daunting. Webflow templates are designed to make the process of building a website in Webflow both quick and efficient, even for beginners. That's where Webflow templates come in! Webflow templates make the design process seamless, and they are just one of the many reasons why Webflow is the best platform for building a website.
Webflow offers a vast library of both free and premium templates encompassing a wide range of styles and functionalities. Whether you're building a simple portfolio site, a complex e-commerce store, or anything in between, there's a template to jumpstart your project.
Webflow's template system offers unmatched flexibility, but how does it stack up against other platforms? Find out by comparing Webflow to other CMS platforms to determine which CMS is the best for your website. In this blog, we'll show you how to use Webflow templates to create a website that stands out from the crowd, without any coding knowledge required.
You will learn from this blog:
- Introductions of blog
- What Are Webflow Templates?
- Understand how Webflow templates work
- Benefits of Using Pre-made Templates vs Not Using Templates
- How to Use Webflow Templates
- How to use E-commerce Functionality in Webflow
- Summary of the blog
- FAQs
What are Webflow Templates, and how do they work?
Webflow templates are essentially pre-made website layouts that you can use as a starting point for your website. The Webflow template includes all the essential pages for your new site, such as the homepage, services, blog, portfolio, contact, and more. They also have pre-built UI and components such as navigation menus, hero sections, content sections, listings, forms, testimonials, etc.
How they work:
- Access Webflow Dashboard: Log into your Webflow dashboard to create a new site with a pre-made template.
- Find and choose: Firstly you'll need to find templates for your website.
- Easy Import and Foundation: Once you find a template you like, you can import it into your Webflow project with a single click.
- Customization Power: You can easily customize the content (text, images) with your own and adjust the design to match your brand.
- Content Management Friendly: Some templates are built with Webflow's CMS, allowing you to manage your website content (text, blog posts, products) effortlessly.
Benefits of Using Templates vs Not Using Templates
Building a website can be exciting, but a blank page can feel daunting. Pre-made templates offer a tempting shortcut, but are they the right choice for you? Let's explore the benefits of both approaches:
Benefits of Using Pre-Made Templates:
- Faster Start: No need to design everything from scratch. Templates provide a pre-built structure, saving you tons of time.
- Easy Customization: Templates are like starter kits. Swap content, edit styles, and add your own touches to make it your own.
- Professional Look: Many templates are crafted by designers, ensuring a polished and professional aesthetic for your website.
- Cost-Effective: Free and paid templates offer a range of options to fit your budget.
Benefits of Building from Scratch:
- Unique Design: A custom design allows you to create a website or presentation that perfectly reflects your brand and vision, standing out from the crowd.
- Full Control: You have complete control over every aspect of the design, ensuring it aligns perfectly with your functionality needs.
- Scalability: Custom designs can be built to scale and adapt as your project grows, unlike some templates with limitations.
- Skills Development: Building from scratch allows you to develop your design skills and gain a deeper understanding of the design process.
Choosing the Right Path:
- Need a quick, professional website? Templates are a great choice.
- Do you have a unique vision and require complete control? Consider starting from scratch.
How To Use Webflow Templates
Using Webflow templates is easy, even if you have no prior experience with web design. Here's a step-by-step guide to help you get started:
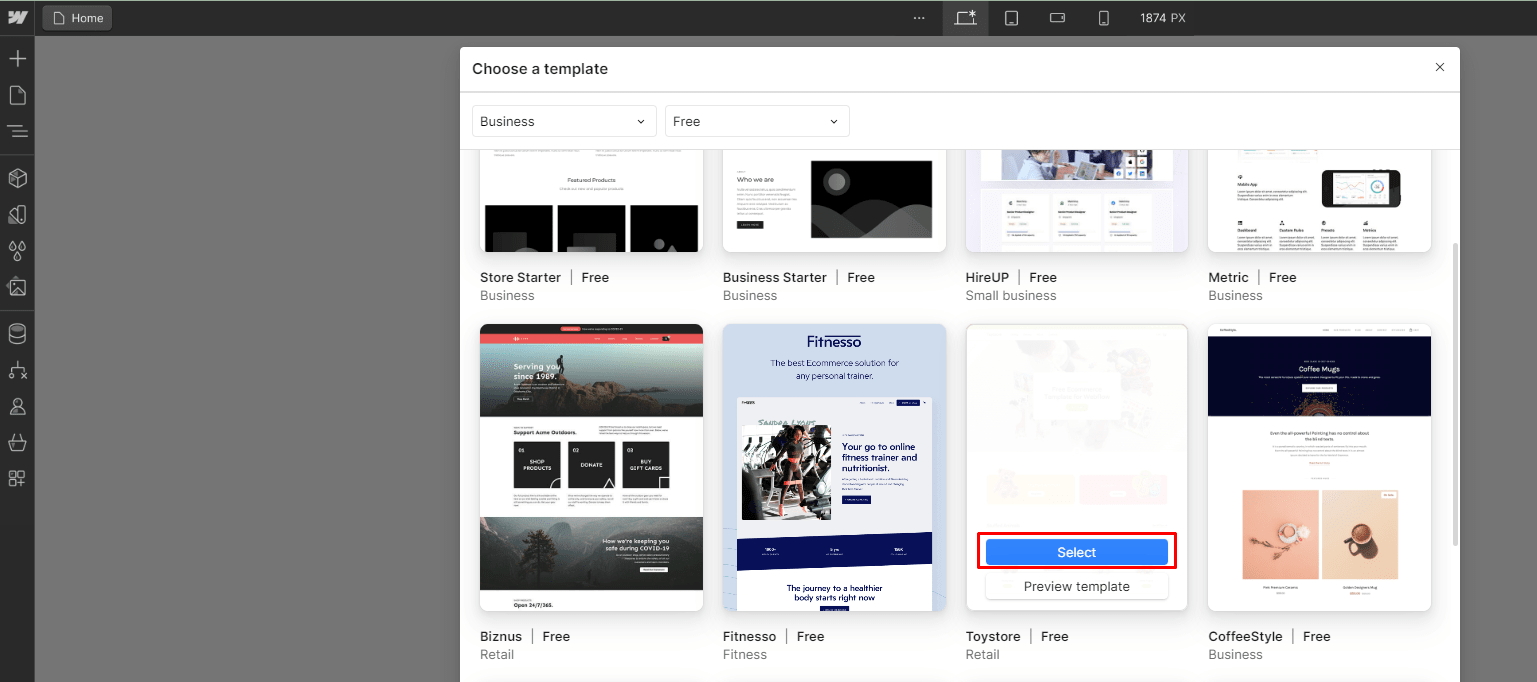
Step-1: Finding the Perfect Template
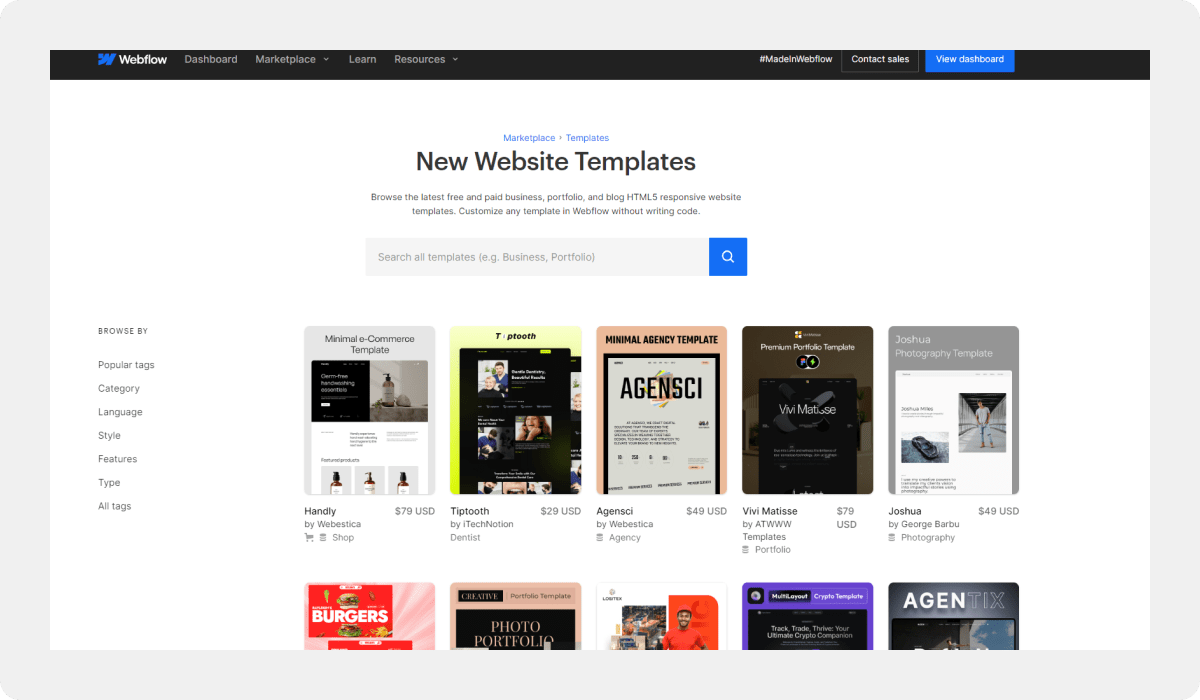
Webflow offers a user-friendly template marketplace where you can browse through a variety of options. You can filter by category, features, and price (free or premium) to find a template that aligns with your vision.
You'll find templates for:
- Business websites
- E-commerce stores
- Blog websites
- Landing pages
Once you've found a few potential templates, take some time to explore them in the Webflow Designer. This will give you a better sense of the layout, structure, and customization options.
Step-2: Using a Webflow Template
When you find the perfect template, using it is as simple as clicking a button. To use the Webflow template you need to log in to your Webflow dashboard.
To use the Webflow template you need to create a new site, Click on the “new site” button.
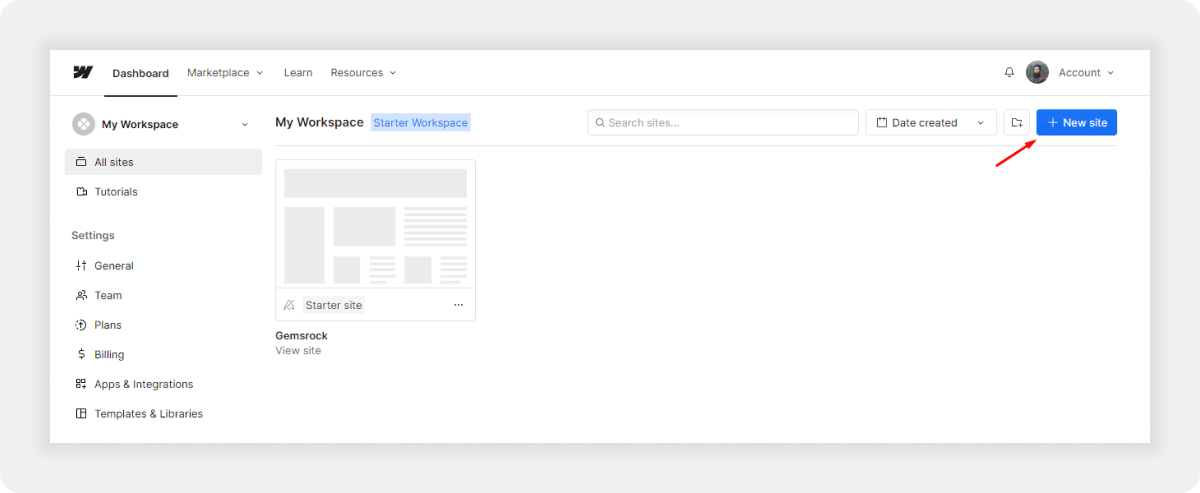
Now click on the “template” option.
- You will see the template collections. There are both free and premium templates. Select the template of your choice give a name and open it with the webflow designer interface.
Step-3: Customizing Your Template
Now you can start to customize your Webflow template. You're not stuck with the original design; you can make it your own! After completing importing a template, it's time to customize the design to fit your brand. Webflow's visual editor makes it easy to customize every aspect of your website, from colors and fonts to layout and content. Simply click on an element to edit it, or drag and drop new elements onto the page. You can also add custom animations and interactions to make your website stand out.
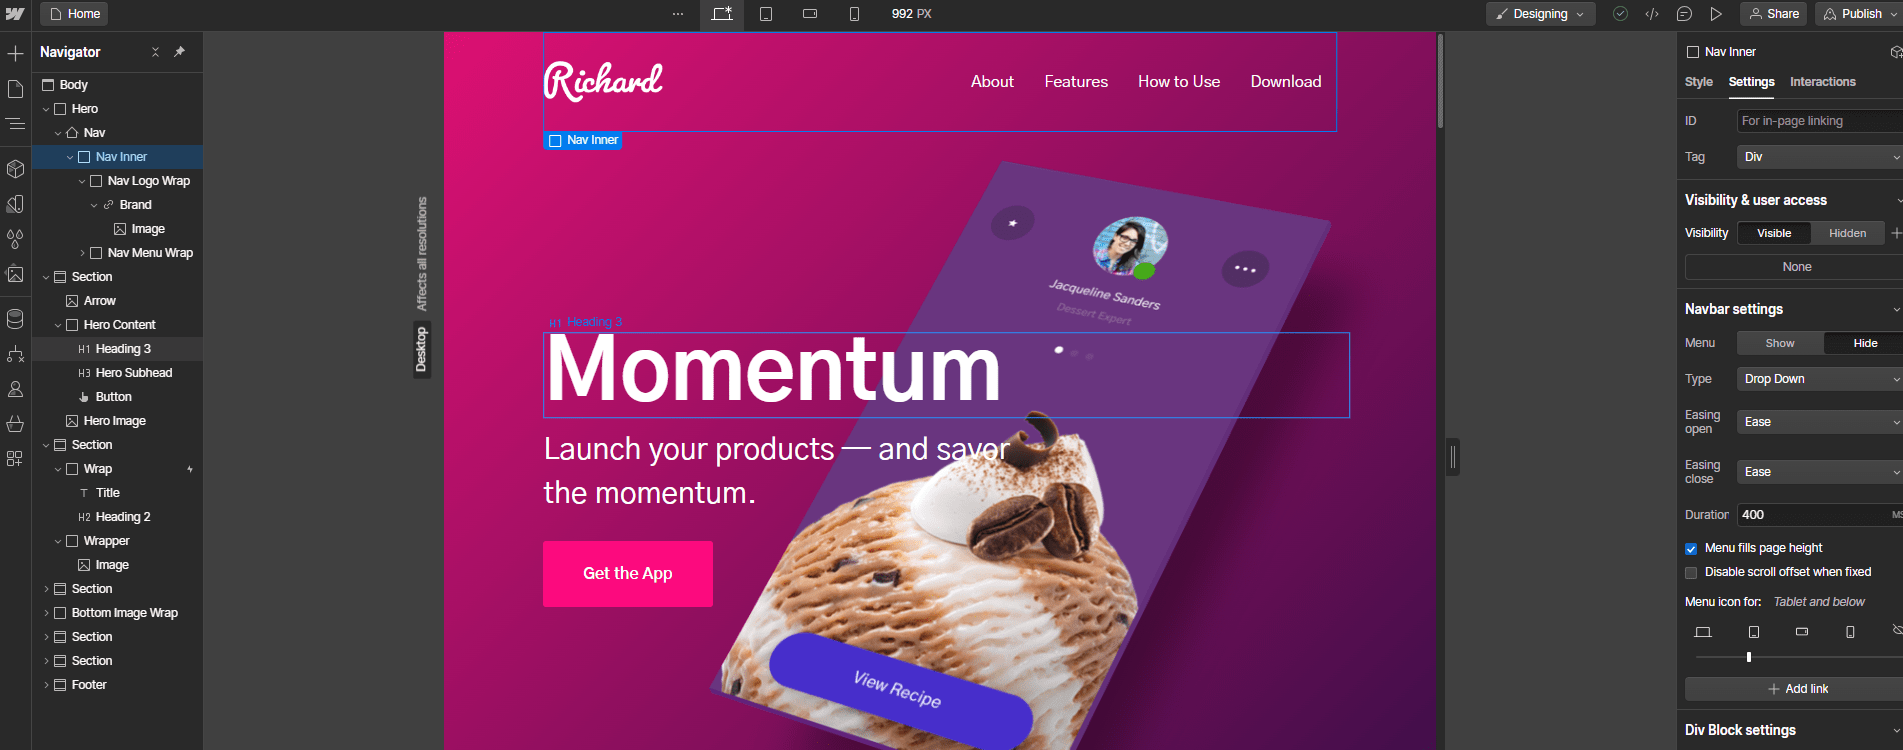
Here are some ways to personalize your template:
- Replace Text and Images: Change all content with your own text, images, and logos.
- Edit Styles: Fine-tune the fonts, colors, and spacing to create a unique visual identity.
- Add or Remove Elements: Feel free to add new sections or remove elements that don't suit your needs.
- CMS Content Management: If your template uses a CMS, you can easily add, edit, and publish website content.
Webflow's intuitive visual interface makes customization a breeze. You can drag, drop, and edit elements directly on the canvas, giving you complete control over your website's look and feel.
Step-4: Preview and Publish
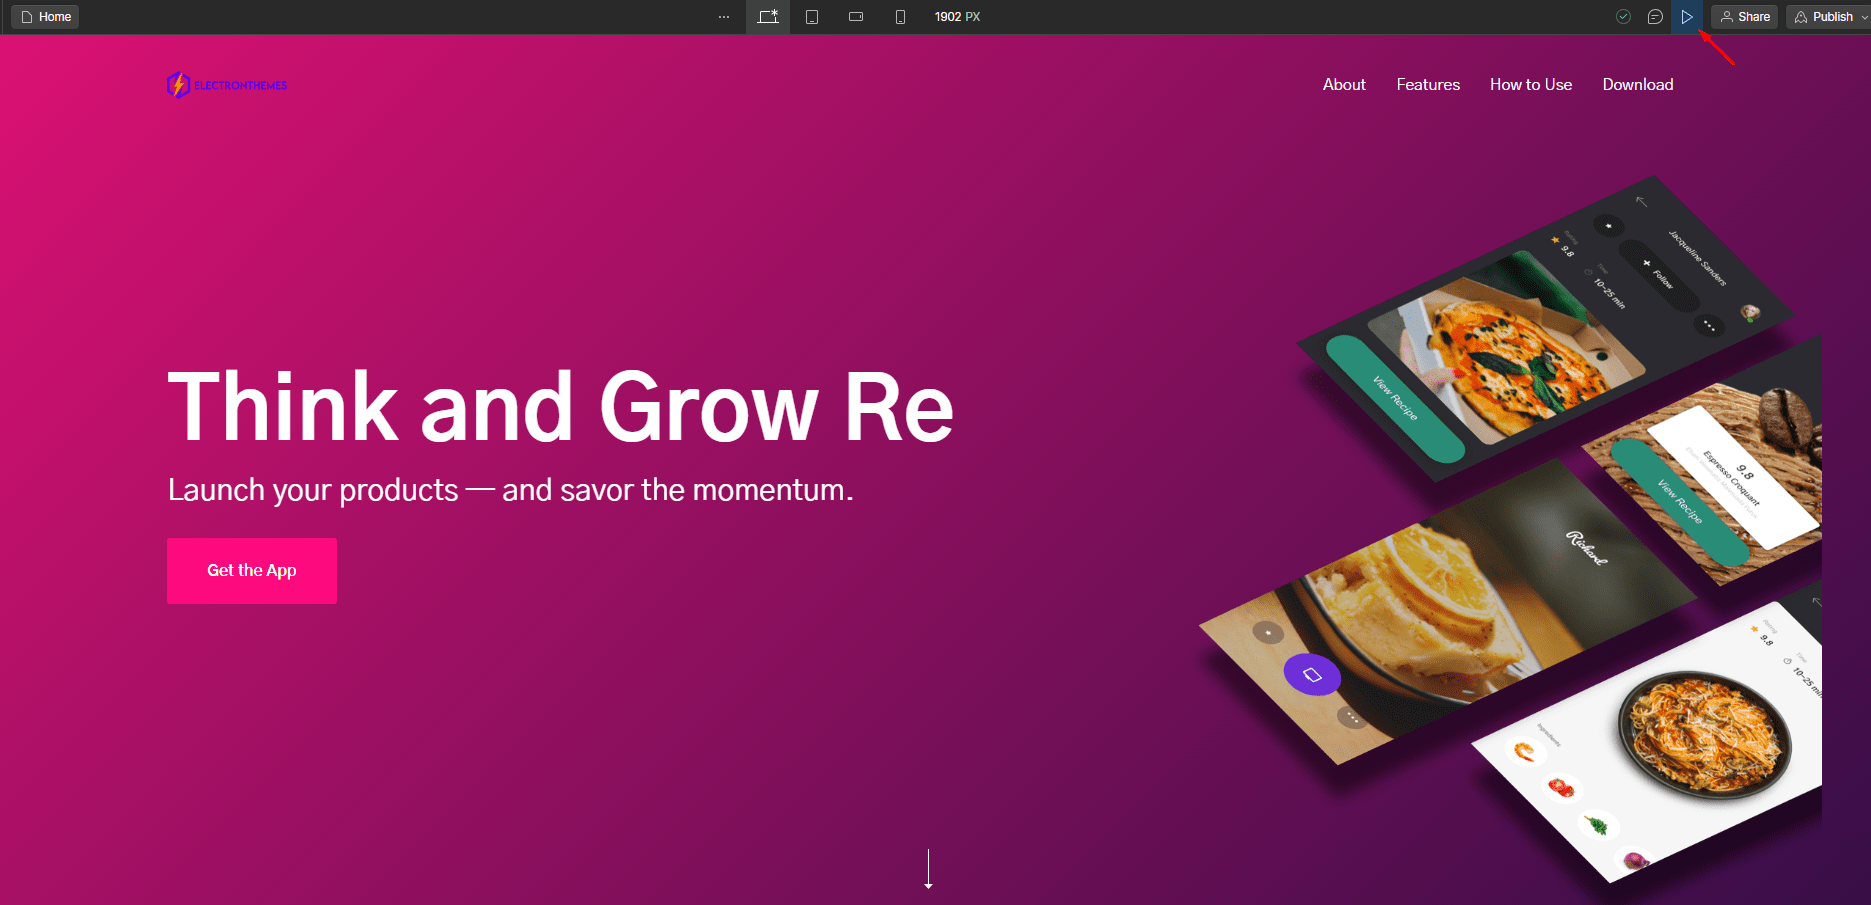
Before you publish your website, preview it to make sure everything looks and works well. Webflow allows you to preview your website in real-time, so you can see exactly how it will look on desktop, tablet, and mobile devices. Once you're happy with the design, simply click the publish button to make your website live.
Step-5: Domain Setup
Free plans offer subdomains. For a custom domain (yourbrand.com), you'll need a paid Site plan. These plans provide secure hosting and advanced SEO controls to get your site noticed.
Choosing Your Plan
Webflow offers tiered plans for both websites and e-commerce stores. The best plan depends on your needs. If you're starting with a simple website, a Basic Site plan might suffice. For e-commerce or feature-rich websites, consider higher tiers that offer more CMS items, form submissions, and advanced functionalities.
Using Webflow E-Commerce Functionality
Learn how to enable e-commerce options, add products, configure payment and shipping options, and optimize your store for a seamless shopping experience.
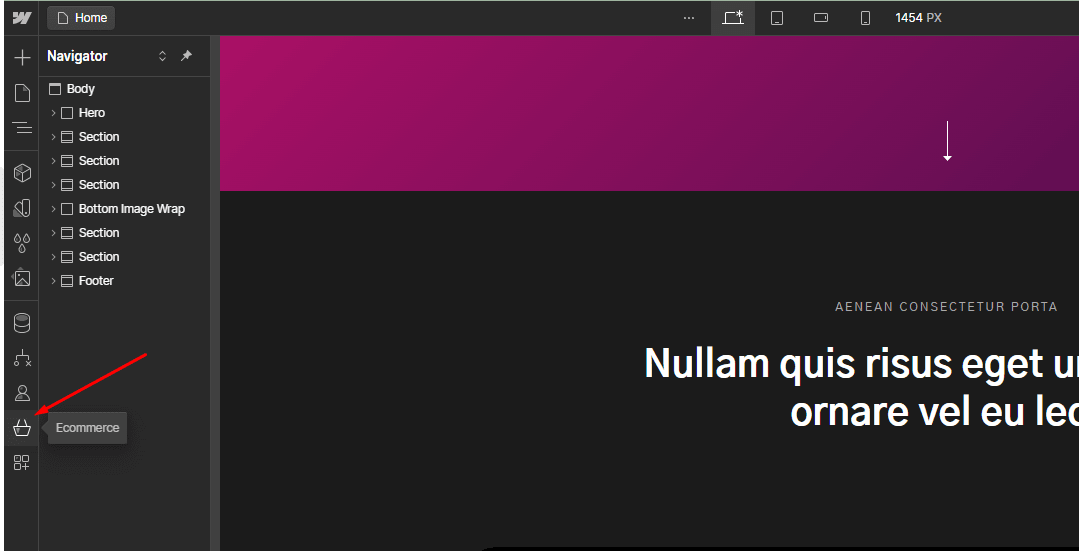
1. Enabling E-Commerce:
To enable e-commerce on your Webflow site, go to the Project Settings, select the 'E-Commerce' tab, and follow the prompts to set up your store. Choose a suitable plan that supports e-commerce. Webflow offers various plans depending on the size and needs of your store.
2. Adding Products:
- Navigate to the E-Commerce panel within the Designer. Click on 'Products' and then 'Add New Product'.
- Fill in the product details, including name, description, price, images, and variants (such as sizes or colors).
3. Design Your Store Pages:
Use the template's pre-built product pages as a starting point. Customize layouts to showcase product information, add variations (sizes, colors), and integrate eye-catching "Add to Cart" buttons.
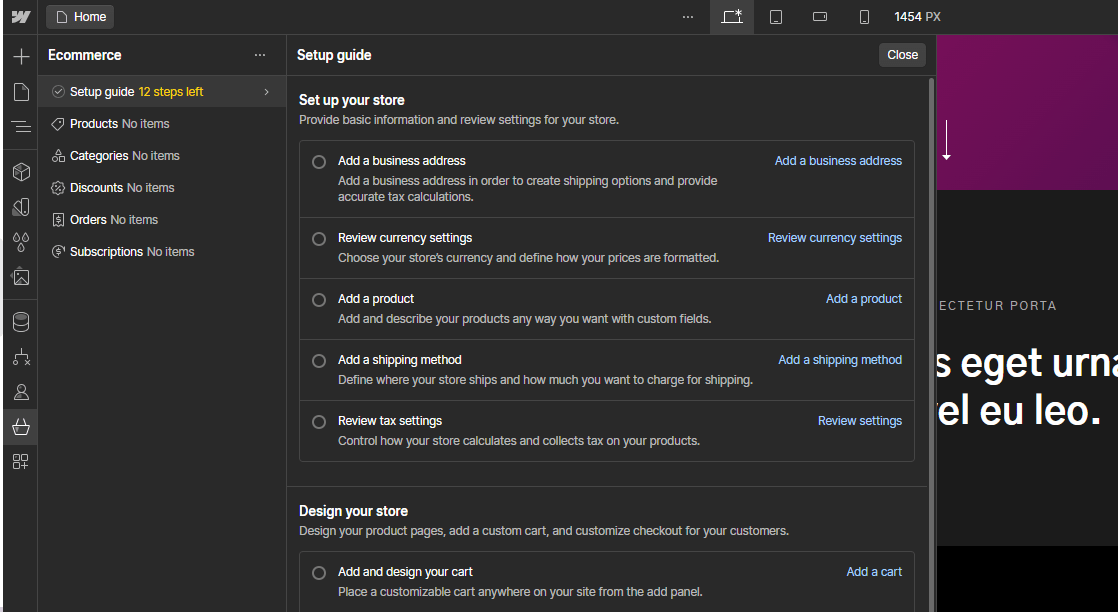
4. Checkout Flow:
Webflow allows you to design a smooth checkout process. This might involve customizing the shopping cart page, designing the checkout form, and integrating a payment gateway (like Stripe or PayPal) to securely accept payments.
Additional Tips for Success
Here are some additional tips to ensure a smooth experience when using Webflow templates:
- Understand the Style Guide: Many templates come with a style guide page that explains how styles are applied across the website. This will help you customize elements efficiently.
- Work on Duplicate Pages: If you're unsure about changes, duplicate a page before making edits. This allows you to experiment without affecting the original design.
- Save Unused Pages as Drafts: If the template includes pages you don't plan to use, save them as drafts to prevent them from appearing on your live site.
Some Tips for Selecting the Right Webflow Template
Here are some key factors to consider when choosing a template:
- Design Style: Does the template's overall aesthetic match your brand or project's vibe?
- Consider Essential Features: Make a list of must-have features and functionalities for your website.
- Functionality: Does it have the features you need, such as contact forms, e-commerce functionality, or a blog section?
- Responsiveness: Make sure the template looks good and functions well on all devices (desktop, tablet, mobile).
- Template Rating and Reviews: Read reviews from other users to get insights into the template's quality, ease of use, and customer support.
Summary
Webflow templates are a powerful tool for getting your website up and running quickly and efficiently. By following these steps and leveraging the intuitive Webflow interface, you can create a professional and customized website without needing to code. So dive into the Webflow template marketplace, find a template that inspires you, and get creative.
FAQs
Do you have any questions about how to use webflow templates? We have answers to some frequently asked questions on the topic.
Do I need coding experience to customize a Webflow template?
No, coding experience is not required! Webflow uses a visual interface for editing, so you can make changes without writing any code
How do I publish my website after customizing the template?
Webflow offers different options for publishing your site. You can host it directly on Webflow's platform or export the code and host it elsewhere.
Should I optimize my Webflow template for speed?
Yes, it's a good practice to remove unnecessary sections and clear unused styles from the template to improve loading speed.
Can I switch templates after starting a project?
While you can switch templates, it might require significant adjustments to your content and design. It’s generally easier to choose the right template at the beginning of your project to avoid extra work.
Related Articles:
- How to Optimize Your WordPress Website for Speed – Learn techniques to improve your website’s speed on WordPress or Webflow.
- How to Build Custom Forms with Free WordPress Plugins – Create effective custom forms for your website using free WordPress plugins.
- Top 20 Best WordPress Themes for Blogging Websites – Explore the best WordPress themes for blogging.
- How to Create a Stunning Ghost Website – Build an impressive Ghost website with these useful tips.

WordPress Expert
Biplob is a technical content writer and junior web developer passionate about creating engaging content and websites. He specializes in web technologies and loves exploring innovative solutions.
See all Articles