Have you ever dreamed of creating a stunning website, but coding seemed like an insurmountable obstacle? Well, fear not! This blog is your one-stop shop for learning how to build a beautiful, professional website using the powerful design platform, Webflow. Whether you're a complete beginner or have some design experience, this guide will take you step-by-step through the process of building a website in Webflow.
Before diving into the step-by-step process, it’s important to understand why you choose Webflow for your website as your platform. We'll cover everything from the basics of the interface to advanced design techniques, all without writing a single line of code.
You will learn from this blog:
👉Introduction of Webflow
👉Before you begin Webflow
👉How to create a complete website from sketch to live
👉Additional Tips for Beginners
👉Summary
👉FAQs
Introduction of Webflow
Webflow is an intuitive website builder that empowers users to design, build, and launch professional websites without writing a single line of code. It combines the flexibility of a drag-and-drop builder with the power of CSS and JavaScript.
With Webflow, designers can create custom, responsive websites, and developers can export clean, production-ready code. It's a game-changer for web design and development.
Whether you're a beginner or an experienced designer, Webflow offers everything you need to bring your vision to life. From choosing a template to customizing your design and optimizing for mobile, this guide will walk you through the process of using Webflow to create a stunning website that reflects your unique style and brand.
Before you start building, it’s important to know which CMS is the best for your website, choosing the best CMS for your website and understanding how Webflow compares to alternatives like WordPress and Shopify.
Before You Begin
Before jumping into Webflow, consider the purpose of your website. Are you building a personal portfolio, a blog, or a website for your business? Having a clear vision will guide your design choices and content creation. Using Webflow templates can save time and simplify the design process. Check out our beginner’s guide to using Webflow templates to get started.
Create A Complete Website From Sketch to Live
Follow the basic steps to create a website with Webflow:
- First, you need to create a Webflow Account (you can get started with the free plan).
- Login into the “Dashboard” & click on “New Project”.
- You can pick a “pre-built template,” or you can start with a blank one.
- If you click the “blank” one, give a name to your project and click on “Create Project”.
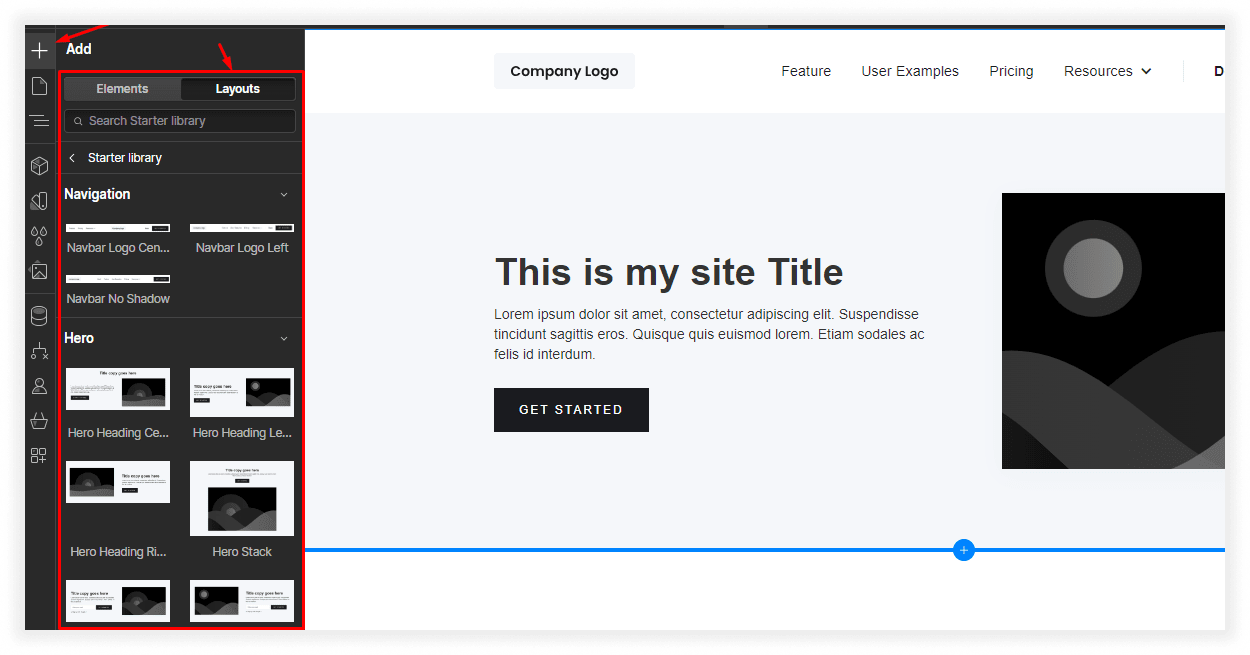
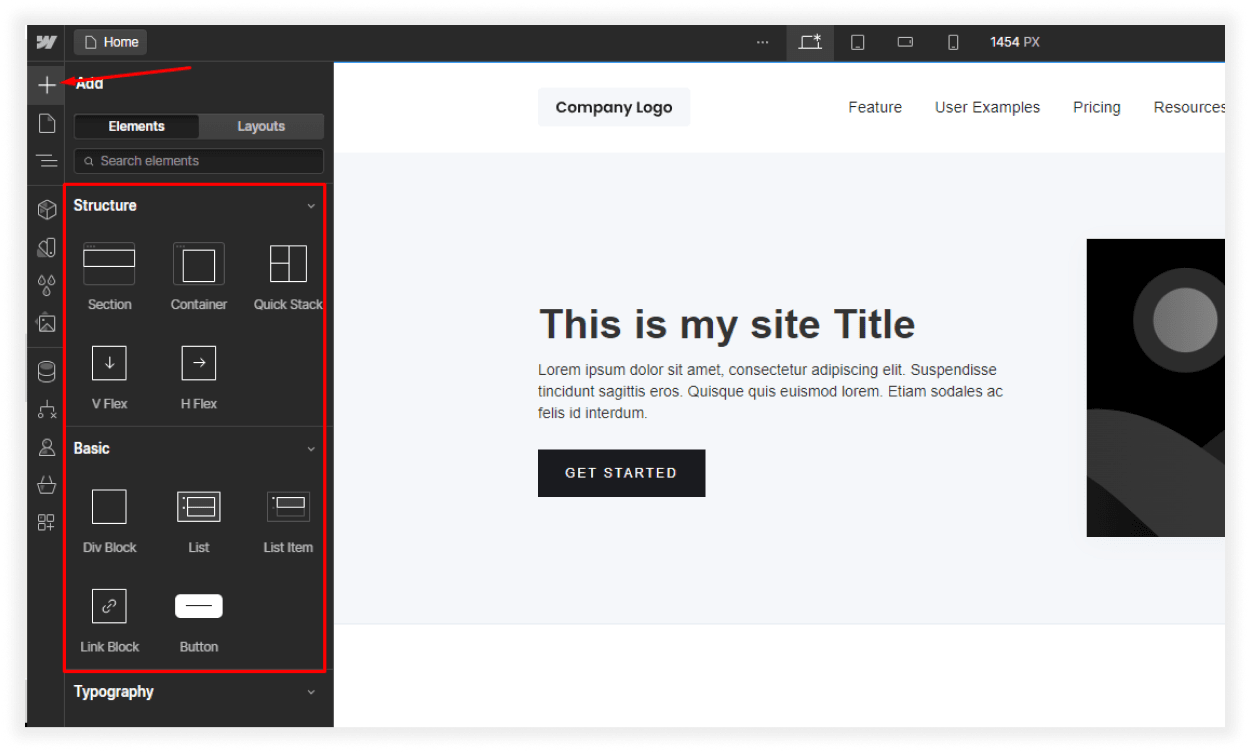
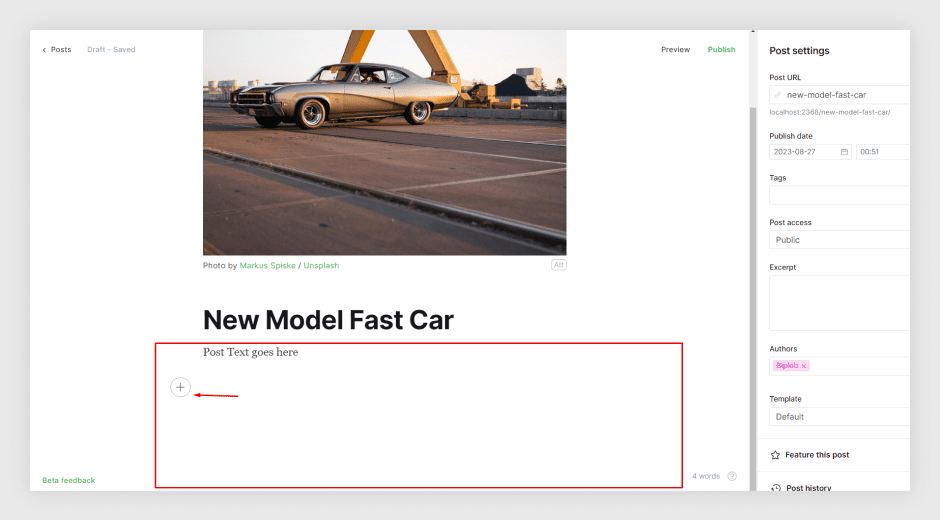
After completing these steps, you will see a blank screen labeled "Body". When you click on the “+” symbol that appears in the left panel toolbar. Here you can add various elements, layouts, containers, buttons, links, images, videos, forms, etc.
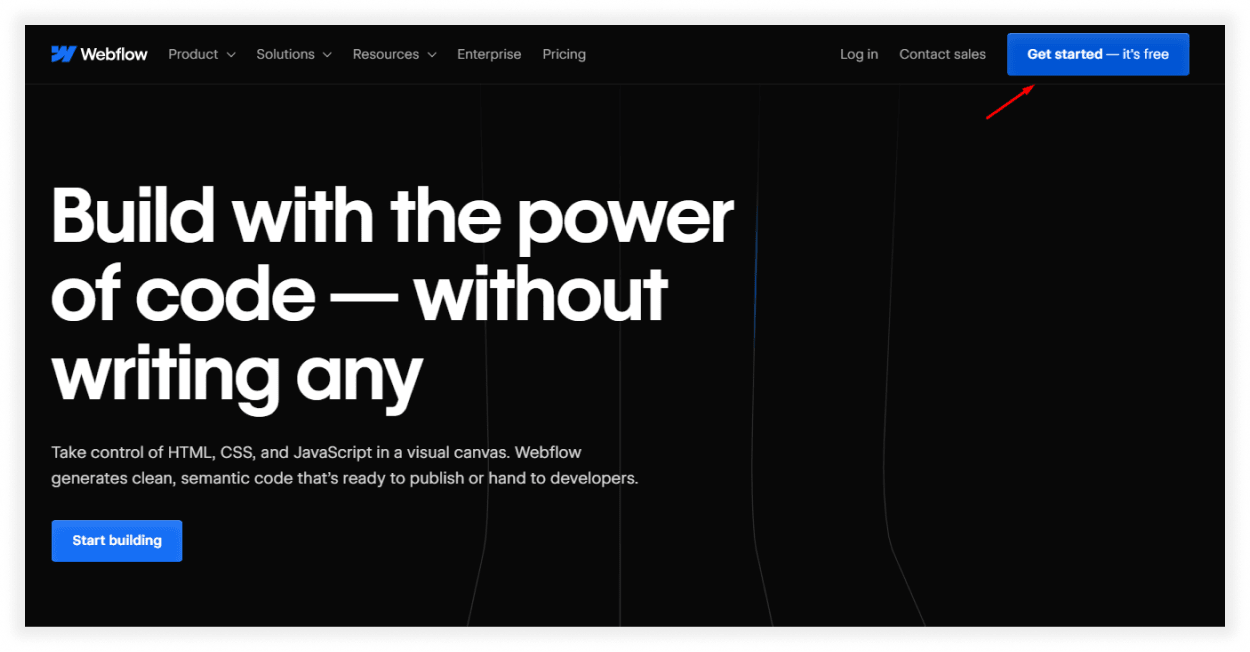
Step-1: Setting Up Your Webflow Account
Go to the Webflow website and sign up for a free account. Webflow offers a generous free plan that allows you to build and host two websites with basic features. As your website grows, you can upgrade to paid plans for additional functionalities.
Step-2: Choosing a Starting Point
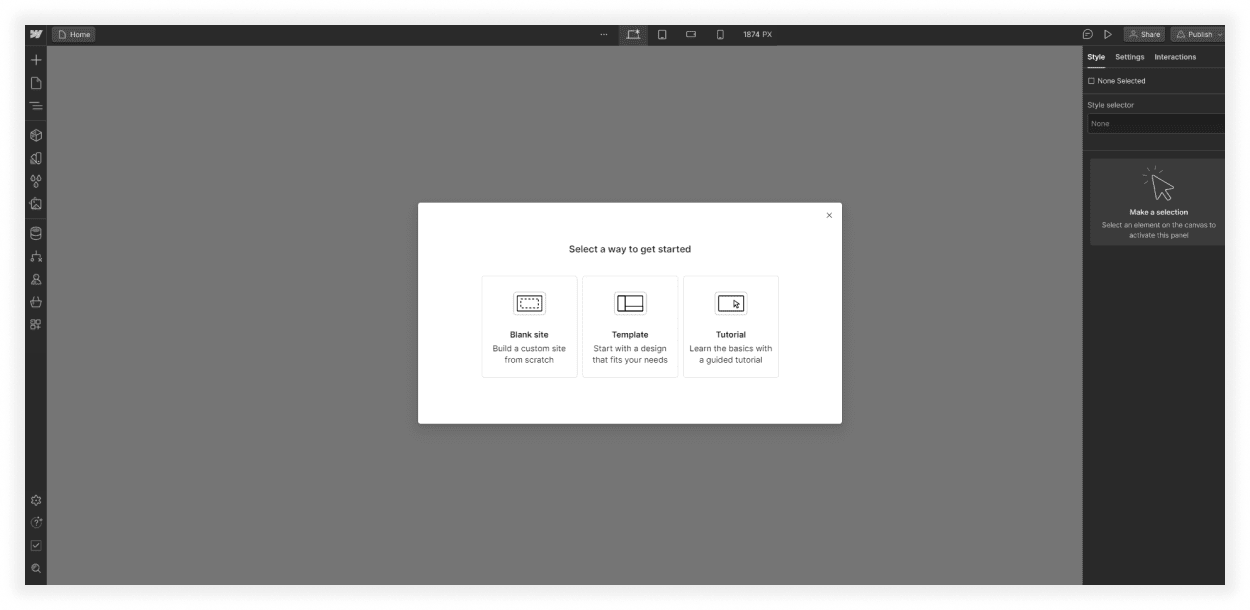
Webflow offers three options for starting your website:
- Blank Site: This is a great choice for those who want complete creative freedom and control over their website's design.
- Template: Webflow boasts a vast library of professionally designed templates covering various website categories. These templates provide a solid foundation and can be easily customized to match your brand identity.
- Cloneable Projects: This option allows you to duplicate existing websites built by other Webflow users. This can be a great way to learn from successful designs and get a head start on your project.
For this tutorial, we'll be starting with a blank canvas to showcase the full capabilities of Webflow.
Step-3: Building Your Website Structure
Webflow's Designer interface is where the magic happens. Here's a breakdown of the key elements:
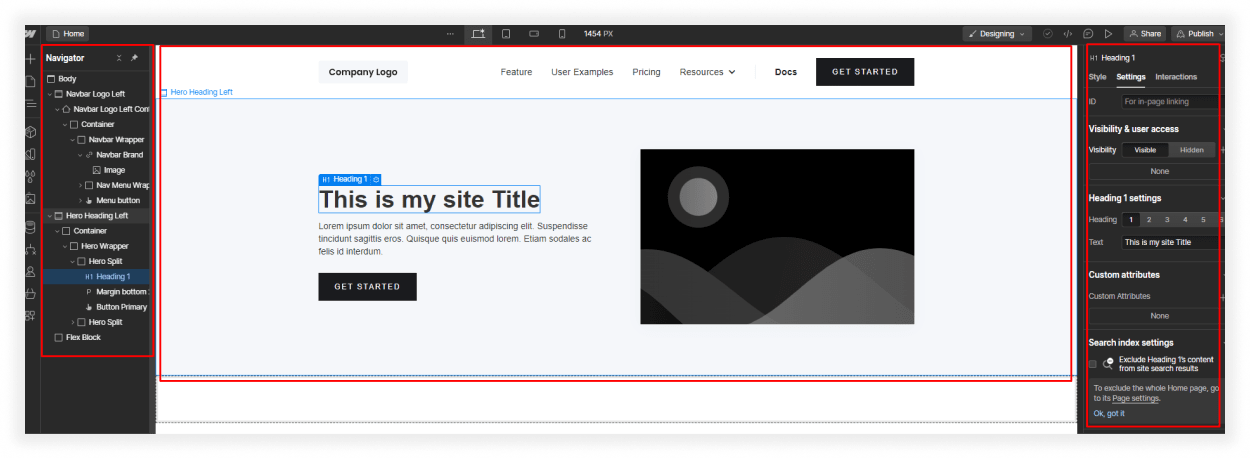
1. Understanding the Interface: Once you've created your blank site, familiarize yourself with the Webflow interface. The main workspace consists of the "Designer" and the "Navigator" panels. The Designer is where you visually build your website's pages, while the Navigator provides a hierarchical overview of your site's structure.
2. Adding Sections: Sections are the fundamental building blocks of your website. They act as containers for other elements like text, images, and buttons. Sections divide your page into distinct areas, like headers, hero sections, content sections, and footers. Click the "+" symbol in the Navigator and select "Section" to add a new section.
3. Creating Page Layout: Each page represents a different section of your website, like the homepage, about us page, or contact page. Webflow offers various layout options within each section. You can choose from grids, flexboxes, or columns to structure your content in a visually appealing and responsive way. To add a new page, click the "+" symbol on the left side of the Designer and select "Page".
4. Adding Content: Now comes the fun part! Click on the "+" symbol within a section and explore the various content elements available. You can add text headings, paragraphs, images, videos, buttons, forms, and more. Simply drag and drop these elements onto your page to position them as desired.
Step-4: Designing Your Website
Webflow's visual editor allows you to customize every aspect of your website's design. Here are some key steps:
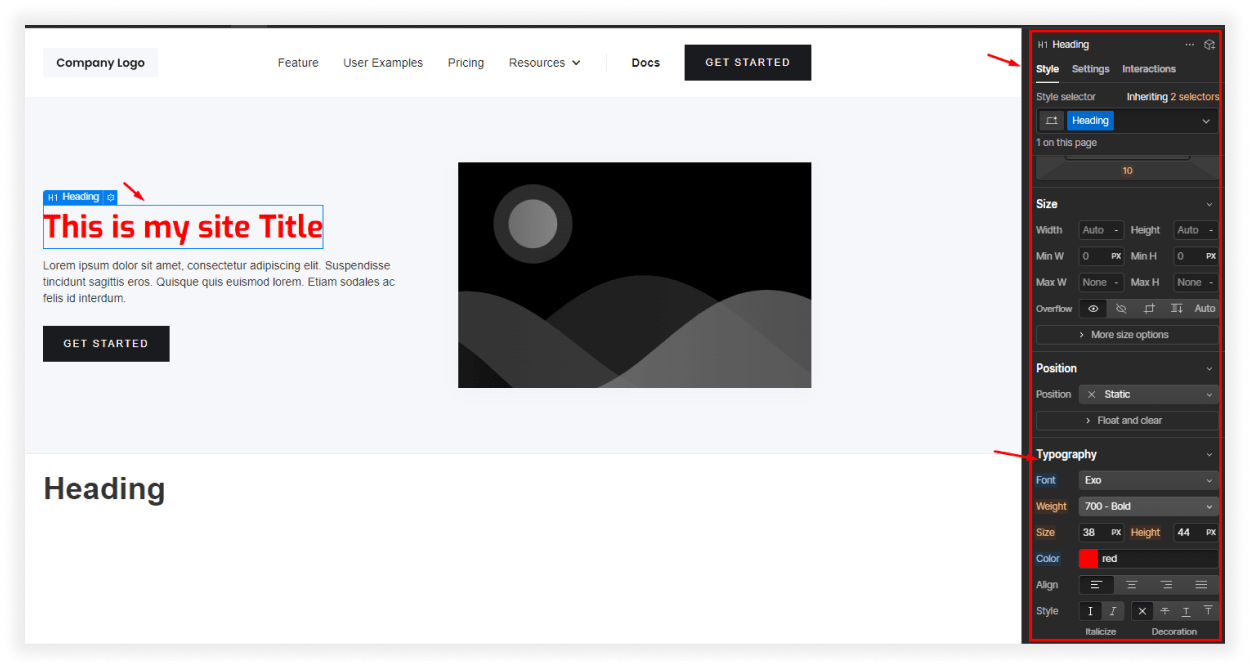
- The Style Panel: Webflow provides a powerful style panel where you can customize the appearance of each element on your website. Select an element and click on the "Styles" tab in the right-hand panel. Here, you can adjust fonts, colors, margins, paddings, and various other design properties.
- Global Styles: Webflow allows you to define global styles for specific elements like headings, paragraphs, and buttons. This ensures consistency across your entire website and saves you time from styling each element individually.
- Adding Images and Videos: Drag and drop images or videos directly onto your page from your computer or use Webflow's built-in image library.
- Animations and Interactions: Webflow offers various animation options to add interactivity and visual interest to your website. You can animate elements on scroll, hover, or click.
Step-5: Making Your Website Responsive
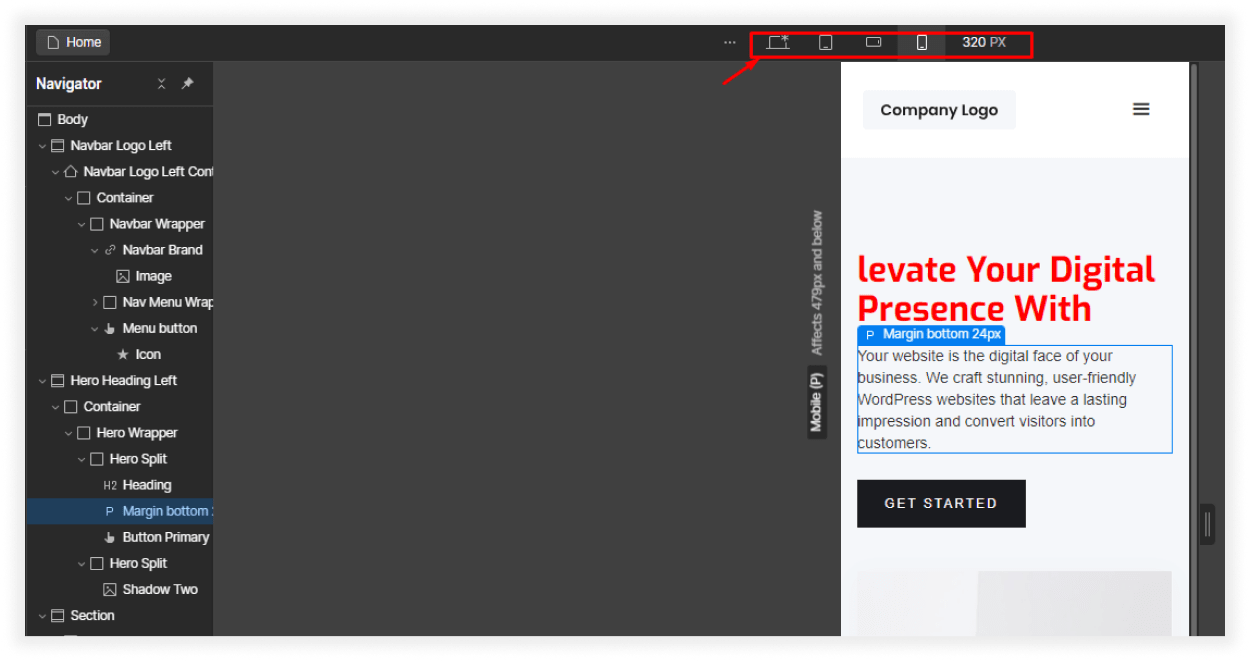
Webflow ensures your website looks good on all devices, from desktops to tablets and smartphones. The responsive design engine automatically adjusts the layout and elements based on the screen size. You can further fine-tune the mobile view using the dedicated mobile editor.
Step-6: Adding Content
Once you've designed the basic structure, it's time to add content to your website. Simply click on any text box and start typing. You can also use Webflow's CMS (Content Management System) to manage your website's content easily. This allows you to add, edit, and update text, images, and other content without needing to touch the code.
Step- 7: Test and Preview
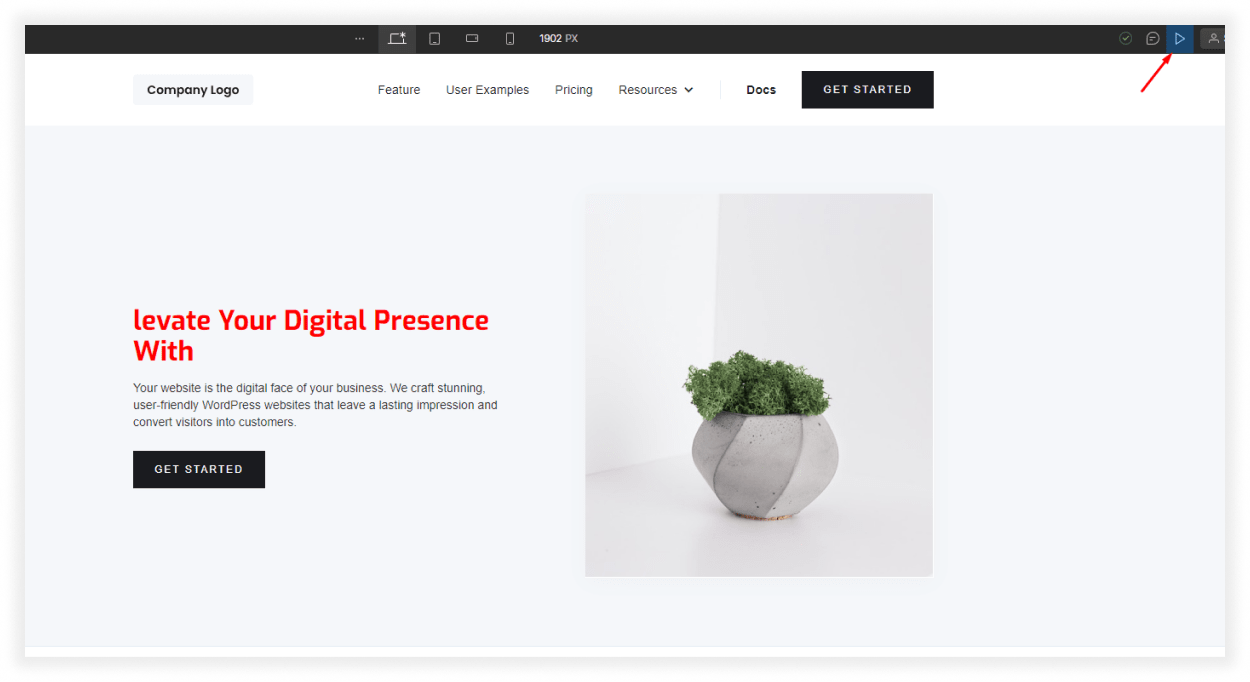
Before you publish your website, it's essential to test it to make sure everything is working correctly. Webflow allows you to preview your website in real-time, so you can see how it will look and function before you publish it.
Step- 8: Publish Your Website
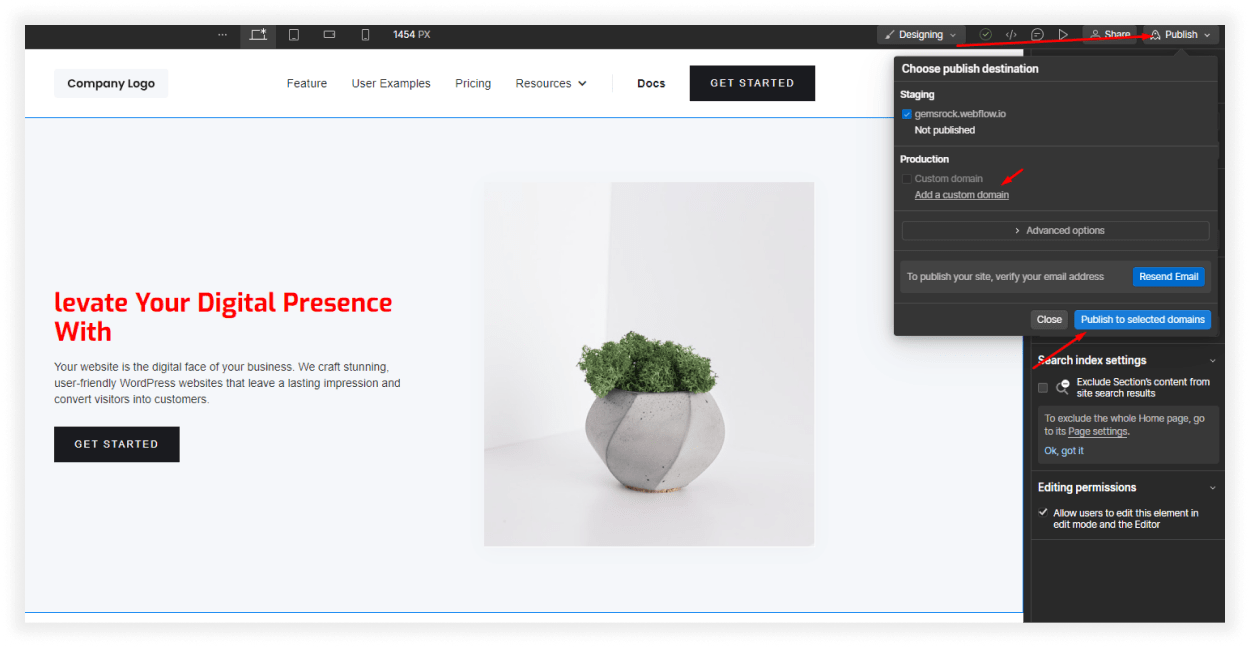
- Connecting a Custom Domain: While Webflow offers a free subdomain for your website, it's recommended to connect your own custom domain name for a more professional look. You can either purchase a domain through Webflow or connect an existing one from another registrar.
- Launching Your Website: Once you're satisfied with your website's design and functionality, click the "Publish" button. Webflow provides hosting within its platform, so your website will be live on the internet shortly after publishing.
Additional Tips for Beginners
- Start Simple: Don't try to build a complex website right away. Begin with a basic structure and gradually add more features and functionalities as you learn.
- Utilize Webflow Resources: Webflow offers a wealth of resources, including tutorials, articles, and videos, to help you learn the platform.
- Join the Community: Webflow has a vibrant online community of designers and developers who are always happy to help and answer your questions.
- Experiment and Have Fun: Building a website should be an enjoyable experience. Don't be afraid to experiment with different designs and functionalities to find what works best for you.
Wrap up
Building a website in Webflow doesn't require much coding knowledge, making it an excellent platform for beginners. Sometimes if you want to custom slider and heavy outstanding animation for your website, you should have coding knowledge. By following this step-by-step guide and utilizing the platform's intuitive tools, you can create a professional and visually appealing website that reflects your brand and purpose. Remember, the beauty of Webflow lies in its flexibility and ease of use. Don't be afraid to experiment, explore its features, and have fun building your online presence!
FAQs
Do you have any questions about how to build a website with webflow? We have answers to some frequently asked questions on the topic.
Do I need to know how to code to use Webflow?
No, you don't need to know how to code to use Webflow. It has a visual interface that allows you to design and customize your website without writing code. If you want to add custom slider or scripts, you should have coding knowledge.
Can I use my own domain with a website built in Webflow?
Yes, you can use your own domain with a website built in Webflow. You can either transfer an existing domain to Webflow or connect a new domain that you purchase through a domain registrar.
Can I add e-commerce functionality to my website built in Webflow?
Yes, you can add e-commerce functionality to your website built in Webflow using Webflow Ecommerce. You can create and customize your online store, manage your products, and accept payments.
Is Webflow mobile-responsive?
Yes, websites built in Webflow are automatically mobile-responsive. You can customize the design and layout for desktop, tablet, and mobile views.
How much does Webflow cost?
Webflow offers a variety of pricing plans, including a free plan with basic features. Paid plans start at $14 per month for basic websites and $39 per month for larger websites.
Can I export my Webflow website to host it elsewhere?
Yes, you can export your Webflow website's HTML, CSS, and JavaScript code to host it elsewhere. However, you'll lose the ability to use Webflow's visual editor to make changes to your website.
Related Articles:
- How to Optimize Your WordPress Website for Speed – Techniques to speed up your Webflow or WordPress website for a better user experience.
- Top 20 Best WordPress Themes for Blogging Websites – Explore the best WordPress themes that can be optimized for fast load times.
- Webflow vs. WordPress vs. Squarespace vs. Shopify: Which is the Best CMS – A detailed comparison of CMS platforms, focusing on Webflow’s advantages for speed and customization.
- Top 10 Headless CMS – Discover the top headless CMS solutions for building scalable, fast-loading websites.

WordPress Expert
Biplob is a technical content writer and junior web developer passionate about creating engaging content and websites. He specializes in web technologies and loves exploring innovative solutions.
See all Articles