
On this page
General Information
Welcome to the Furnixar eCommerce WordPress Theme for Furniture Stores. This theme is built with Elementor Page Builder and is optimized for WooCommerce, Mailchimp, ACF Pro, Kirki Customizer, and Contact Form 7 plugins. This guide will walk you through the steps from installing the theme to customizing it with the available tools and widgets to design your furniture eCommerce store.
If you find any kind of issue or bug don’t hesitate to contact us. We will resolve your problem as soon as possible.
Requirements
To ensure the smooth installation and optimal performance of the Furnixar - eCommerce WordPress Theme, your hosting environment, and WordPress setup must meet the following requirements:
- For WordPress Version
- WordPress 5.6 or higher.
- Ensure that your web hosting provider meets the minimum system requirements to run WordPress effectively.
- You can download the most recent version of WordPress from WordPress.org.
- For Furnxar Theme
To use Furnixar Theme please make sure that your hosting is running with the following features:
- WordPress 5.6 or higher
- PHP 7.4 or higher
- MySQL 5.6
- Recommended PHP Configuration Limits
- Max_execution_time 600
- Memory_limit 512M
- Upload_max_filesize 40M
- Post_max_size 48M
What’s Included?
When you purchase the Furnixar Theme, you’ll receive a complete package to build a stunning and functional furniture eCommerce website. Here's what's included:
- Included Files
- Furnixar Theme Files
- Child Theme
- Demo Content XML File
- Support Plugins
- Documentation
- How to download the Furnixar Theme from Themeforest?
- Log in to your ThemeForest account.
- Navigate to the Download tab.
- Find Furnixar them purchase and click on the Download button.
- Choose from All Files & Documentation.
Theme Installation
To install the theme, you must have WordPress already installed on your server.
Using WordPress Dashboard
- Download the full theme ZIP package and Extract it to the normal folder
- Go to your WordPress dashboard and click on
Appearance > Themes - Click on
Add NewThemes then click onUpload Themeand select the Furnixar themefurnixar.zipfile. - Hit the
Install NowButton - After finishing the installation process click on
Activate the ThemeButton
Step 1: Dashboard > Appearance > Themes > Add New Button

Step 2: Click on the Upload Theme > Choose theme file then click on the Install Now button
Uploading the theme via (FTP)
- Extract furnixar.zip to the normal folder.
- Open the WordPress installation directory.
- Go to /wp-content/themes directory.
- Upload the Furnixar folder to that "themes" directory.
Theme Activation and Registration
ThemeForest regular theme license is meant to be activated for one website at a time.
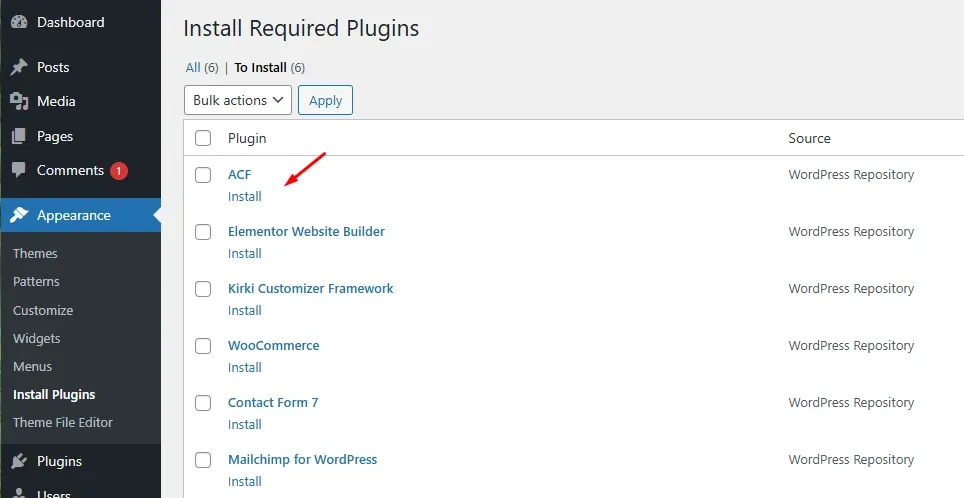
Install Required & Recommended Plugins
After installing the Furnixar theme, the theme shows a message to Begin Installing Plugins. Follow the instructions to install and activate them.
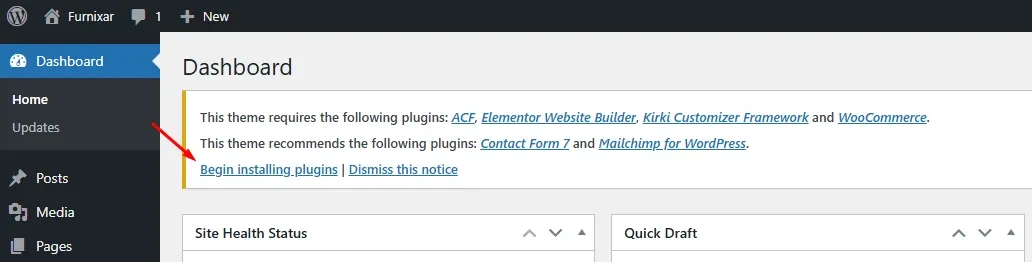
To install all required and recommended plugins follow the steps below:
- Click On Begin installing Plugins
- Select all the Required & Recommended plugins then
- Click on
Bulk Actions, chooseInstallfrom the options - Click on
Applyor you can install them one by one.
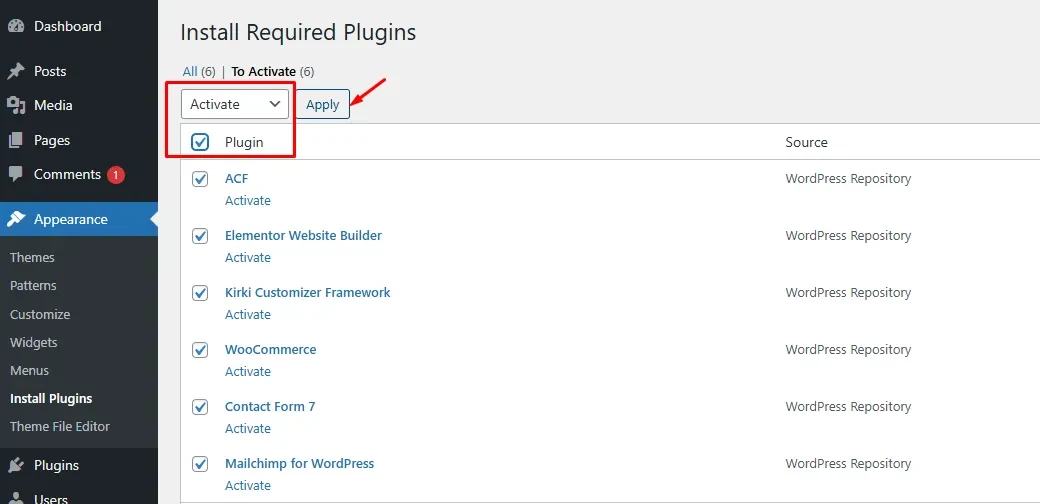
After installing all plugins, activate them. To activate the plugins follow the instructions below:
- Click on
Bulk Actions, chooseActivate, then select the plugin and click on theApplyButton
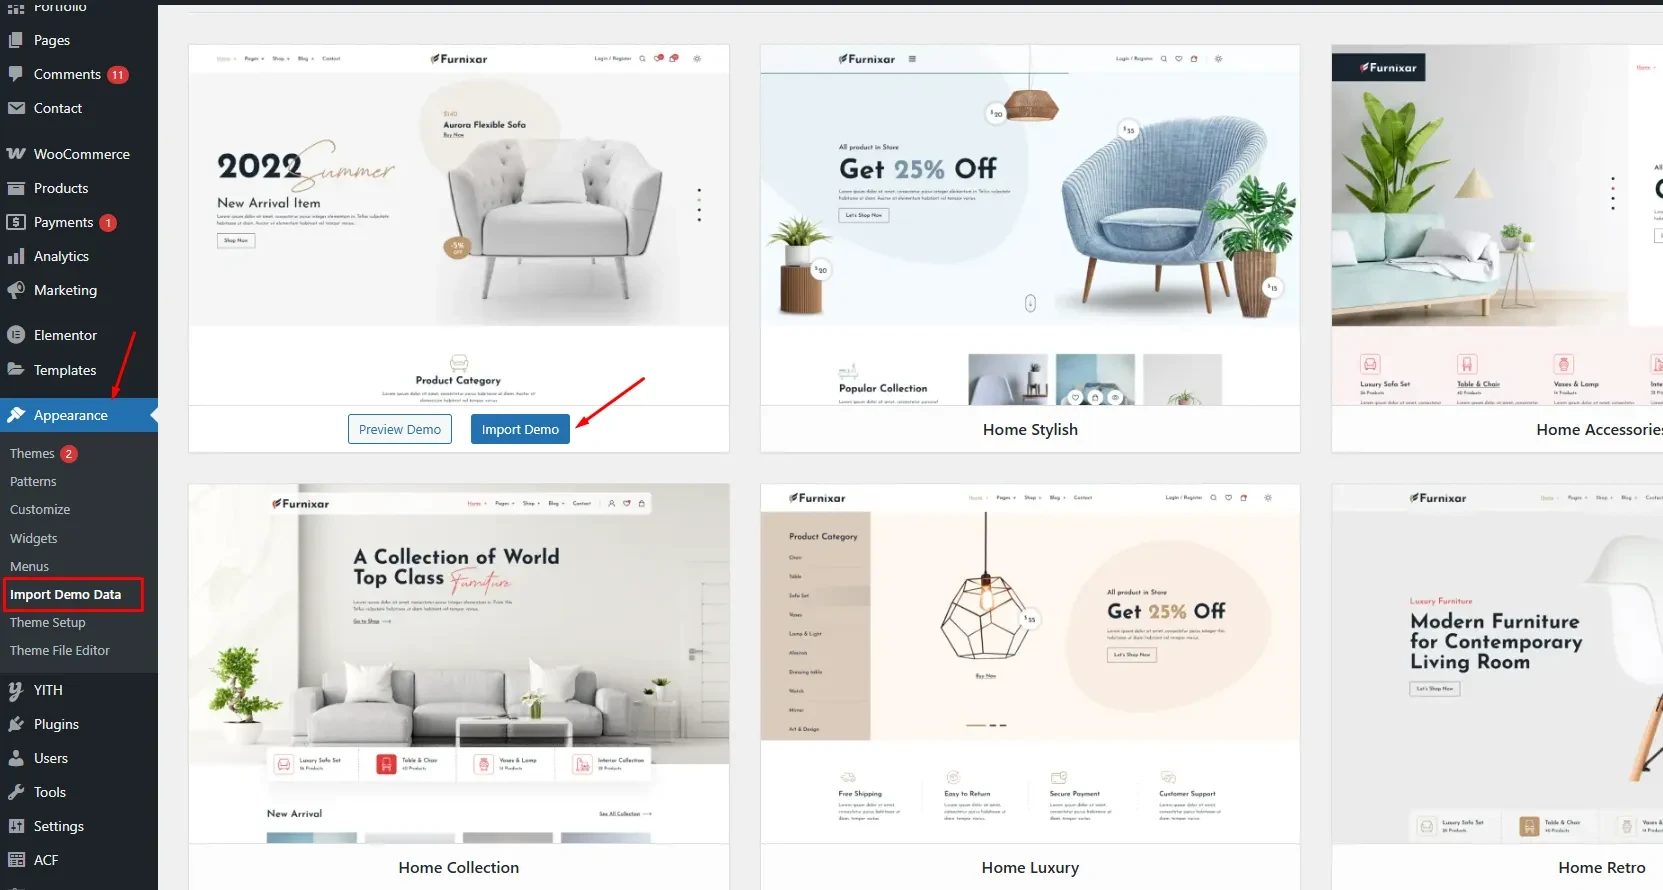
Import Demo Content
Setting up your site with the Furnixar demo content is quick and easy. We offer two methods for importing demo content: One-Click Demo Import and Manual Import.
1. One-Click Demo Import
- Go to
Dashboard > Appearance > Import Demo Data - Browse available demos and click Import Demo on the one you want to import.
2. Manual Import
Furnixar theme comes with the XML demo content file "furnixar-demo-data.xml" You will find it inside the theme package folder. To import it.
- Go to
Dashboard > Tools > Import - Click on
WordPress - Install and activate the
WordPress Importer plugin - Upload "furnixar-demo-data.xml" and import it
- Update the Permalinks from settings
Import Elementor-kit
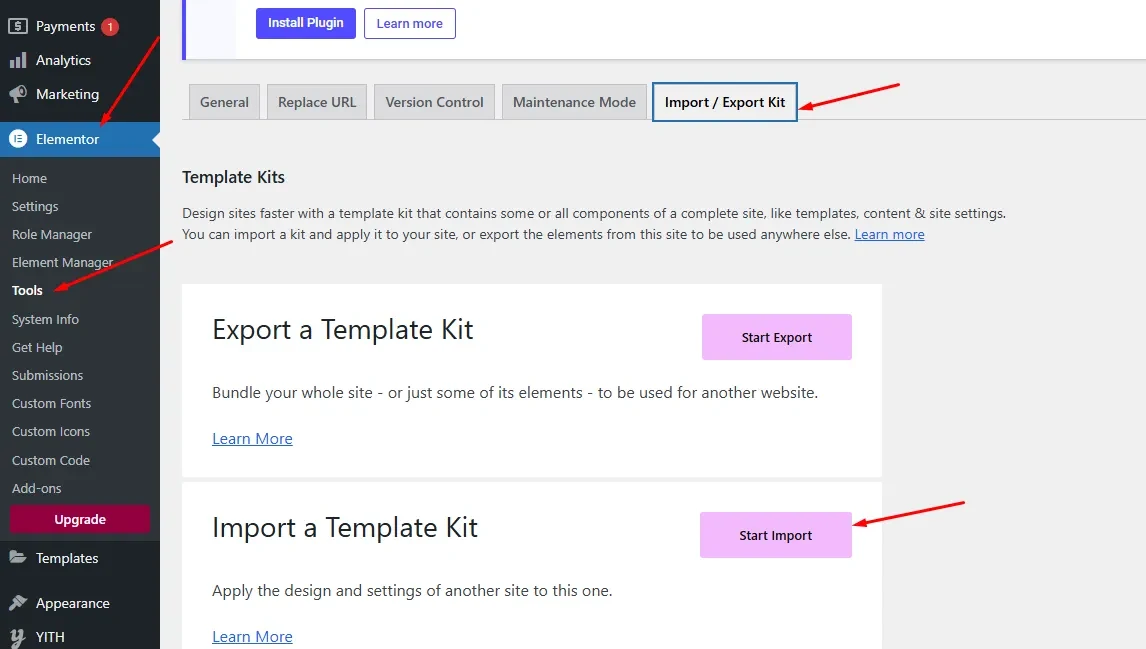
After importing the full demo content, you should import the Elementor kit for basic Elementor settings such as colors, fonts, etc.
You will find the Elementor kit file in the theme’s resources folder. To import the Elementor kit, go to Elementor > Tools > Import.
Permalinks Settings
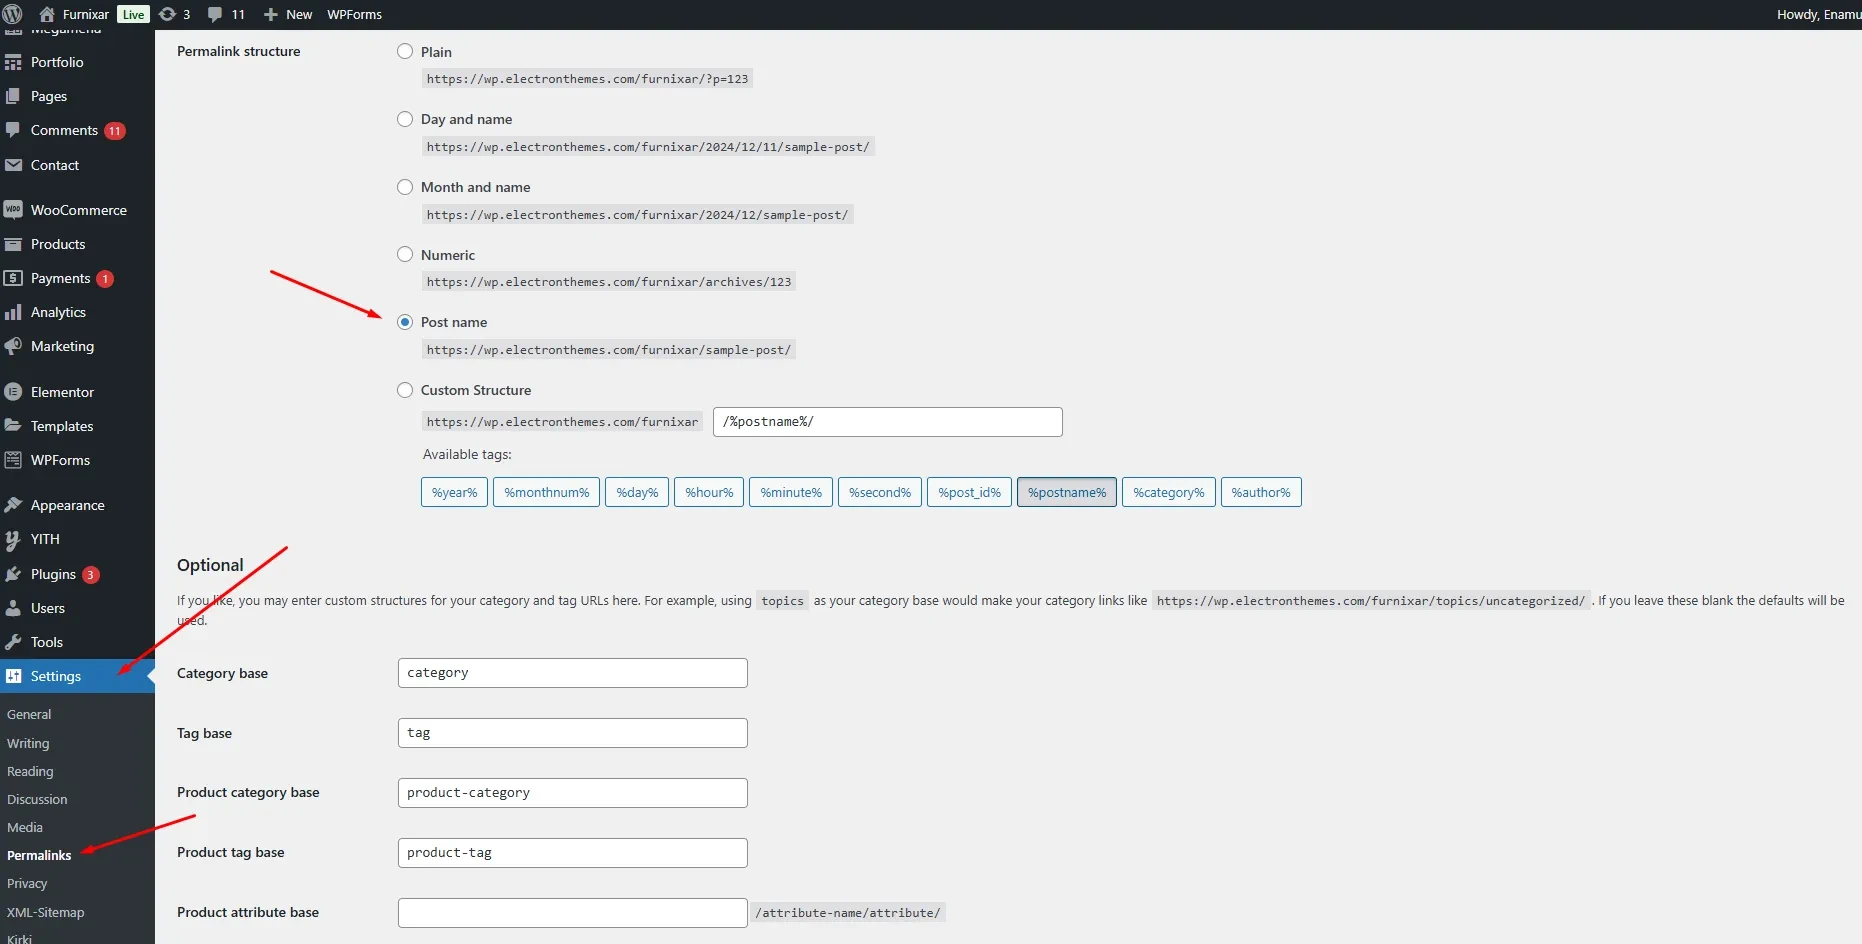
After importing demo data, please update your permalink. To update the permalink
- Go to
Dashboard > Settings > Permalinksand select the Post name as a permalink - Click on the
Save Settingsbutton to make your changes.
General Setup
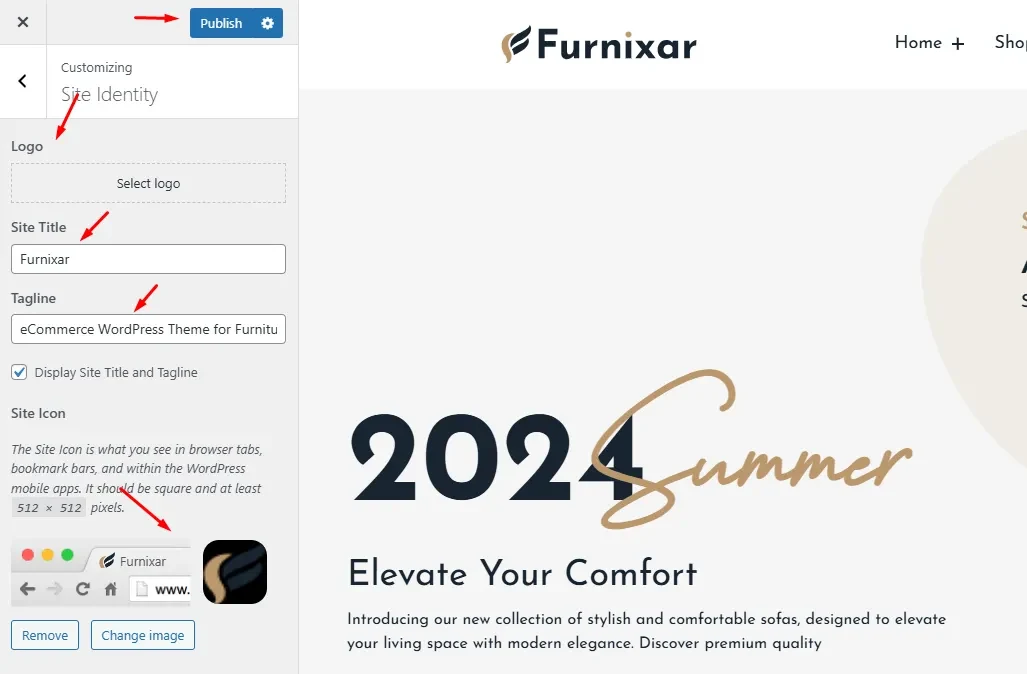
1. Change Logo, Site Title, and Favicon
To change your Site Logo, Site Title, and Favicon. Follow the following steps
- Go to
Dashboard > Appearance > Customize > Site Identity - Select Logo, and Favicon, and write the site Title then.
- Click on the
Publishbutton.
2. Header
Create a Beautiful Header
- Logo
- Menu item
- Search icon
- Dark Light icon
- Wishlist icon
- Cart icon
3. Create a Menu
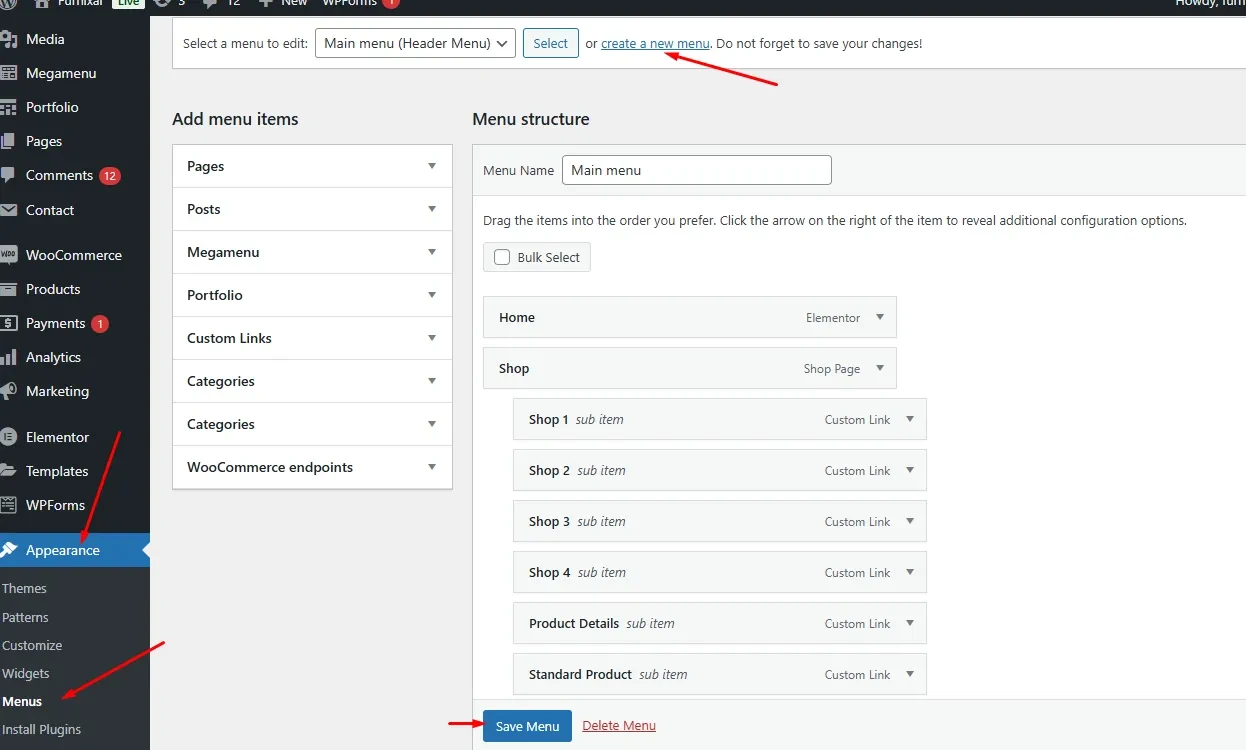
To Create and Activate Menu:
- Go to
Dashboard >Appearance > Menus. - Click on the
Create New Menubutton and give it a name. - Select Page, Posts, Categories, or create custom links then.
- Click the
Add To Menubutton. - Select Menu Location
Header MenuorFooter Menu.
Then Click on the Save Menu button.
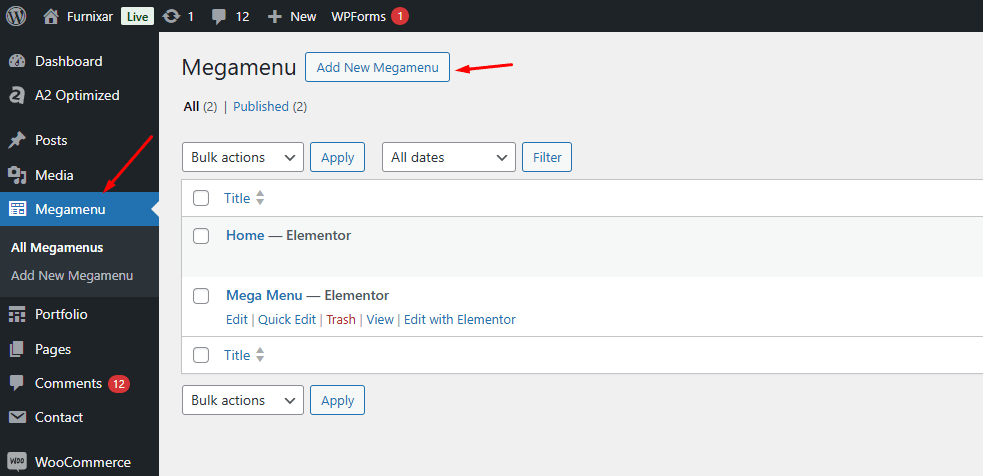
4. Mega Menu
To create a mega menu go to the Dashboard > Megamenus > Add new megamenu
Give a menu name and set the page template elementor canvas then publish it.
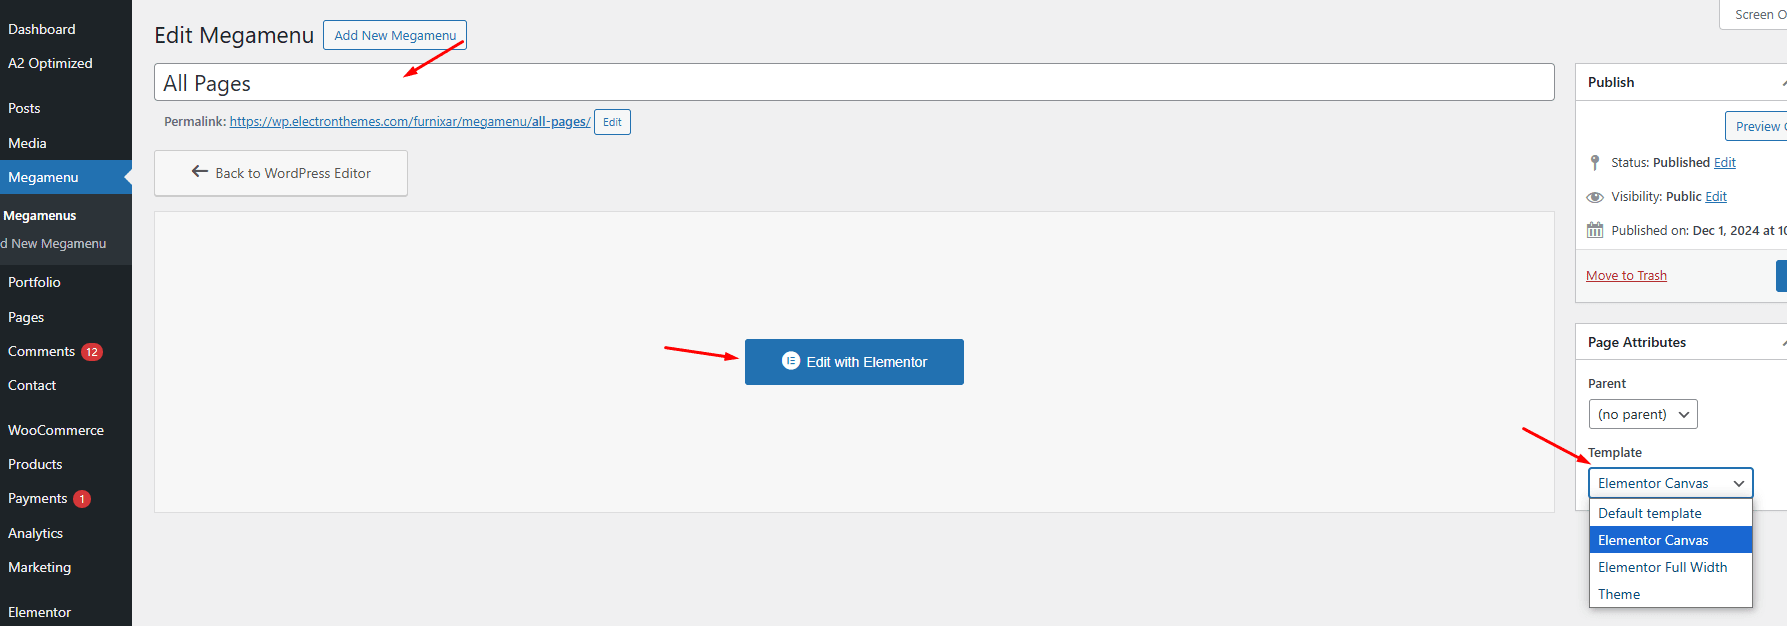
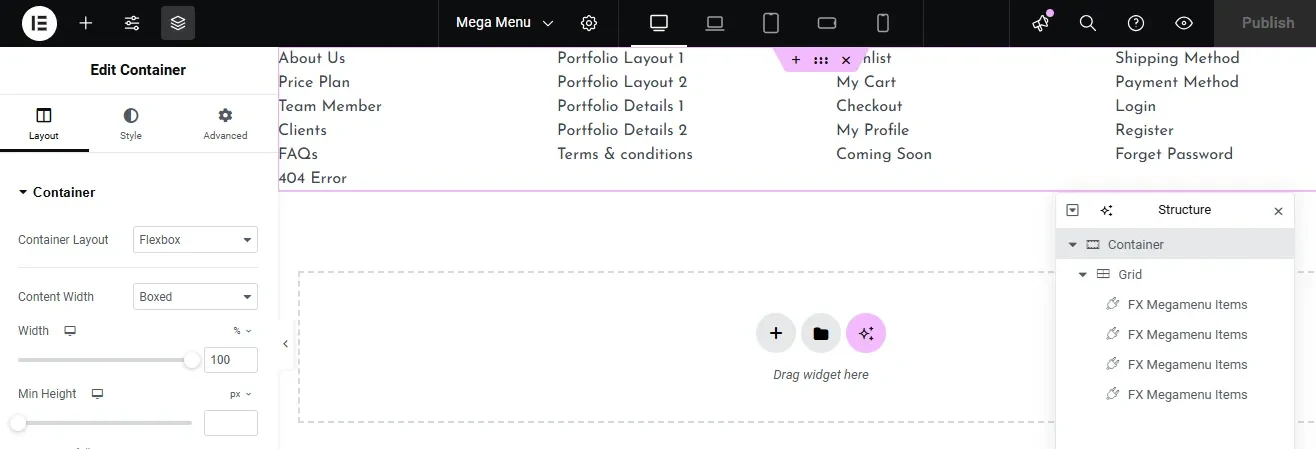
After publishing it opens with elementor and then designs a mega menu layout and publishes the menu.
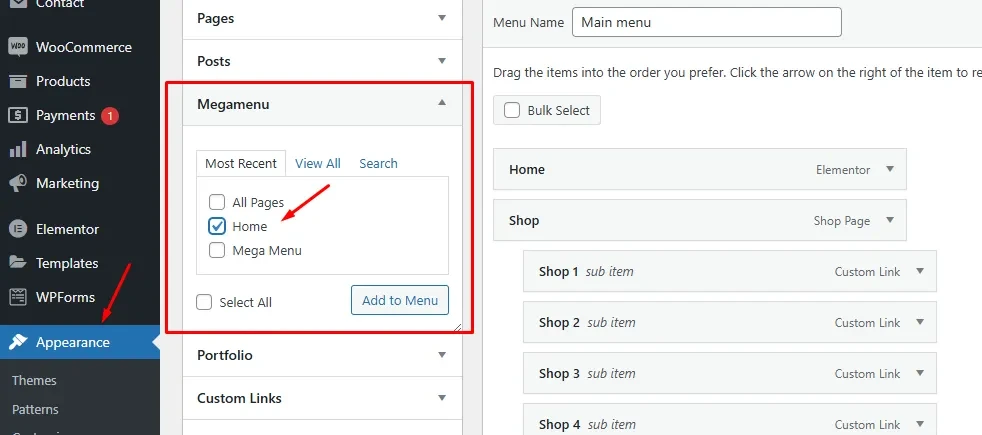
After designing the megamenu, go to the the then add to the menu item from the megamenu list which page you want to display in the main menu. Click on the save menu button.
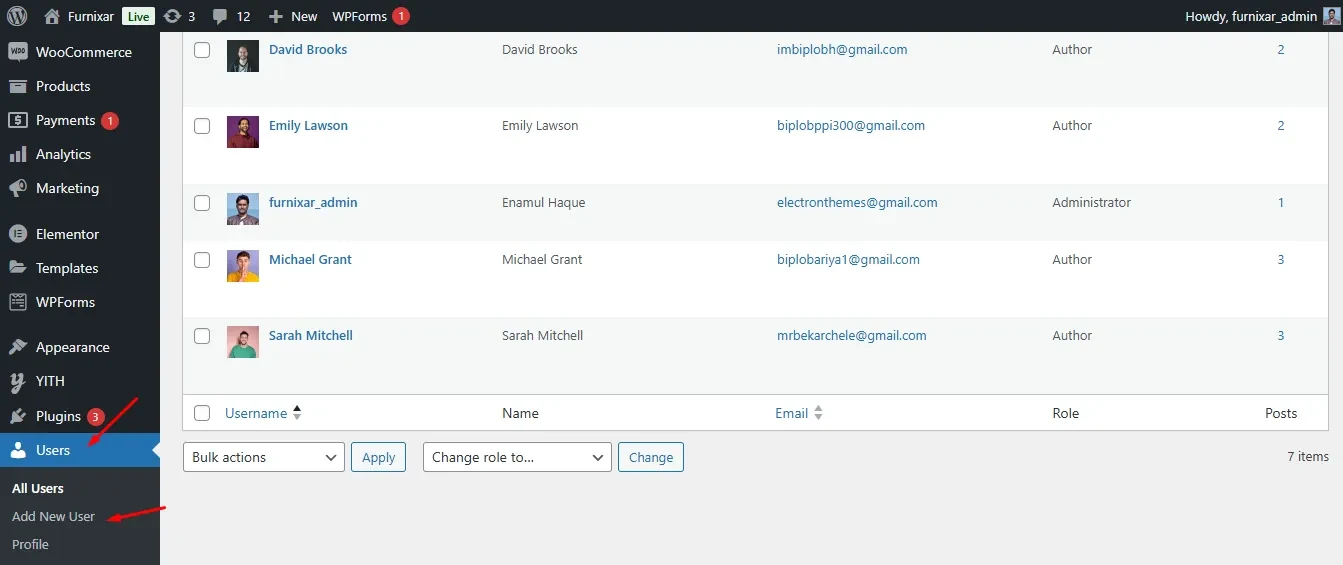
5. Create Author
You can create multiple authors on your site from the dashboard. To create the authors go to Dashboard > Users > Add new
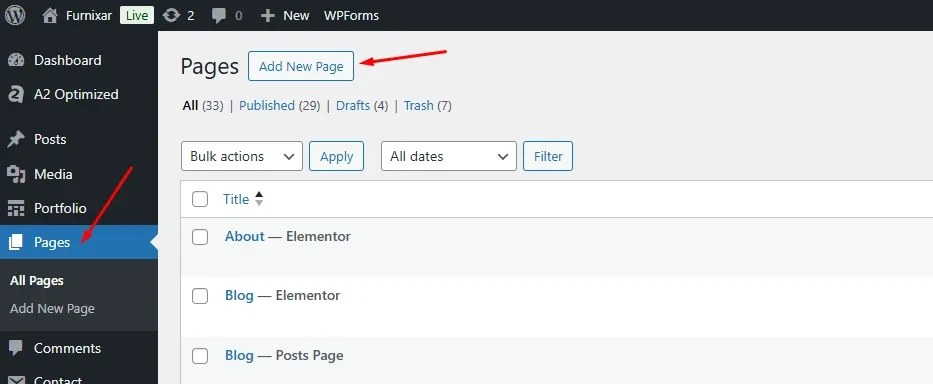
6. Create a page
You can create a new page from Dashboard > Pages > Add New Page.
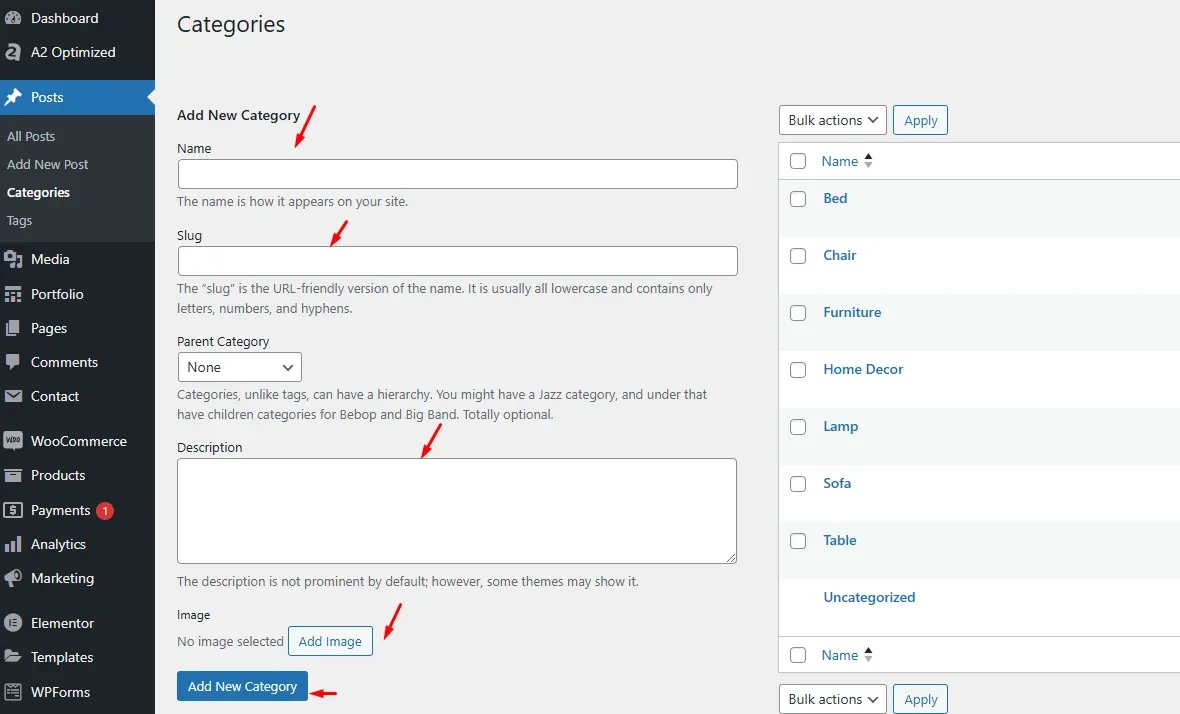
7. Create a Categories
To create new Categories:
- Go to
Dashboard > Posts > Categories > Add New - Write a category Name
- Slug
- Description
- Categories
- Add Category Image.
8. Create Tag
To create a new tag, Go to Dashboard > Tags > New Tag give your tag name, slug, and description then click on the add new tag button.

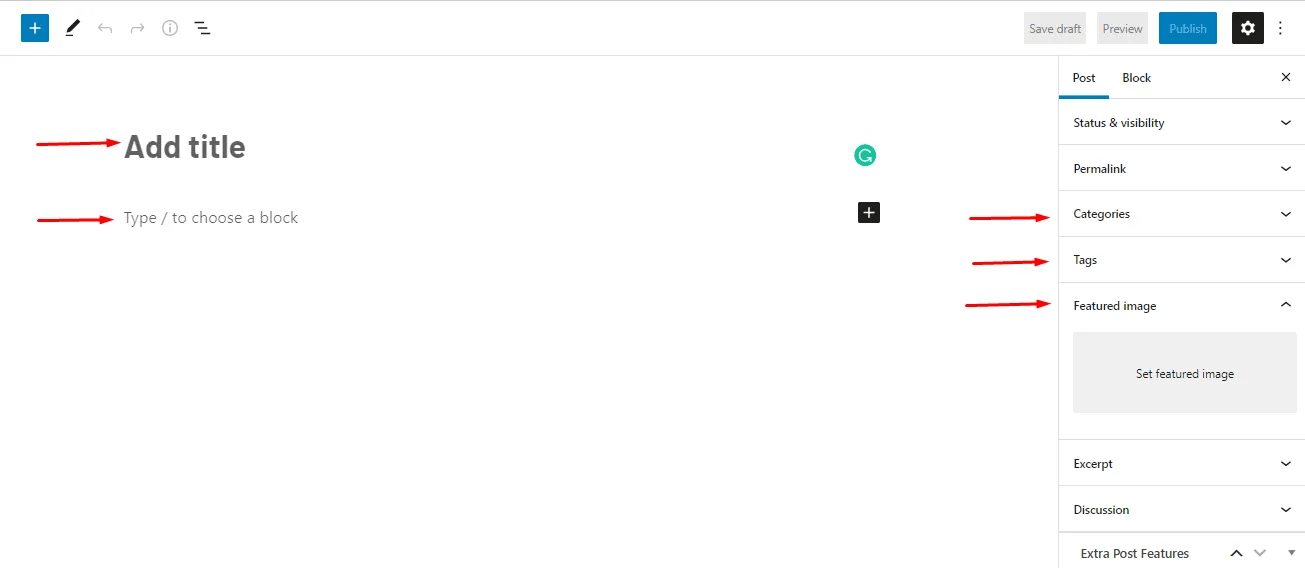
9. Create a Post
To create a new Post :
Go to Dashboard > Posts > Add New Post from your WordPress admin panel
Write a post:
- Title
- Description
- Categories
- Tags
- Set featured post
- Select post Header style
- Sidebar visibility
- Feature Image.
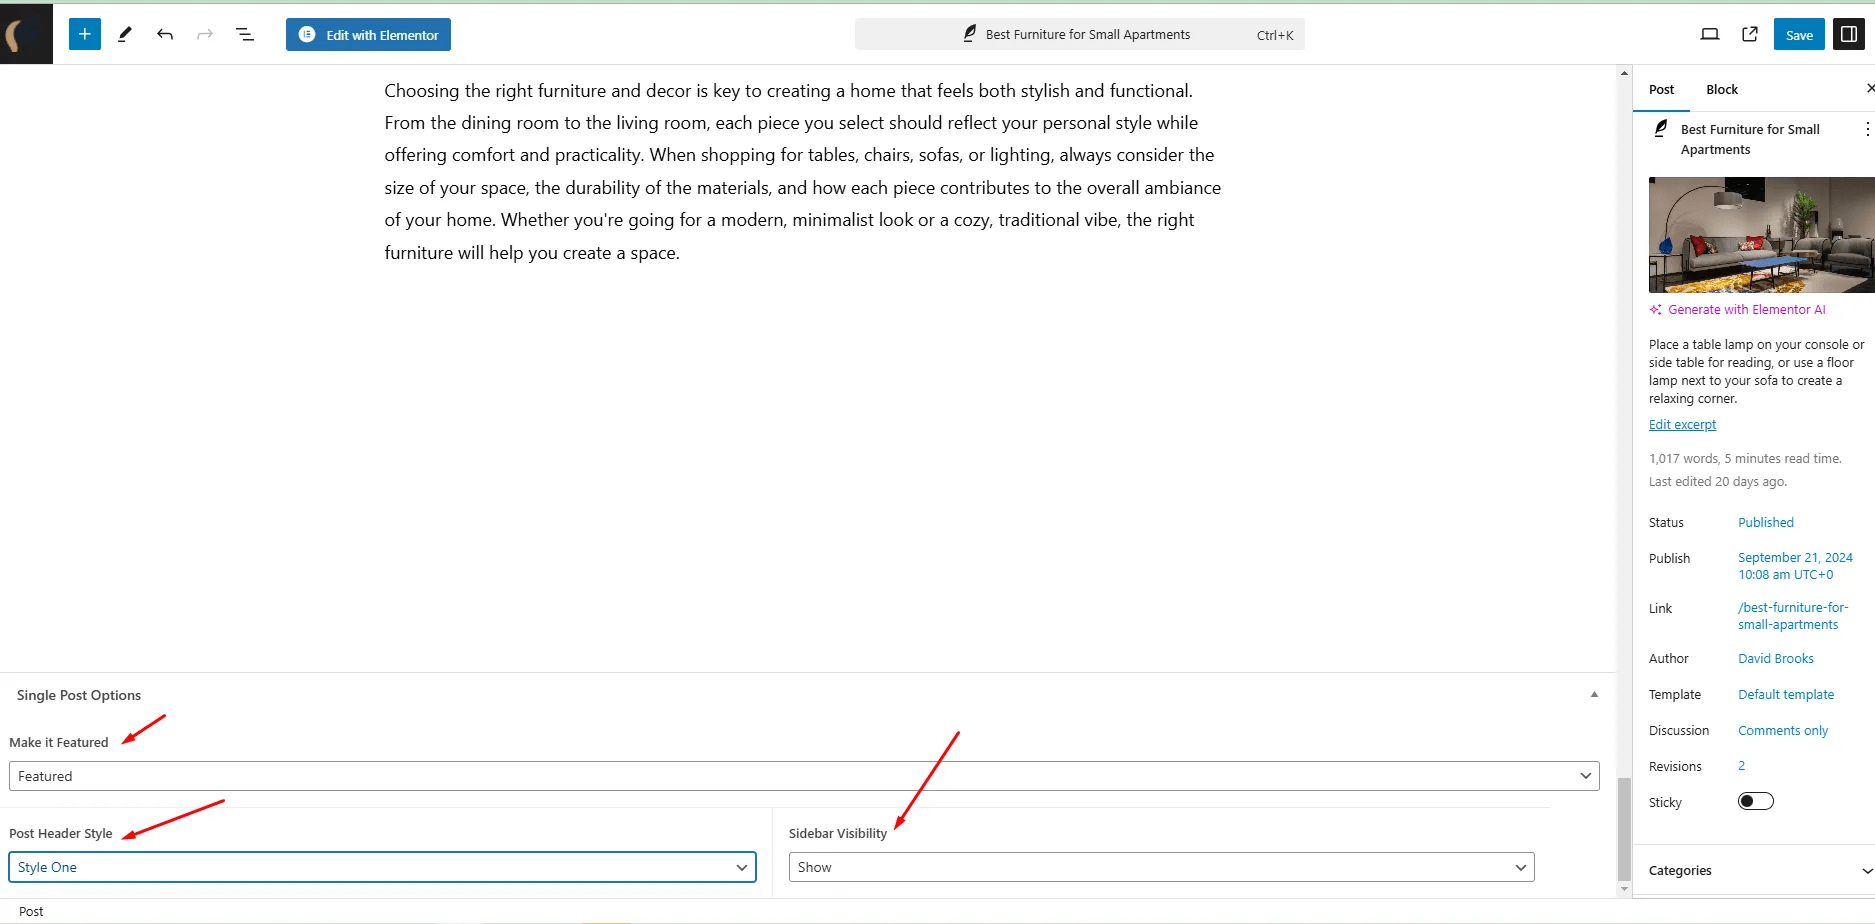
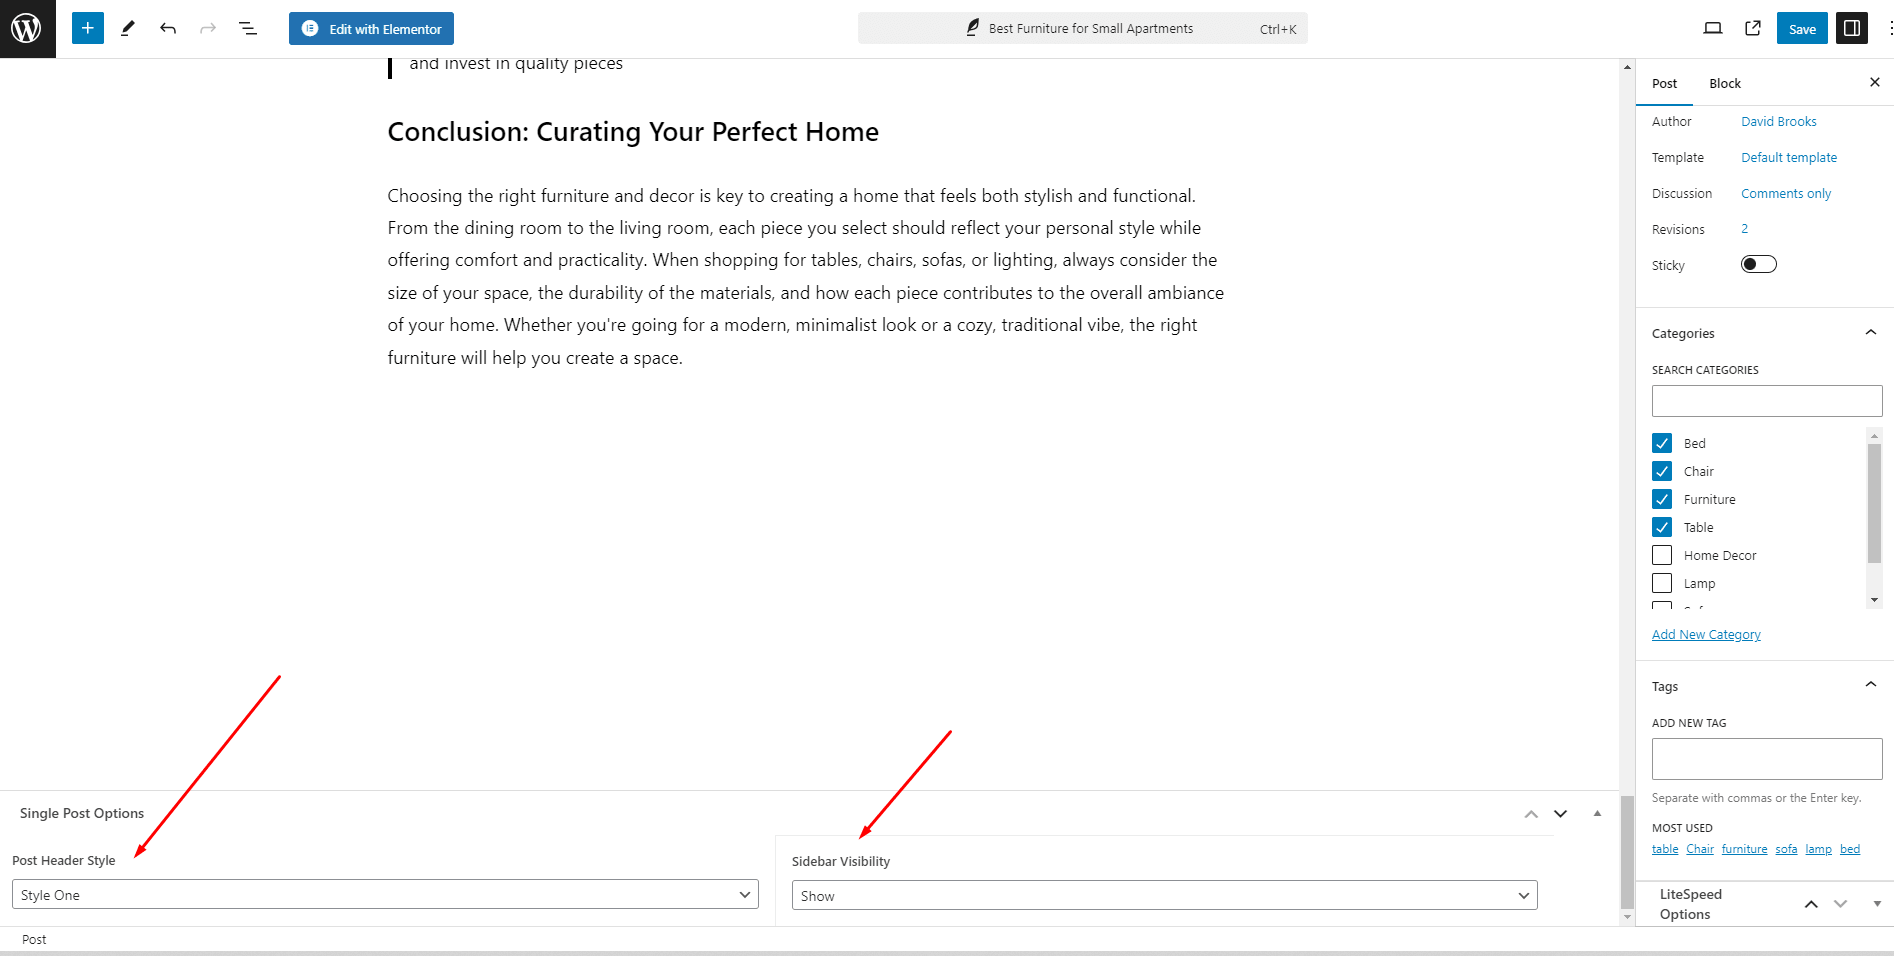
Single Post Options:
To set featured posts, post header style, and sidebar visibility go to the bottom in a single post editor.
10. Blog details page layout
Furnixar has 3 blog details layouts. You can choose from the bottom of the post editor.
- Post with Sidebar
- Post without Sidebar
- Post Full-width
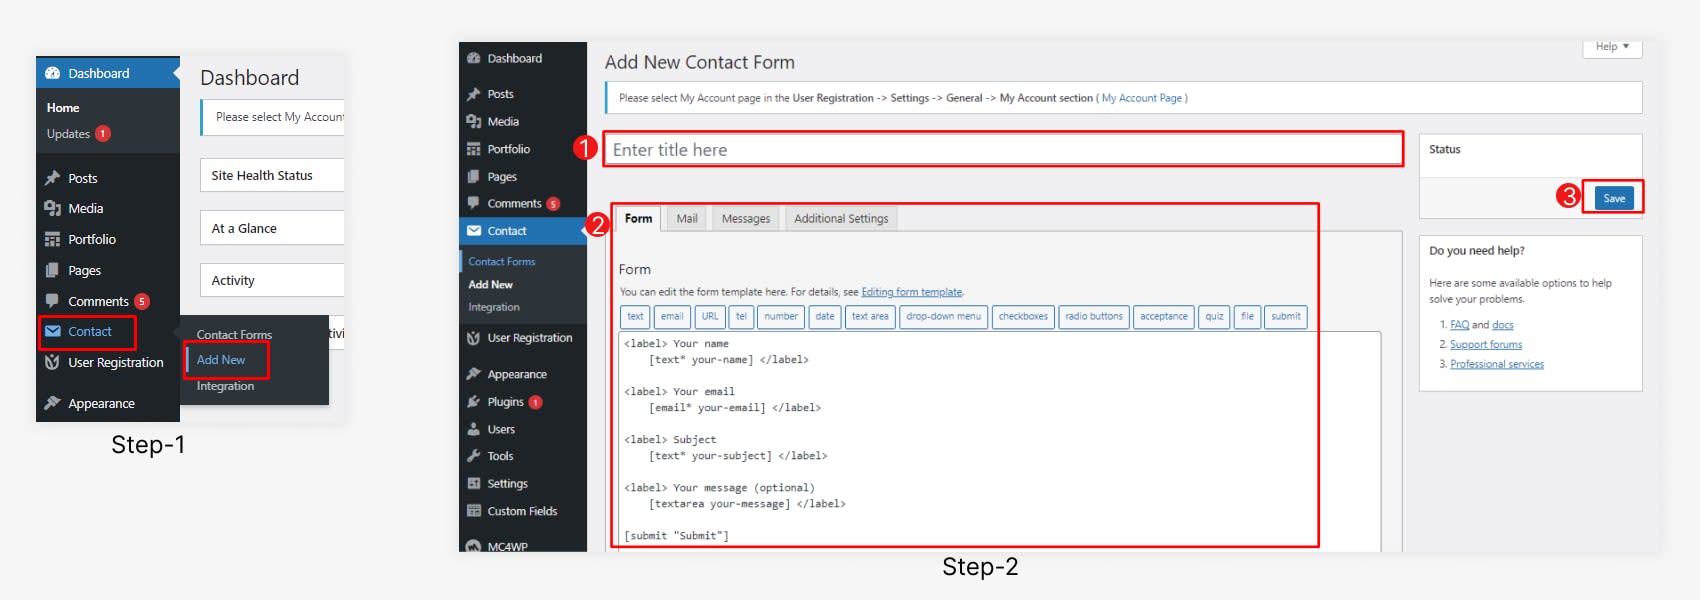
Create and Set up a Contact Form
To Create a Contact form follow the steps:
- Select all and copy the code in the box below.
<div class="tw-mt-8 md:tw-mt-12">
    <div>
        <div class="tw-grid sm:tw-grid-cols-2 lg:tw-grid-cols-1 xl:tw-grid-cols-2 tw-gap-5 sm:tw-gap-6">
            <label class="tw-block contact-input-box">
                <span class="tw-text-base md:tw-text-lg tw-text-title dark:tw-text-white tw-leading-none tw-mb-2 sm:tw-mb-3 tw-block">Full Name</span>
                [text* Name placeholder "Enter your full name"]
            </label>
            <label class="tw-block contact-input-box">
                <span class="tw-text-base md:tw-text-lg tw-text-title dark:tw-text-white tw-leading-none tw-mb-2 sm:tw-mb-3 tw-block">Email</span>
                [email* Email placeholder "Enter your email address"]
            </label>
            <label class="tw-block contact-input-box">
                <span class="tw-text-base md:tw-text-lg tw-text-title dark:tw-text-white tw-leading-none tw-mb-2 sm:tw-mb-3 tw-block">Phone No.</span>
                [tel* Number placeholder "Type your phone number"]
            </label>
            <label>
                <span class="tw-text-base md:tw-text-lg tw-text-title dark:tw-text-white tw-leading-none tw-mb-2 sm:tw-mb-3 tw-block">Subject</span>
                [select Subject class:select-active "Payment Problem" "Furniture Problem" "Agreement Problem" "Carrying Problem"]
            </label>
        </div>
        <label class="tw-mt-5 sm:tw-gap-6 contact-text-area tw-block">
            <span class="tw-text-base md:tw-text-lg tw-text-title dark:tw-text-white tw-leading-none tw-mb-2 sm:tw-mb-3 tw-block">Your Message</span>
            [textarea YourMessage placeholder "Type your message"]
        </label>
        <div class="tw-mt-5 contact-submit">
            [submit class:btn-solid class:btn]
        </div>
    </div>
</div>- Go to
Dashboard > Contact > Add Newand Enter the form name. - Remove all the default code from the Form box and paste the copied code.
- Click on the Save button
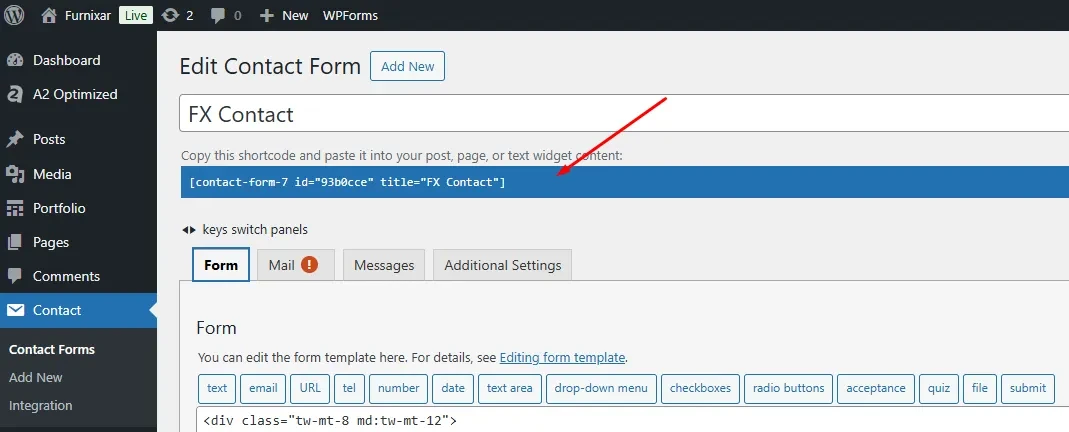
After saving the contact form you will see the shortcode. Copy this shortcode and paste it into the page where you want to show the contact form.
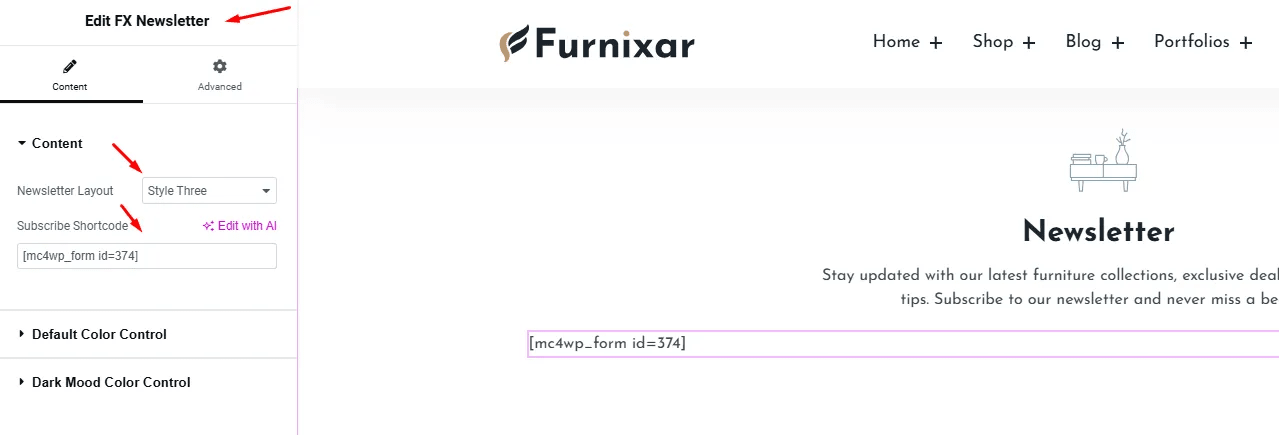
Setup Newsletter
To create a newsletter section follow the 3 steps:
Step 1: Connect your MailChimp account.
Step 2: Create a newsletter form in the WordPress dashboard.
Step 3: Show the Newsletter section on the site.
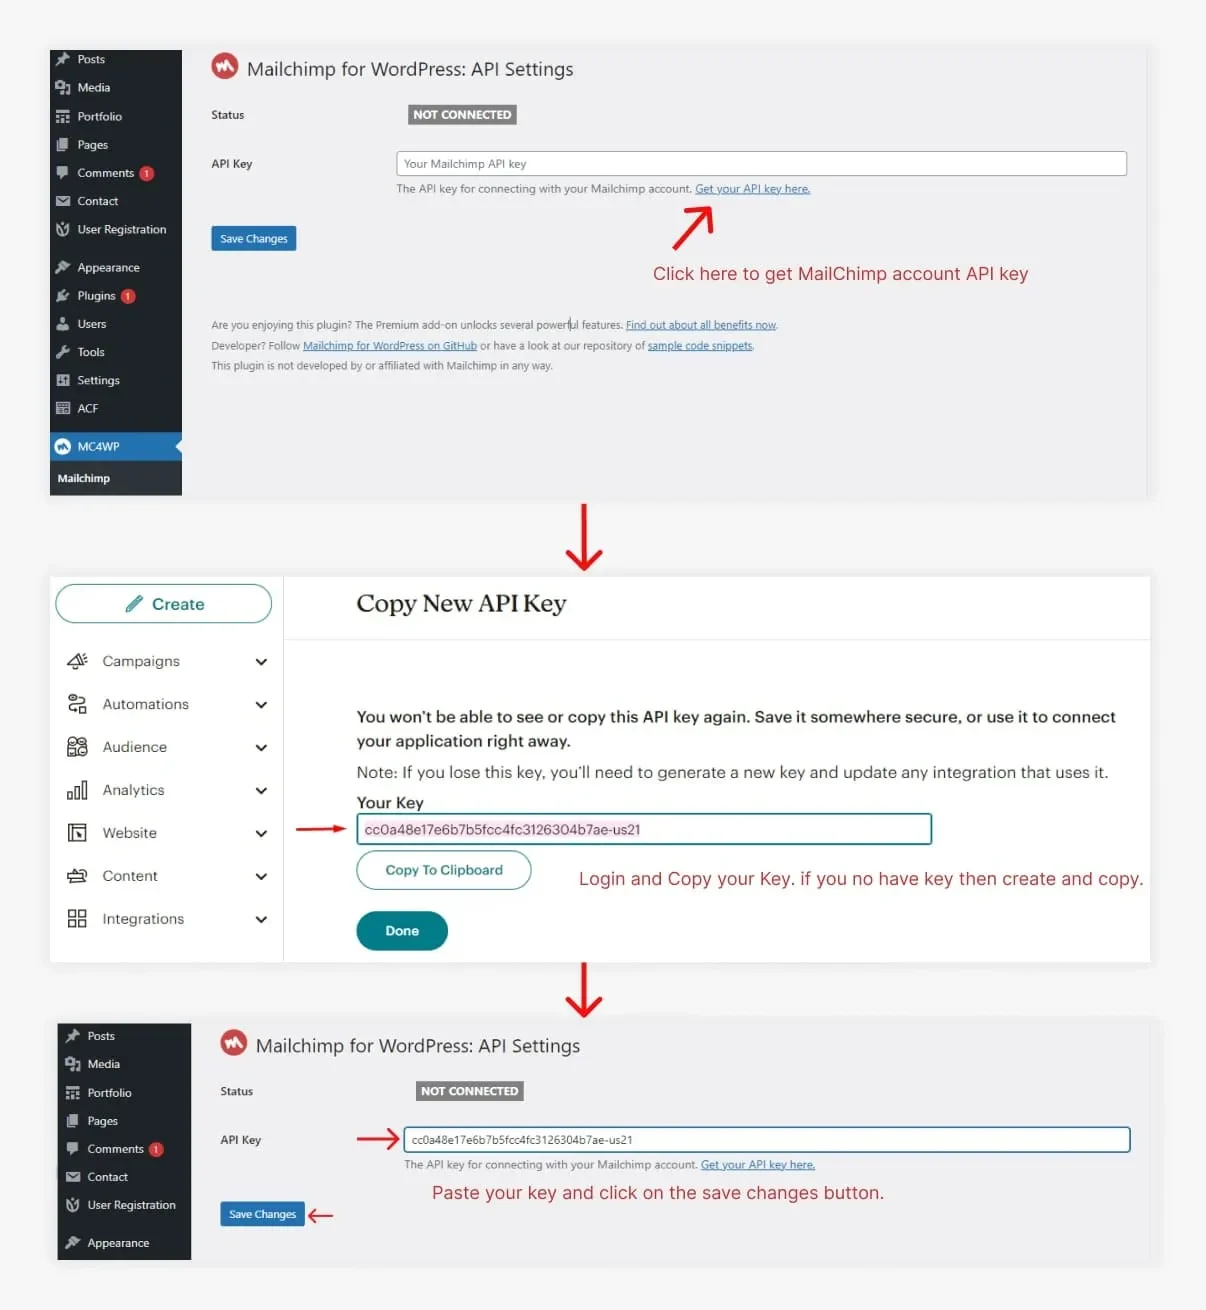
Step-1: Connect your MailChimp account
Firstly you need to connect your MailChimp account with the Furnixar theme.
- Go to
Dashboard > MC4WP > Mailchimpand click on the “Get your API key here” - Login to your MailChimp account. Find and Create an API Key then copy the key.
- Back API setting page in the WP dashboard then Paste your key in the API key field.
- Click on the Save Changes button.
Step 2: Create a newsletter form
To Create a Newsletter :
- Select all and copy the code in the box below.
<div class="fx-footer-newsletter-form">
	<input type="email" name="EMAIL" placeholder="Enter your email address" required />
	<input type="submit" value="Subscribe" />
</div>
- Go to
Dashboard > MC4WP > Form - Enter the Form Title and Paste the Copied Code in the Fields box.
- Click on the Save Changes button.
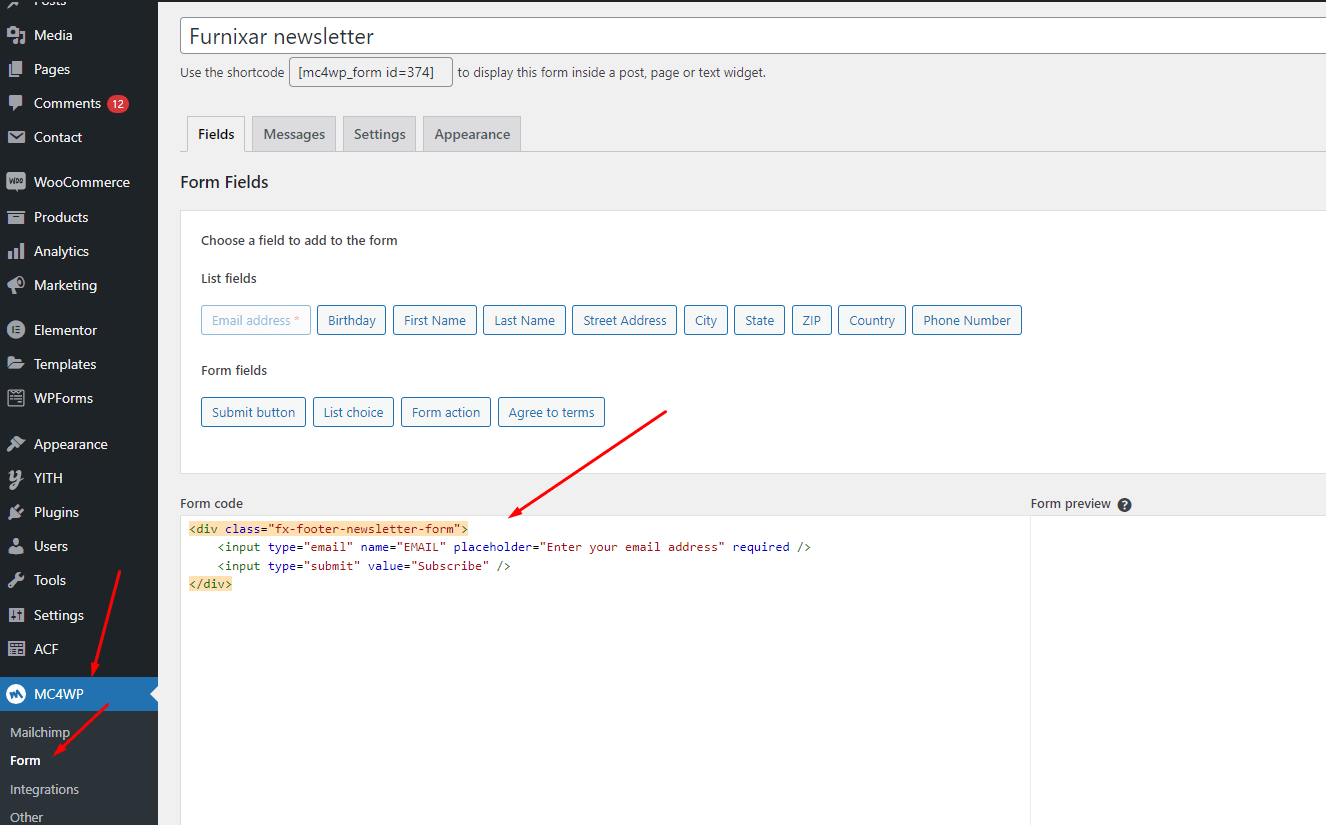
After saving the Newsletter copy the shortcode and paste it on your site which you want to show.
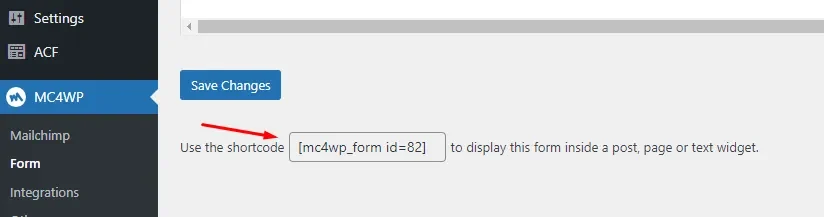
Copy the shortcode
Step 3: Show the Newsletter in the footer section
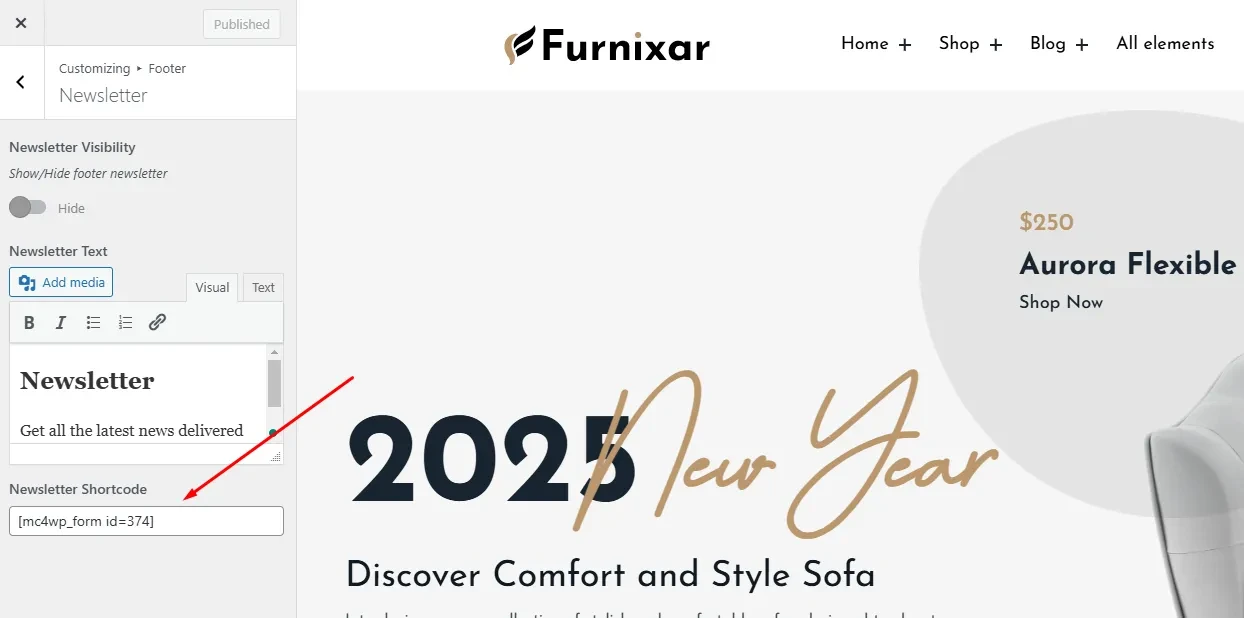
After Copying the MailChimp form Shortcode.
- Go to
Appearance > Customize > Footer > Newsletterthen - Paste Shortcode
Newsletter Fieldthen - Click on the
Publishbutton
WooCommerce Setup
The Furnixar theme is fully integrated with WooCommerce, allowing you to create a powerful online store for your furniture business. After installing and activating the theme, configuring your WooCommerce settings is essential to ensure that your store functions smoothly. Below is a step-by-step guide to set up WooCommerce within the Furnixar theme.
Step 1: Install WooCommerce
- From your WordPress dashboard, go to Plugins > Add New.
- Search for WooCommerce.
- Click Install Now and then Activate once the installation is complete.
- WooCommerce will prompt you with a setup wizard. You can follow the wizard to configure the basic settings of your store, such as location, currency, and product types.
Step 2: Configure WooCommerce Settings
Once WooCommerce is installed, you’ll need to configure the store settings according to your business needs.
General Settings:
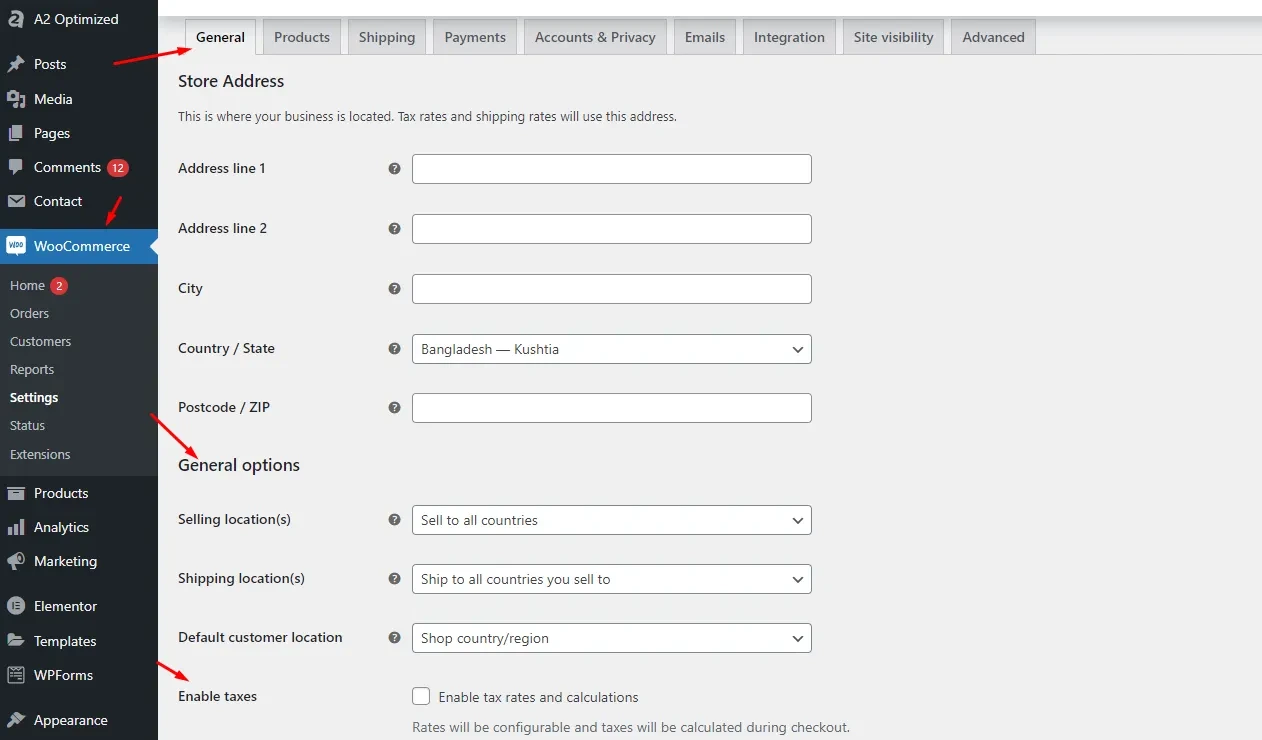
- Navigate to WooCommerce > Settings > General.
- Set your store location, currency, and selling locations.
- Configure tax options if applicable.
Product Settings:
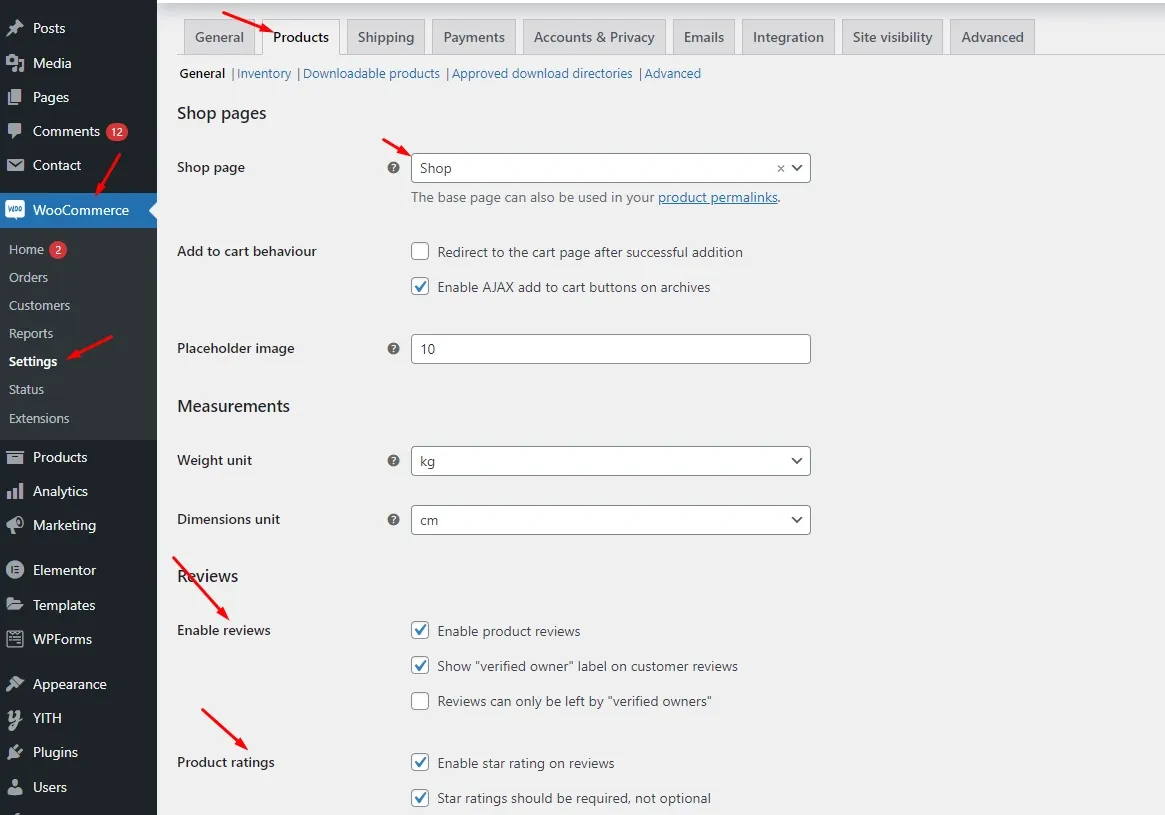
- Go to WooCommerce > Settings > Products.
- Enable product reviews, and ratings, and set the default product category and page display options.
- Configure inventory management to handle stock levels, notifications, and product out-of-stock settings.
Shipping Settings
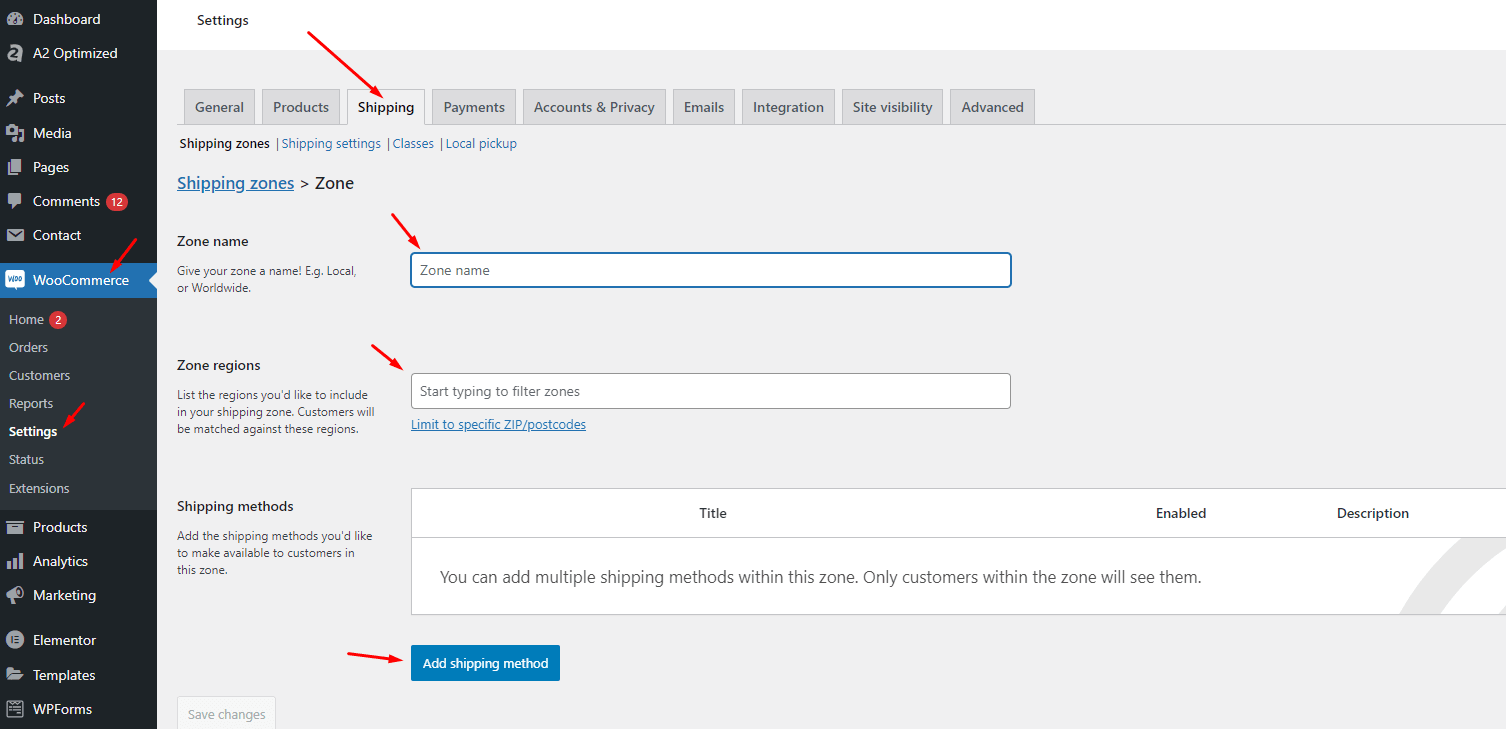
- Under WooCommerce > Settings > Shipping, configure shipping zones, methods, and rates.
- Add a flat rate or free shipping based on your business model.
- Configure shipping classes for different products.
Payment Methods:
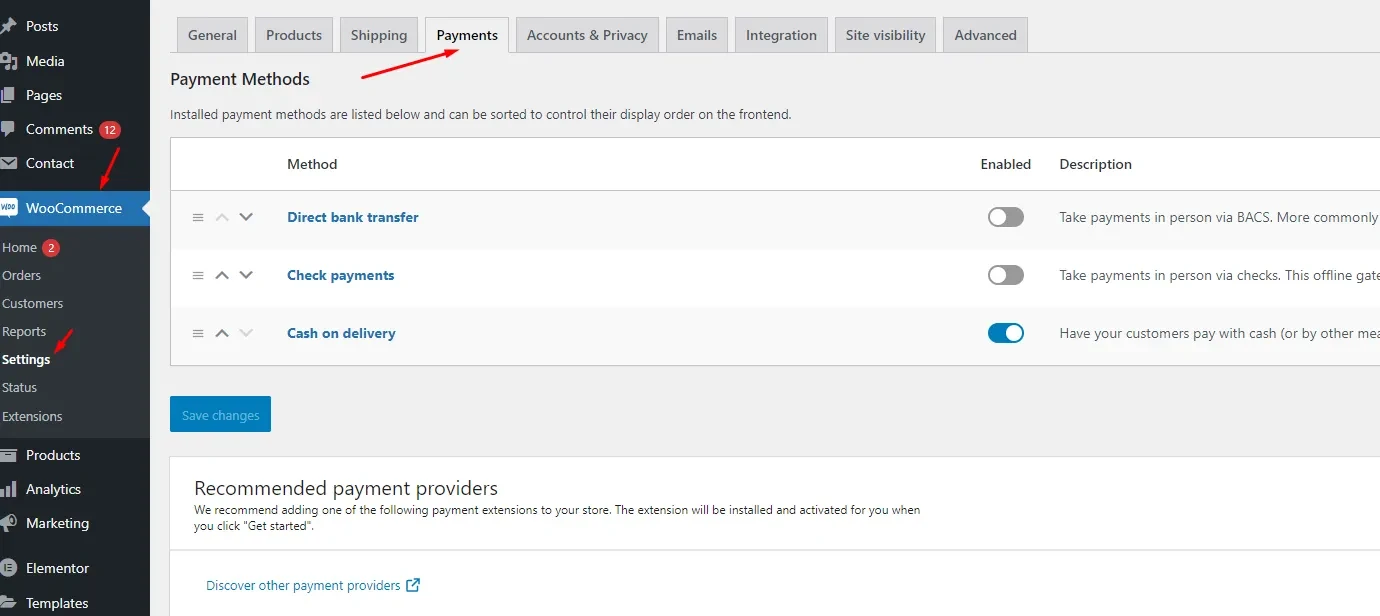
- Go to WooCommerce > Settings > Payments to set up payment gateways.
- Enable popular payment gateways such as PayPal, Stripe, or Bank Transfer.
- For each method, click Set up to configure the necessary details.
Checkout Settings:
Email Notifications:
- Go to WooCommerce > Settings > Emails to configure notification emails for customers and administrators.
- Set up emails for new orders, order cancellations, completed orders, and more.
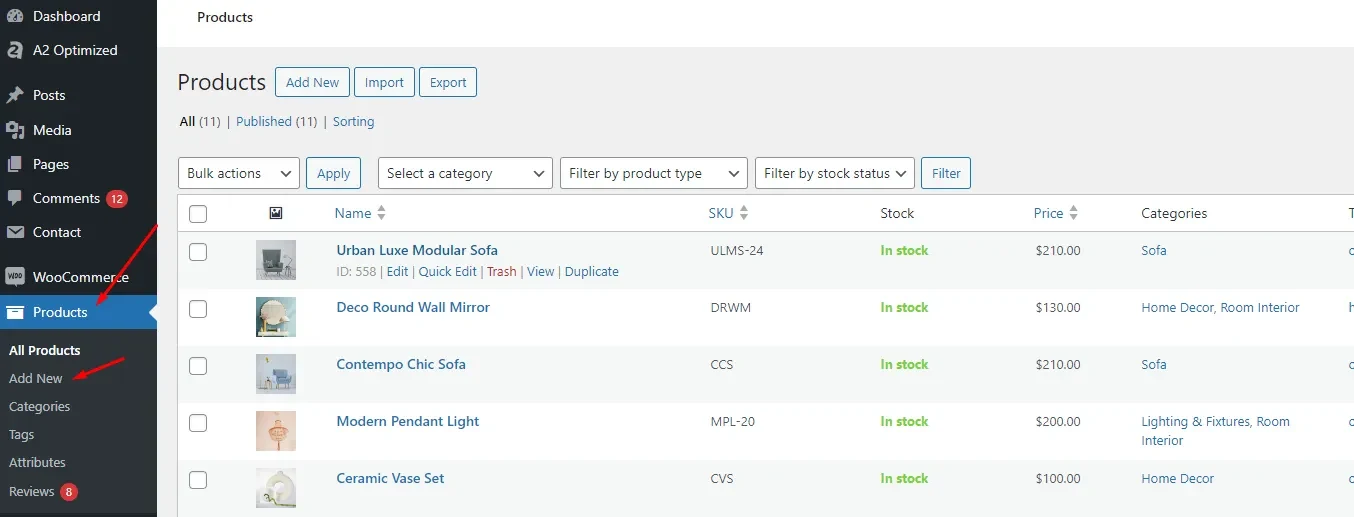
Step 3: Add Products
To add products, go to Products > Add New. Furnixar's custom widgets FX Products help display your products dynamically.
Elementor Setup
The Furnixar WordPress theme is built with the powerful Elementor Page Builder, allowing you to customize your furniture store's website with ease.
Before getting started with the Elementor, read the documentation if you need it.
Customizing with Elementor
Once Elementor is installed and the demo content is imported (if needed), you're ready to start customizing the theme.
- Go to Pages: Navigate to "Pages" in your WordPress dashboard.
- Edit with Elementor: Find the page you want to customize and click "Edit with Elementor".
- Use Drag-and-Drop Editor: Elementor’s drag-and-drop interface allows you to modify sections, columns, and widgets easily. You can add, edit, or remove elements on your pages.
- Save Changes: Once you're happy with the design, click "Update" to save your changes.
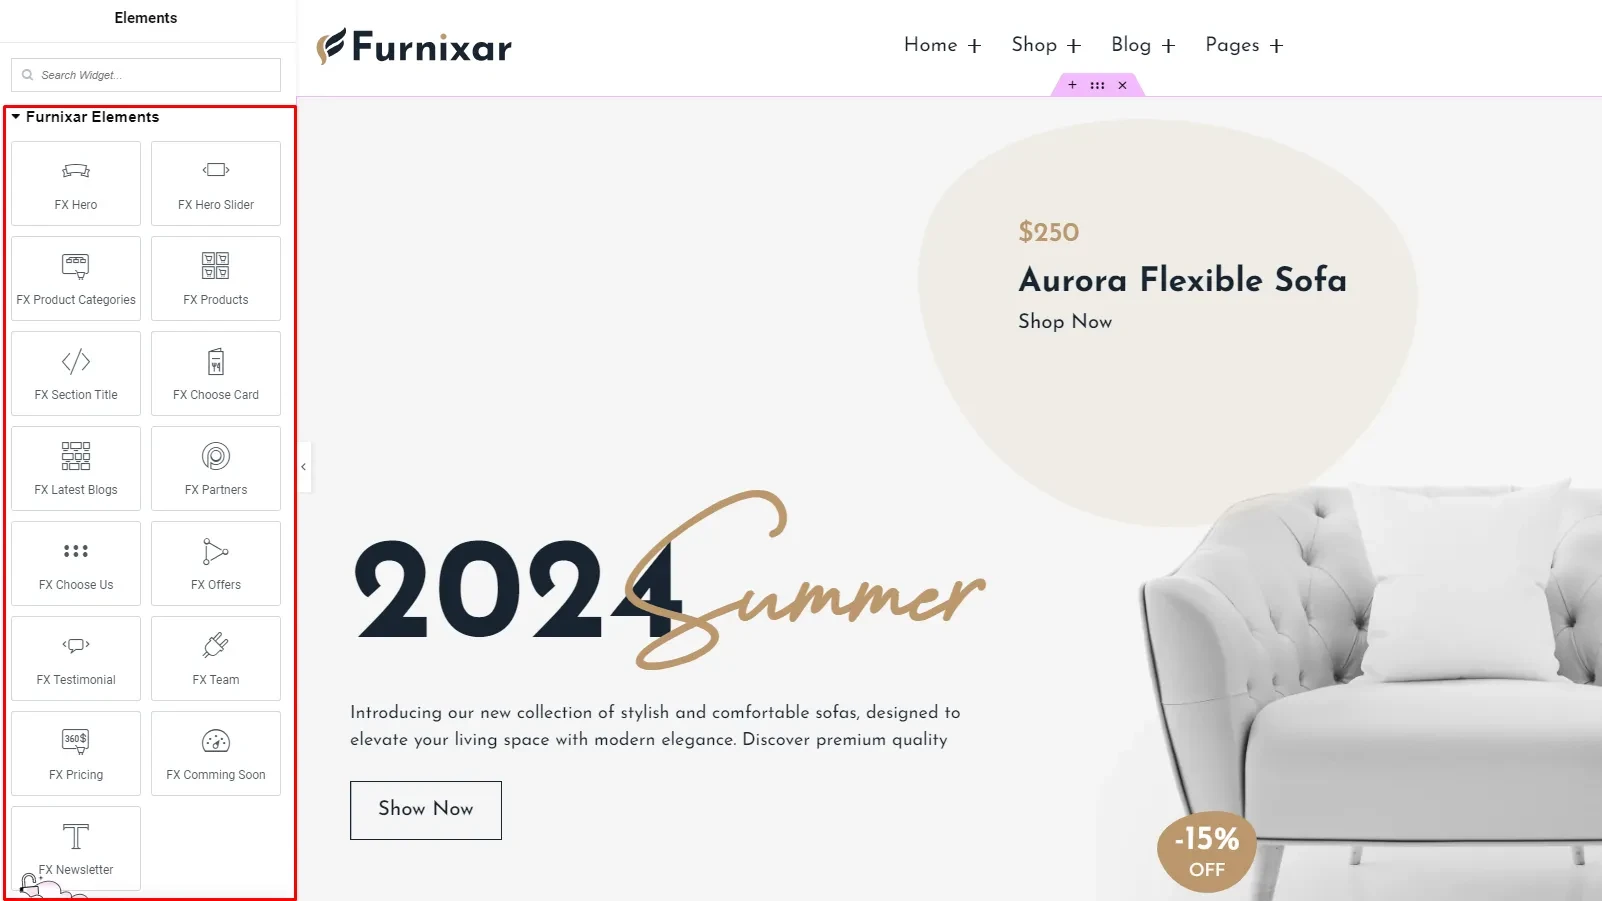
Custom Elementor Widgets
Furnixar has exclusive custom FX Elementor widgets designed to create stunning pages for your furniture store. Here's a brief overview of each custom widget:
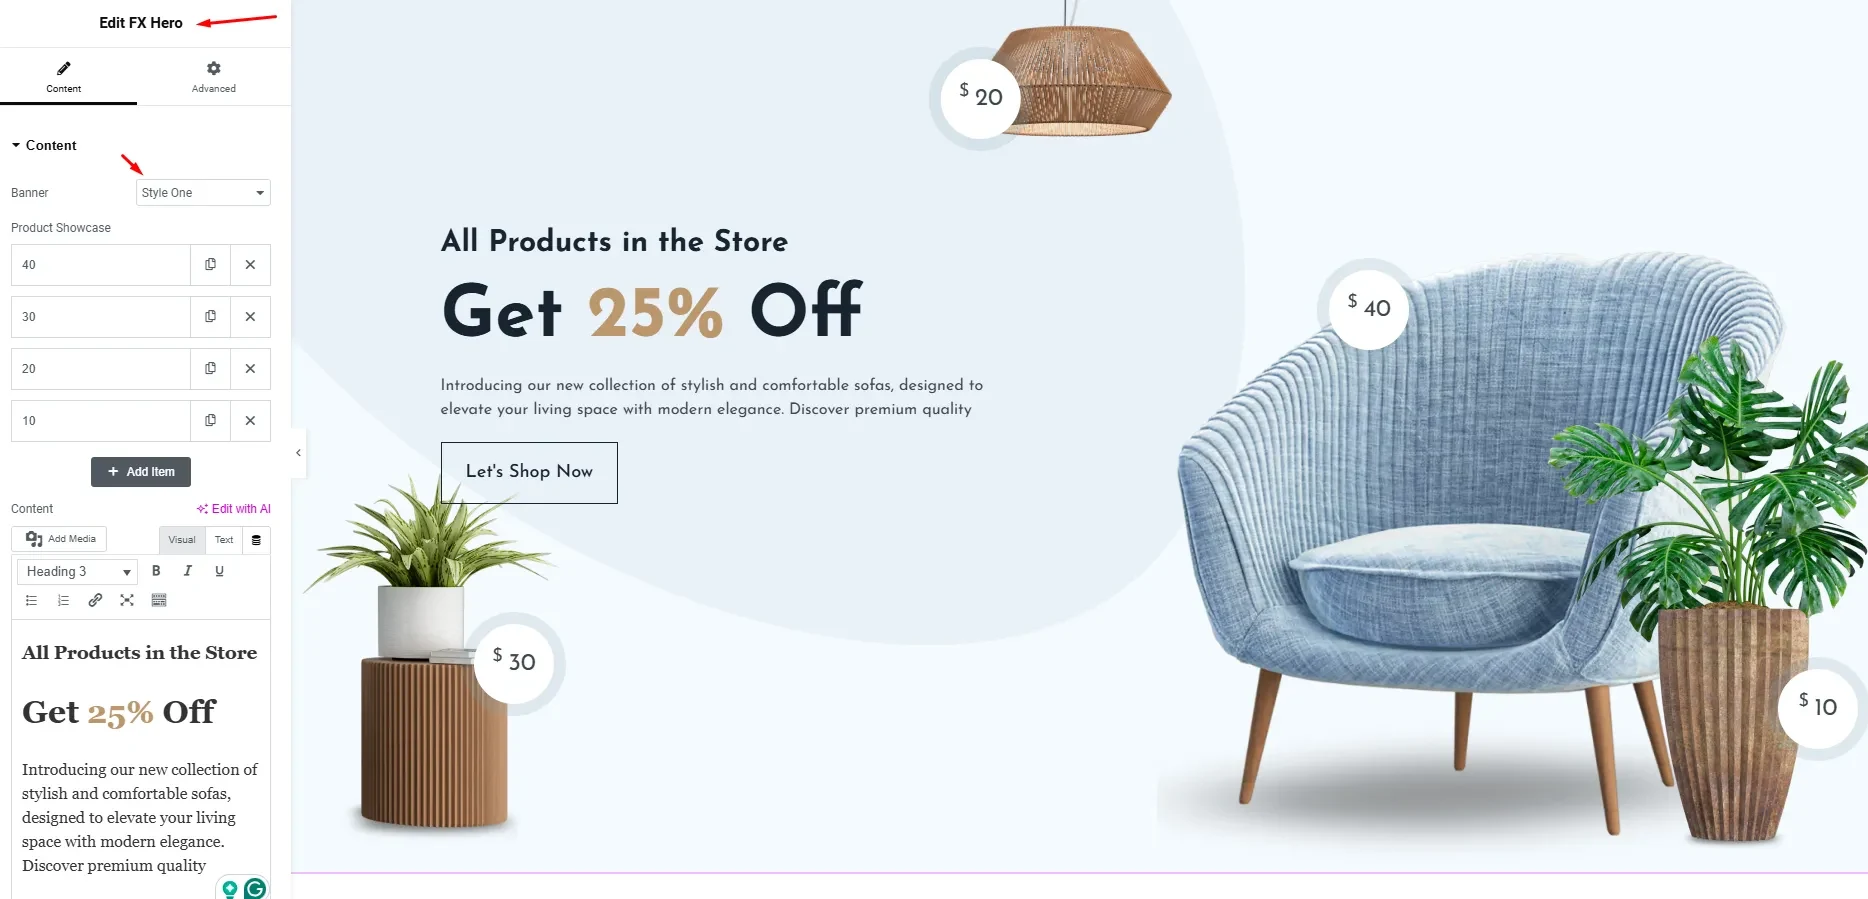
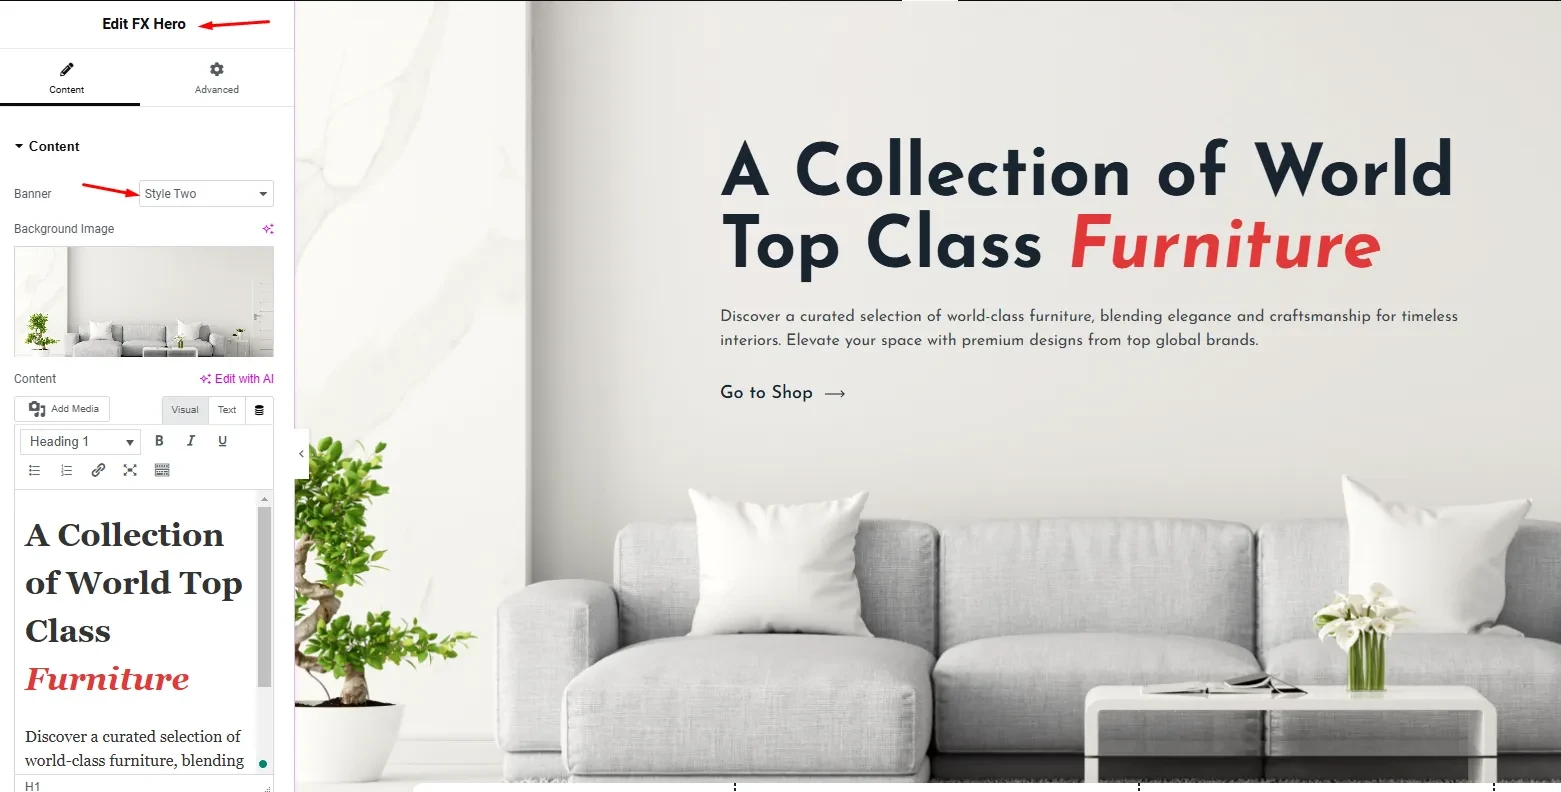
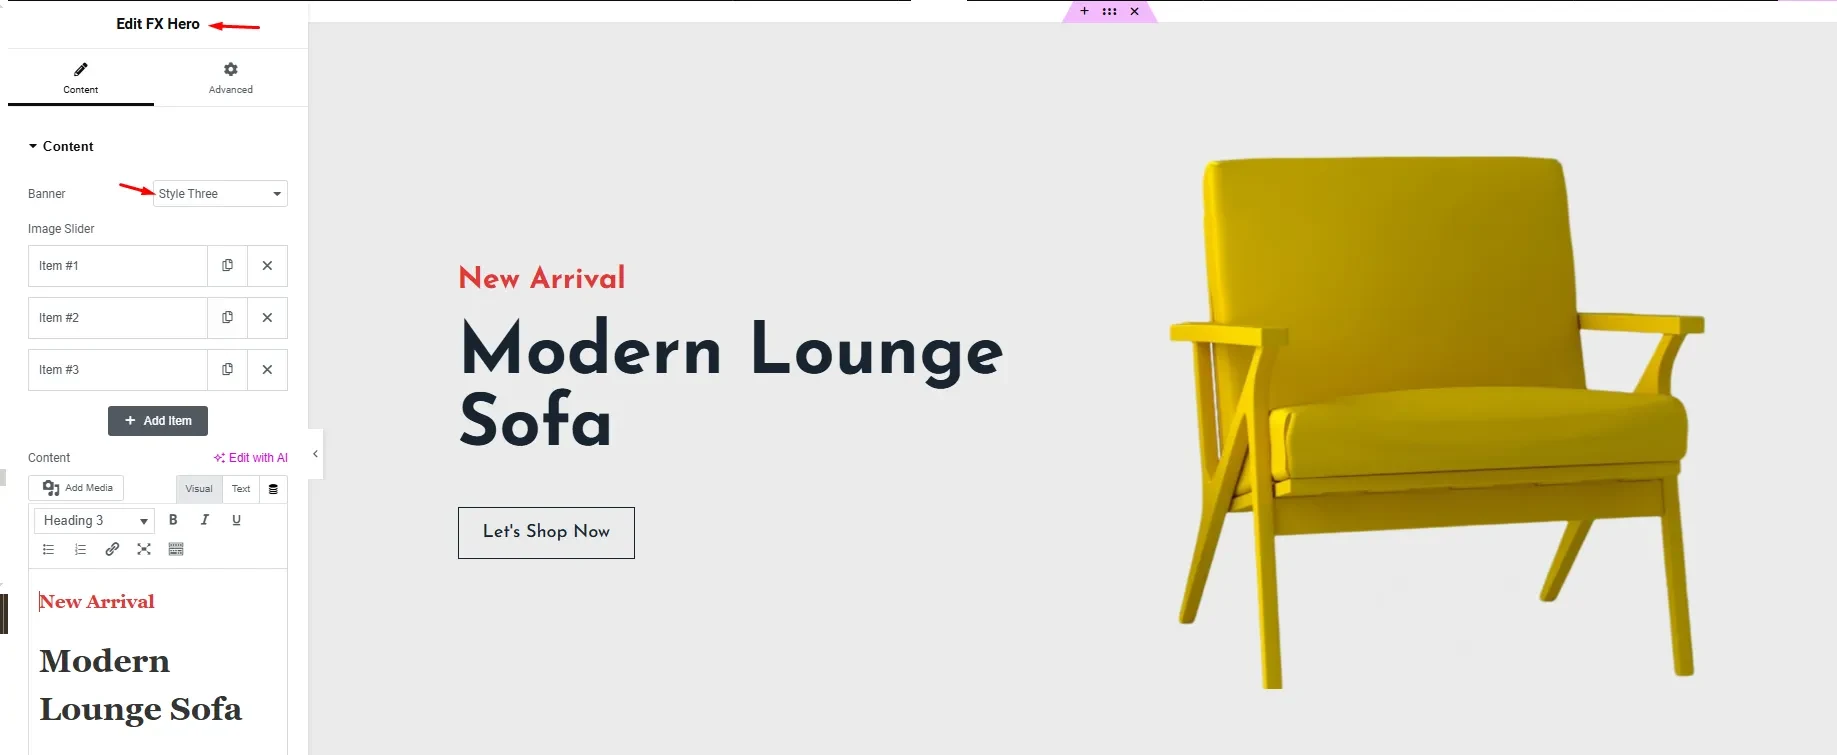
1. FX Hero
Display a bold hero section with custom text and images to grab attention. Perfect for landing pages or home pages. It has 3 unique banner styles to make your design truly stand out.
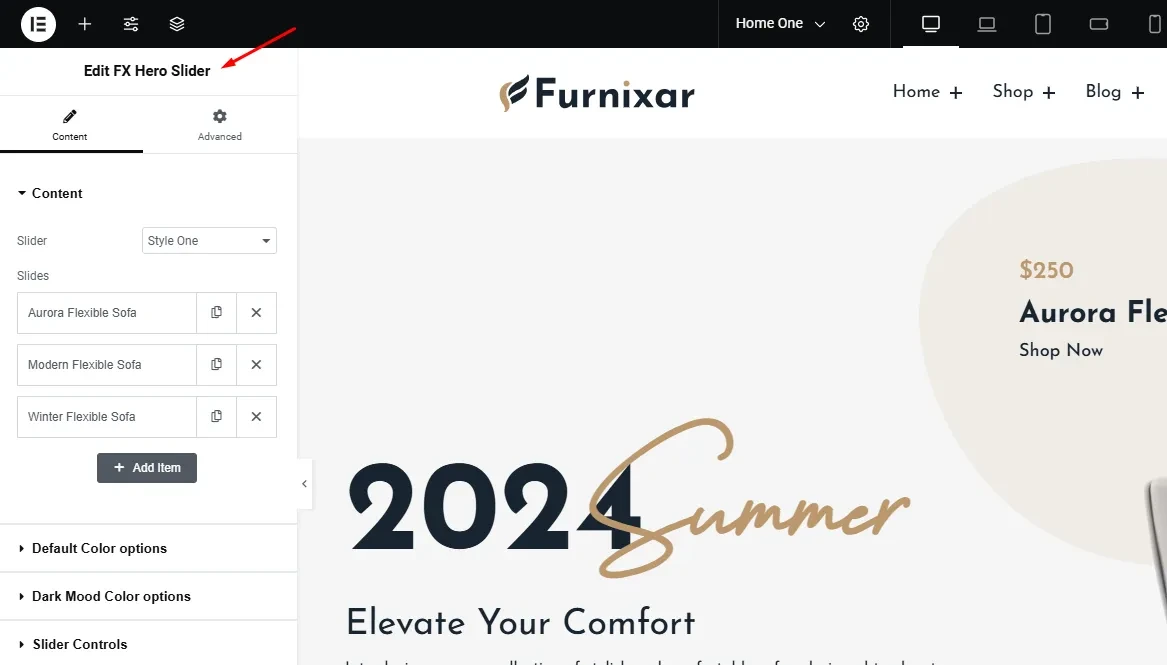
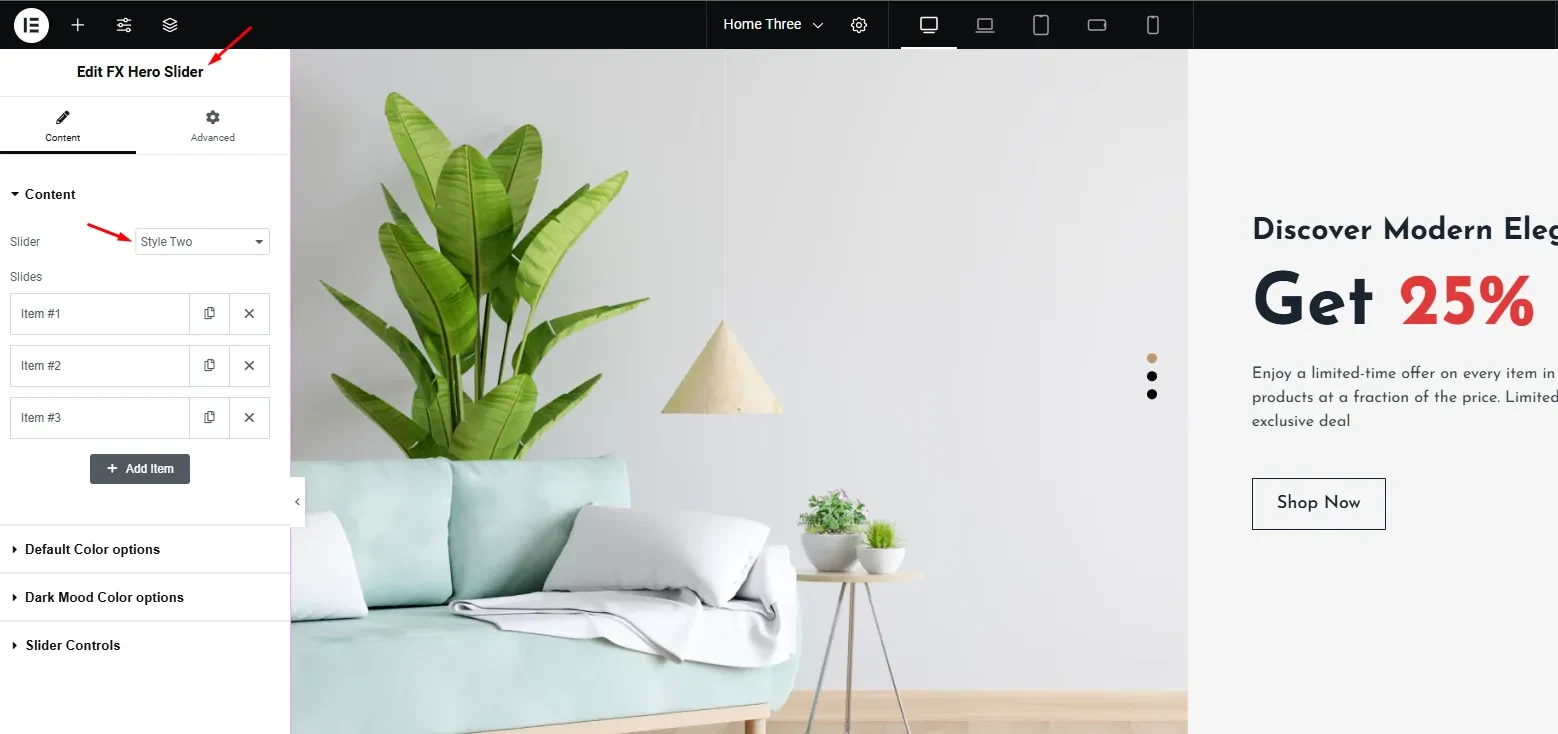
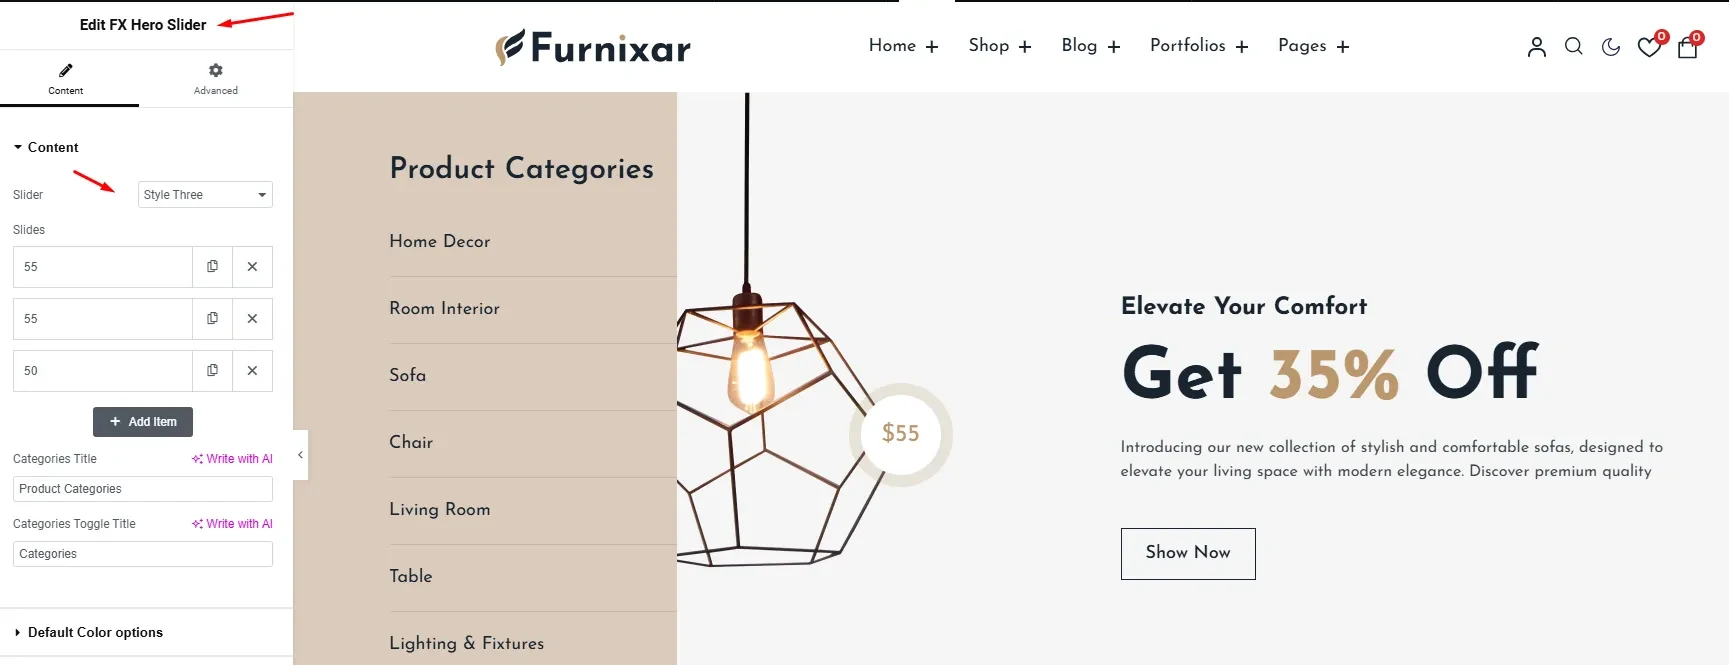
2. FX Hero Slider
Create an eye-catching slider with multiple hero images. Add transitions, captions, and call-to-action buttons. It has 3 hero slider styles to make your design truly stand out.
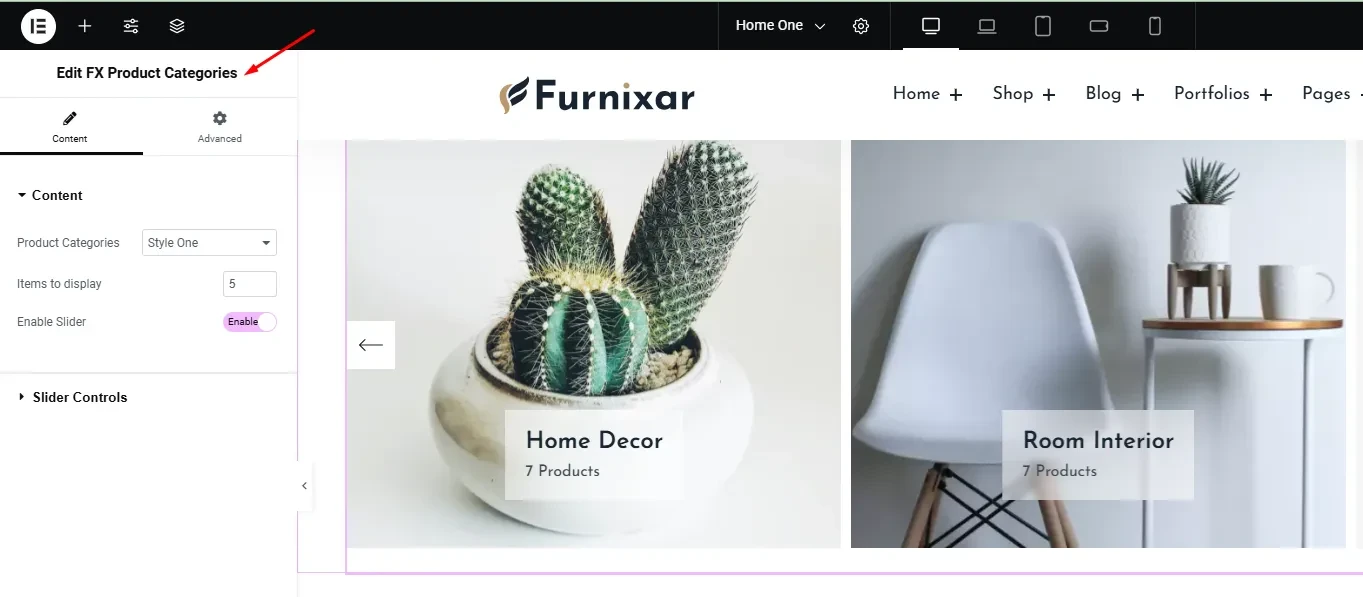
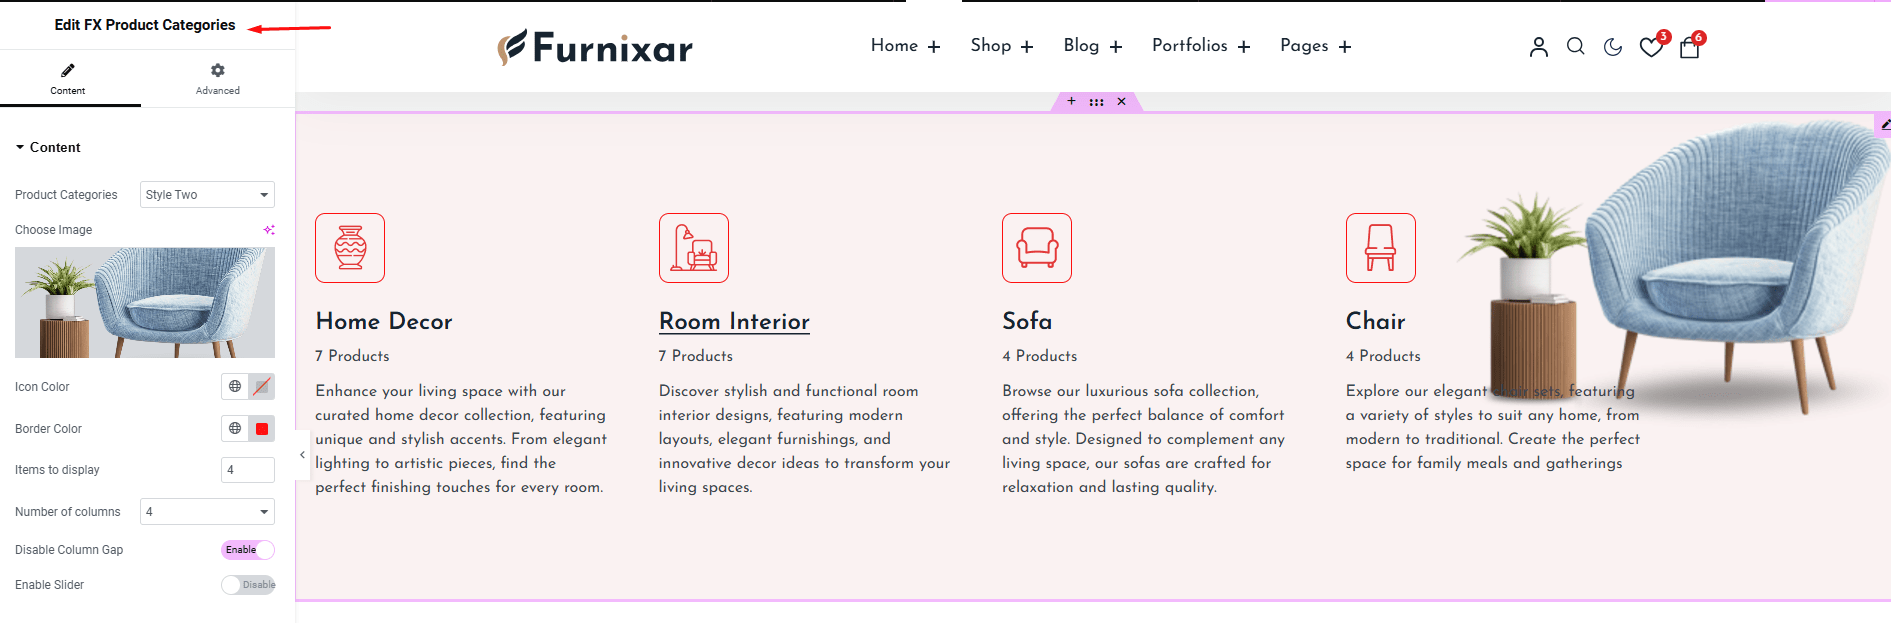
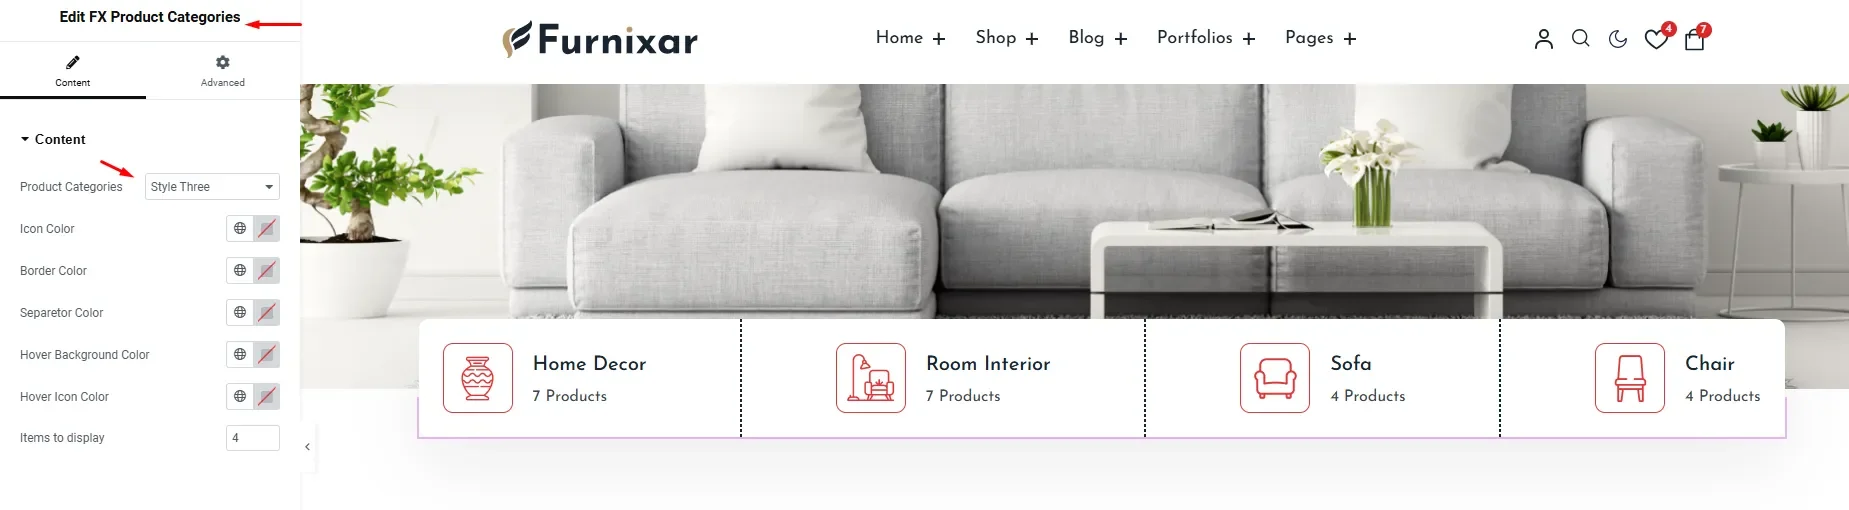
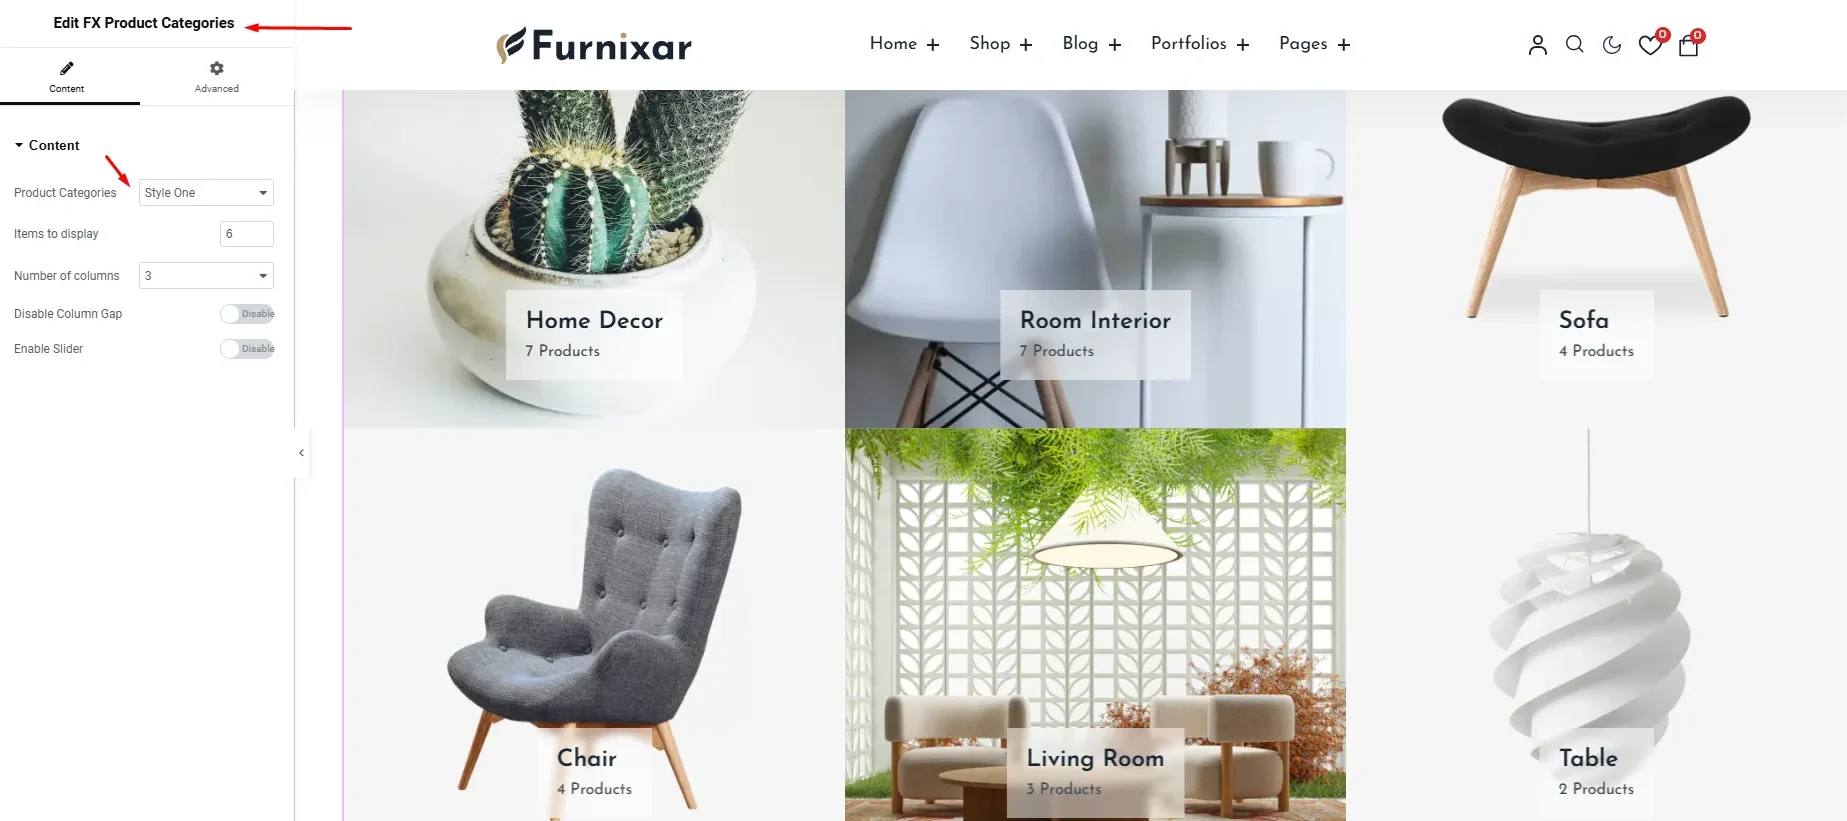
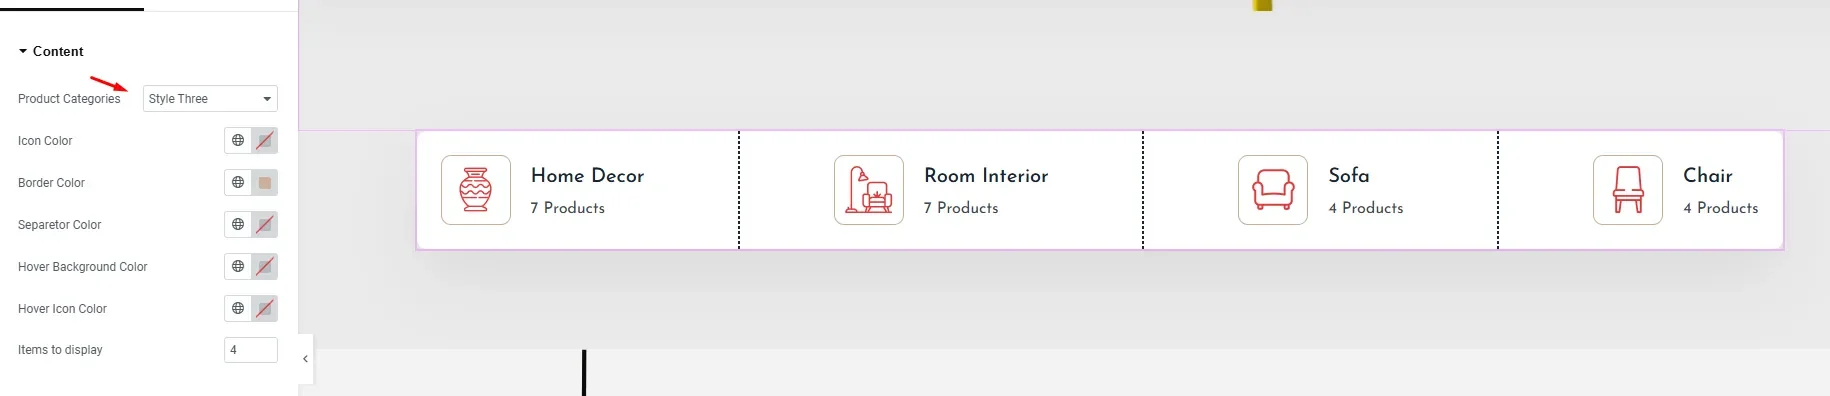
3. FX Product Categories
Showcase your product categories with attractive layouts and easy-to-navigate links to specific collections. The product category has 3 unique banner styles to make your design truly stand out.
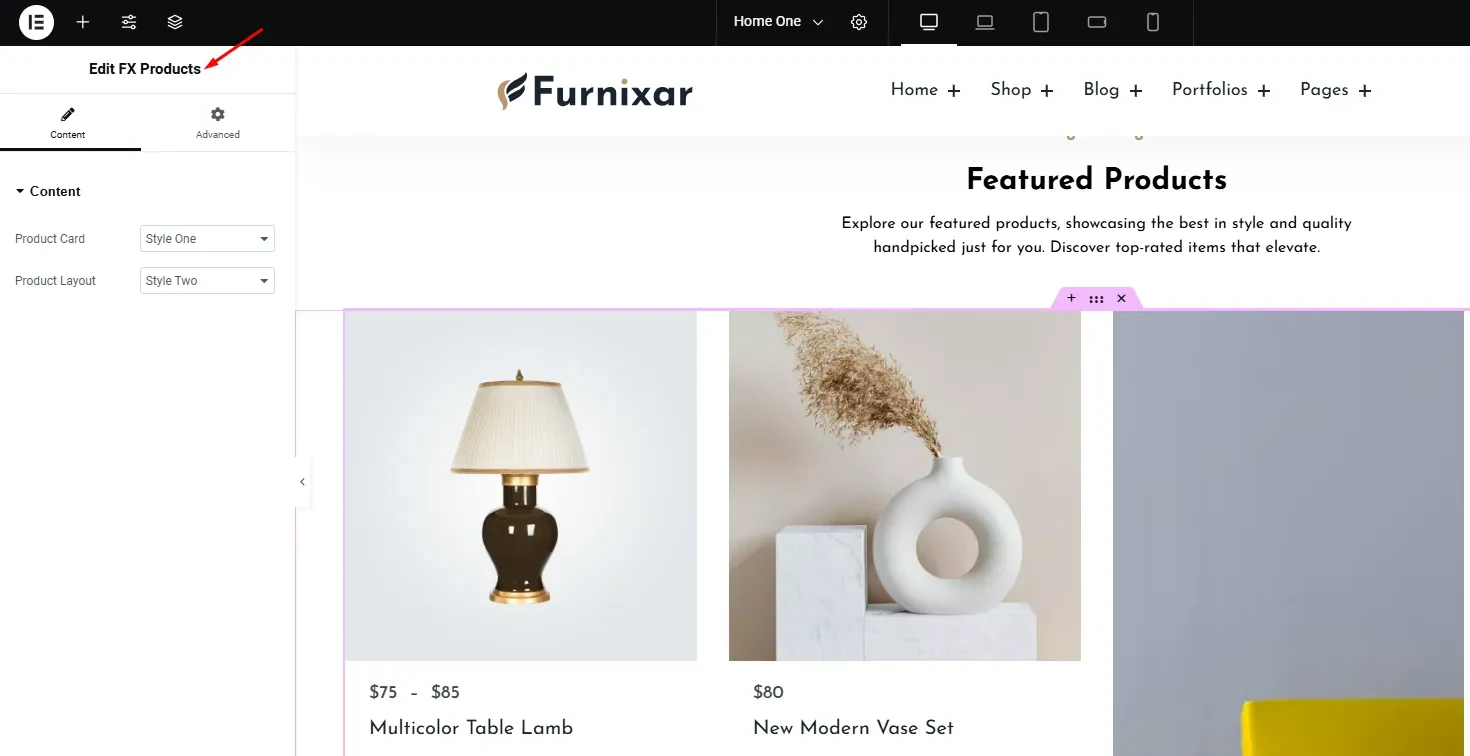
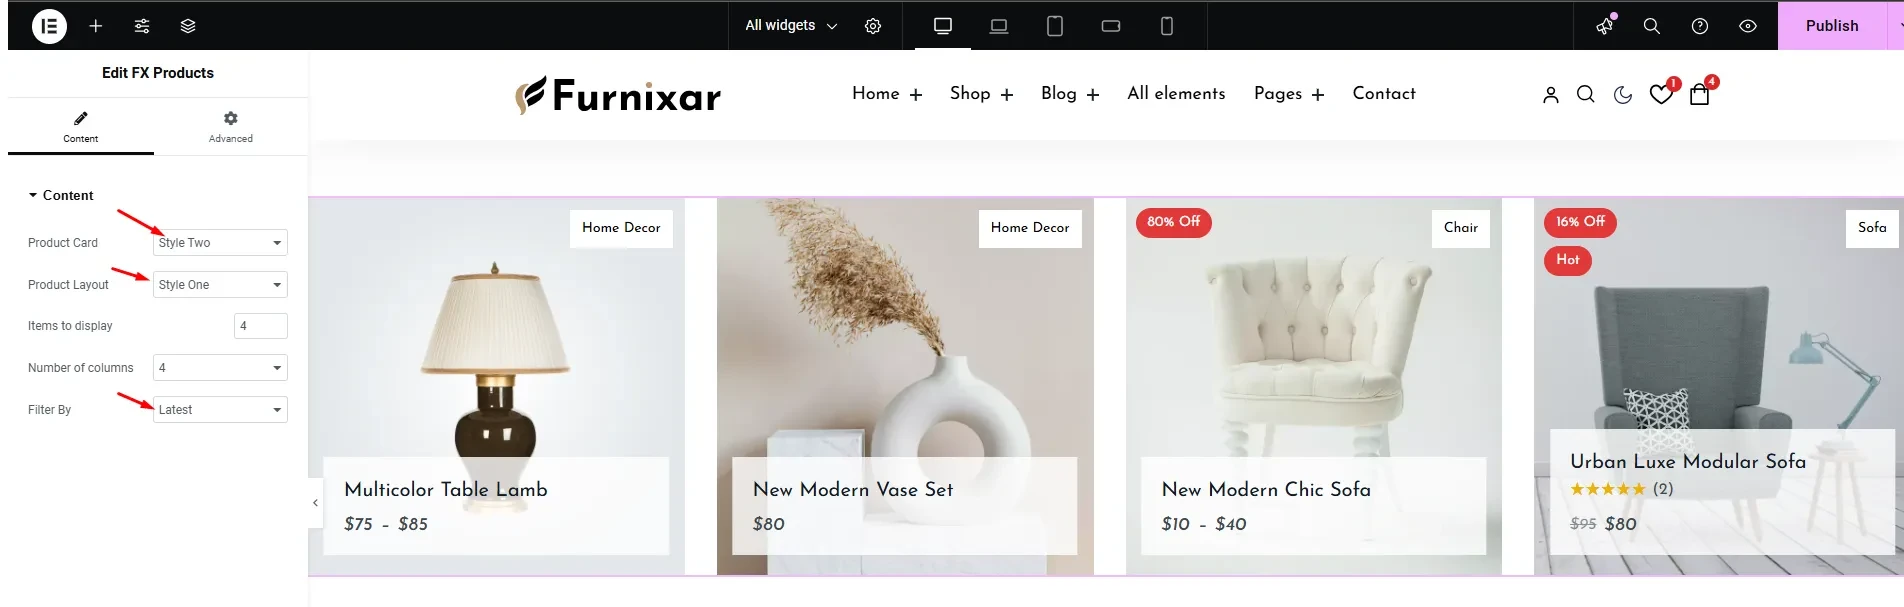
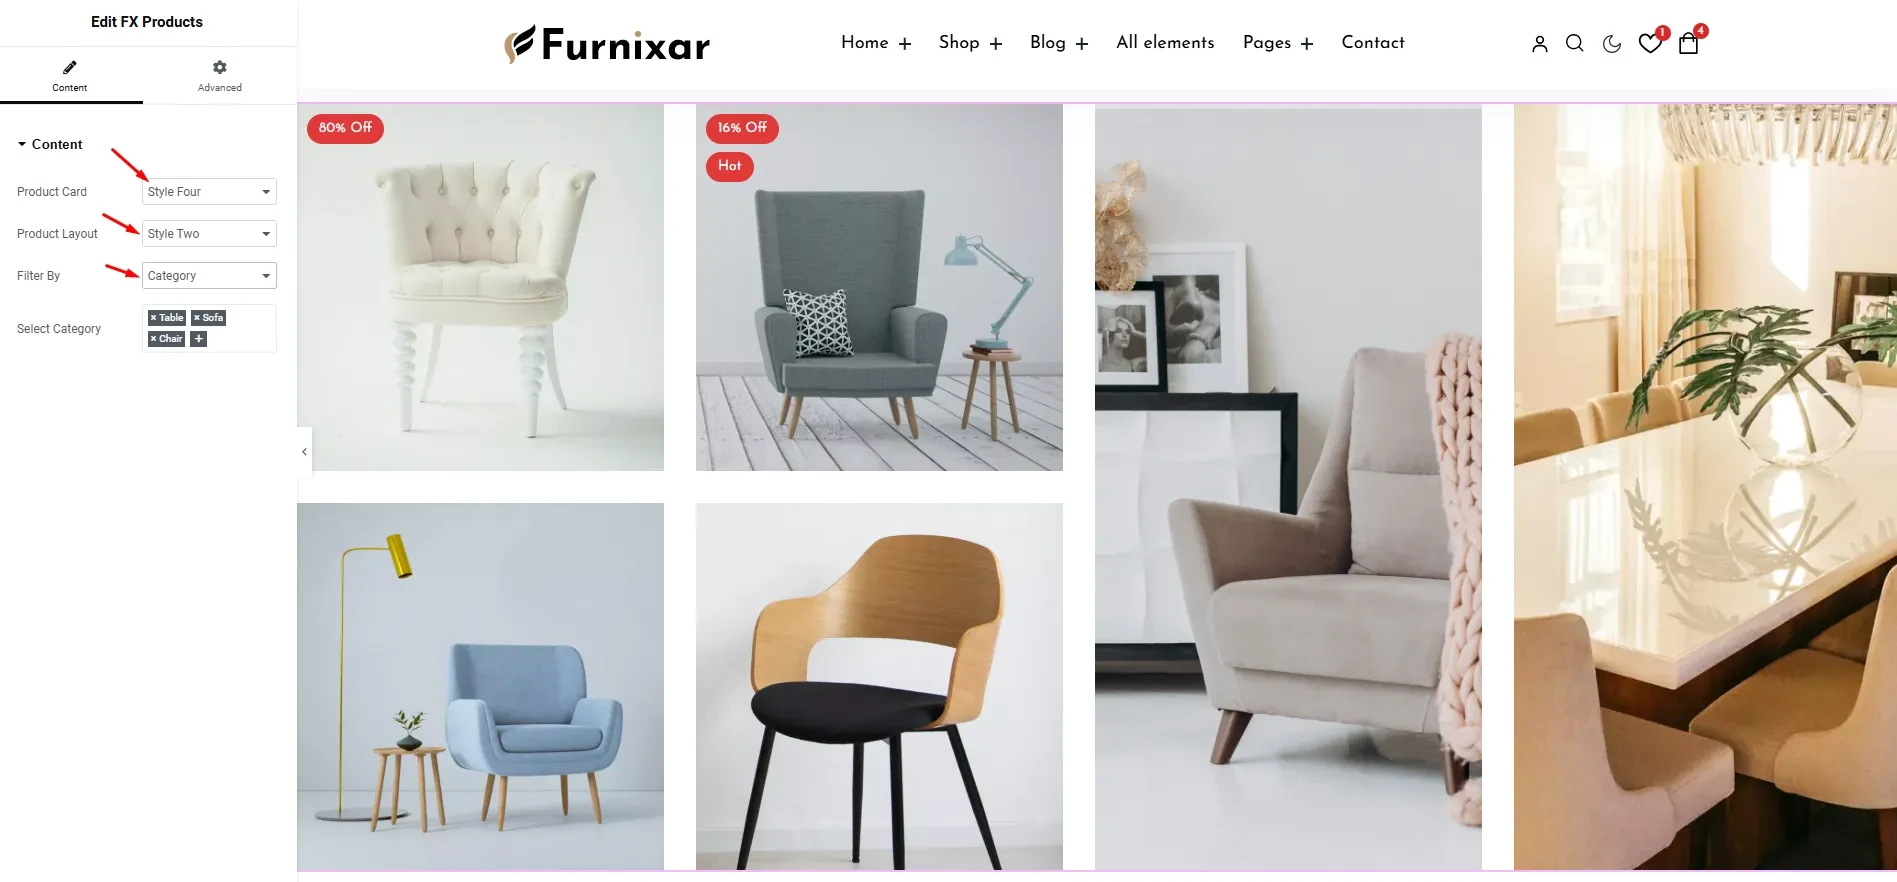
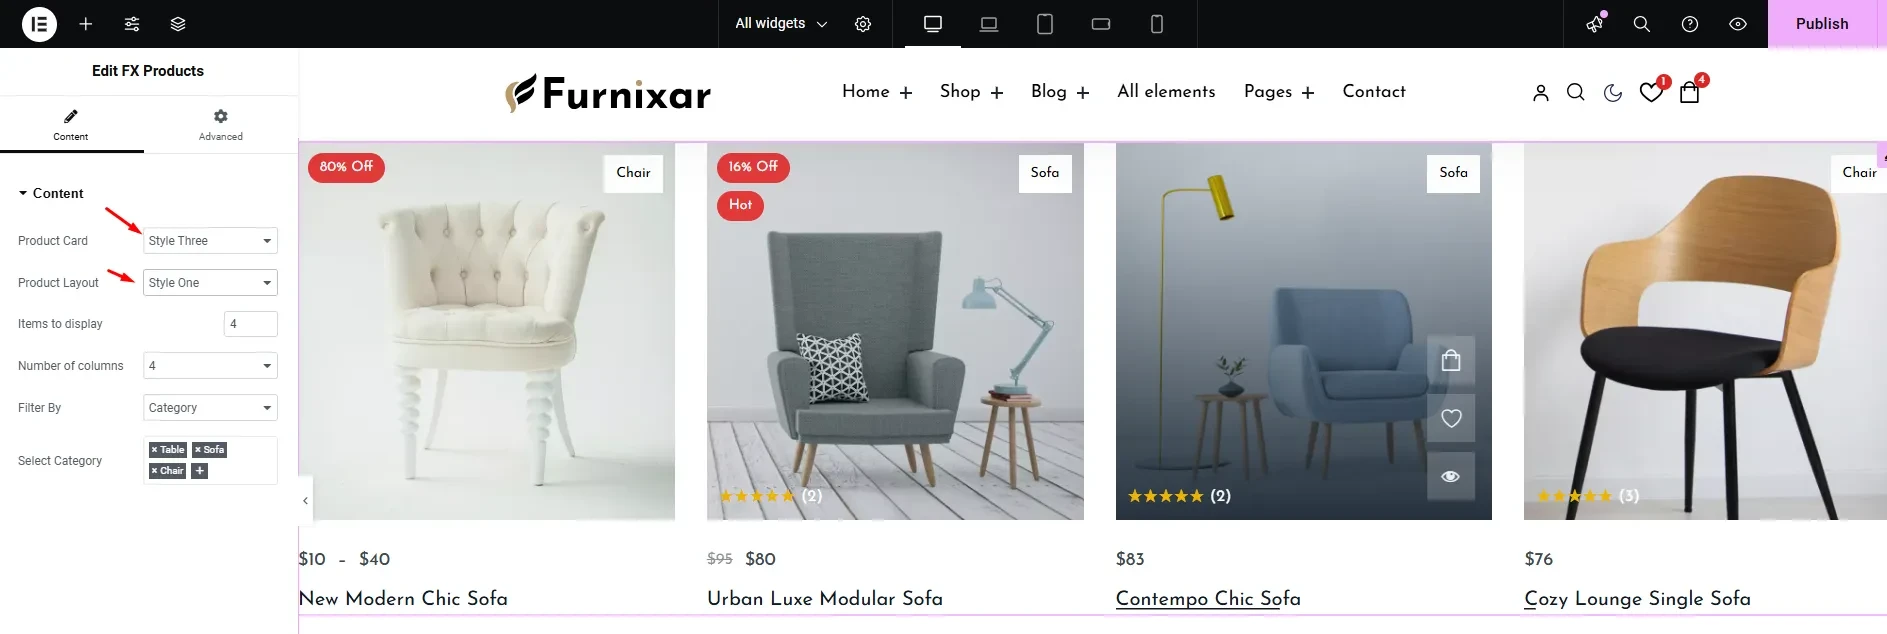
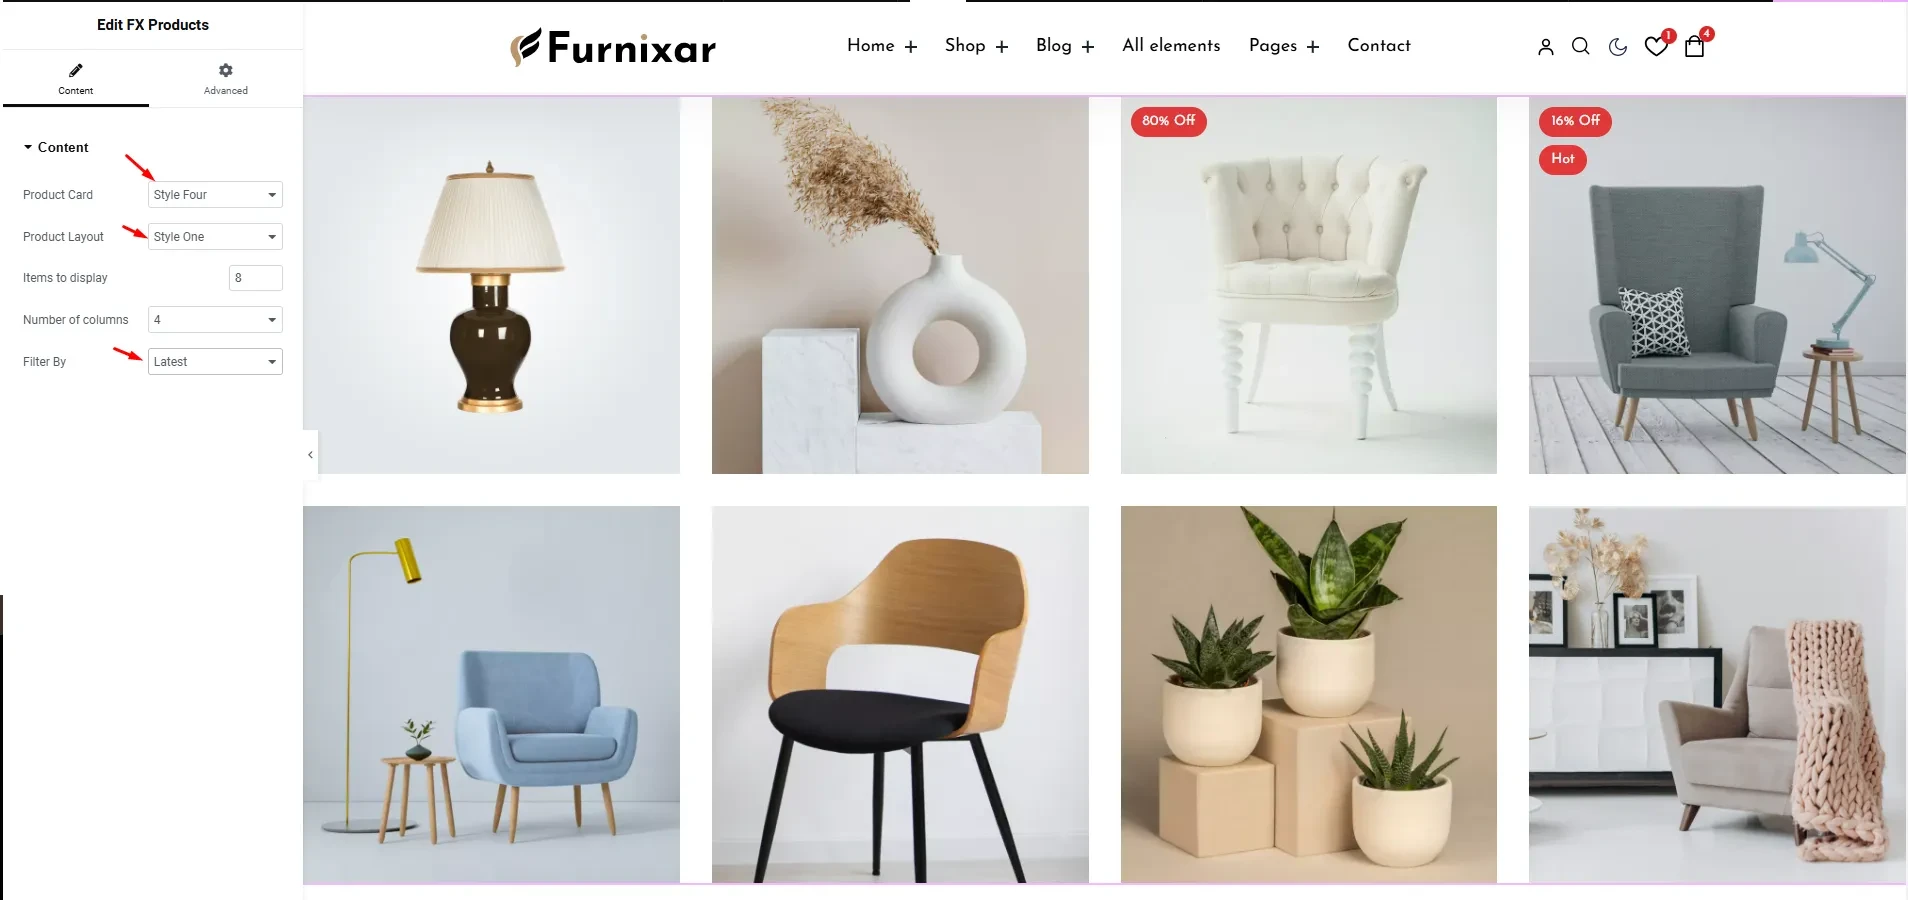
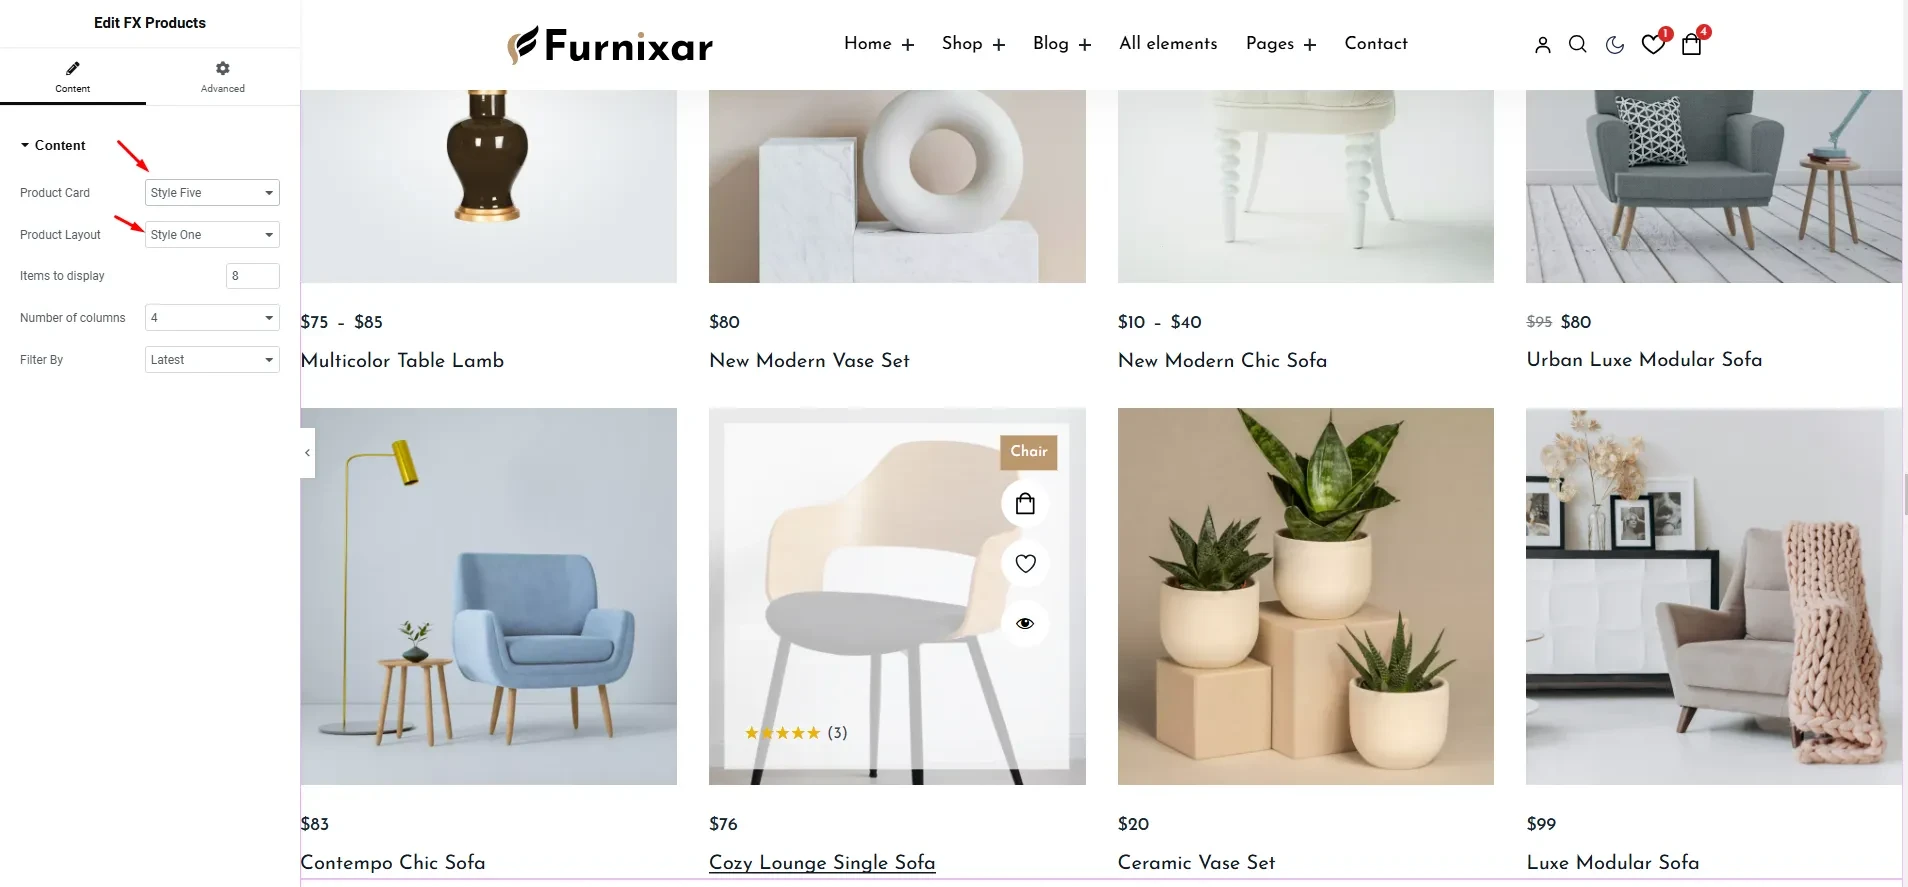
4. FX Products
Highlight selected products or recent arrivals in a grid or carousel format. Fully customizable to fit your store's needs. The FX products widget includes 3 product layout styles and 6 product card styles to make your design truly stand out.
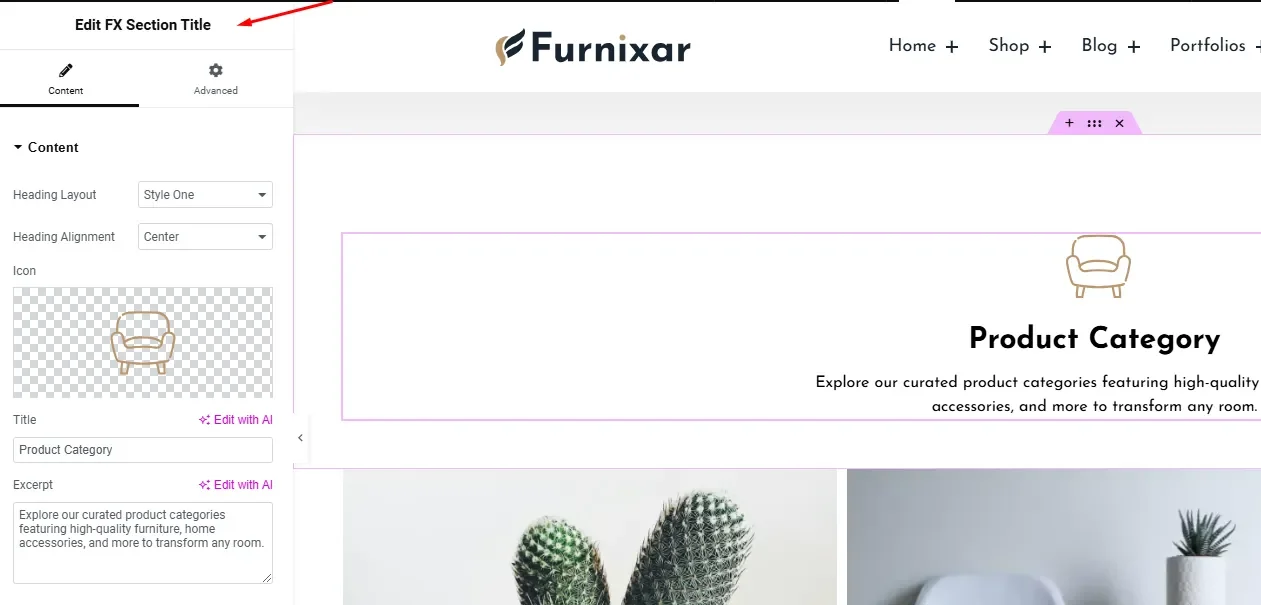
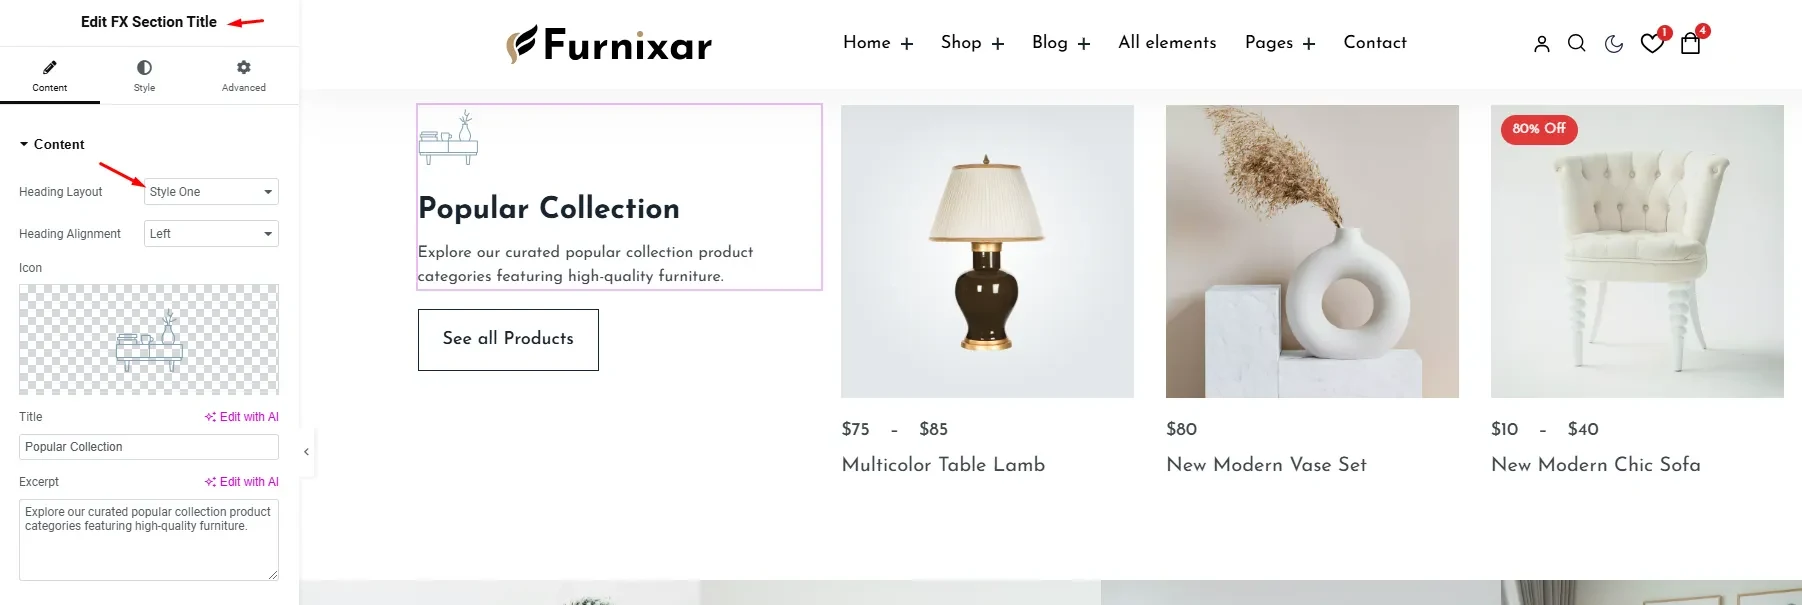
5. FX Section Title
Add stylish section titles to different parts of your page with customizable fonts, colors, and alignments. It has 2 heading layout styles.
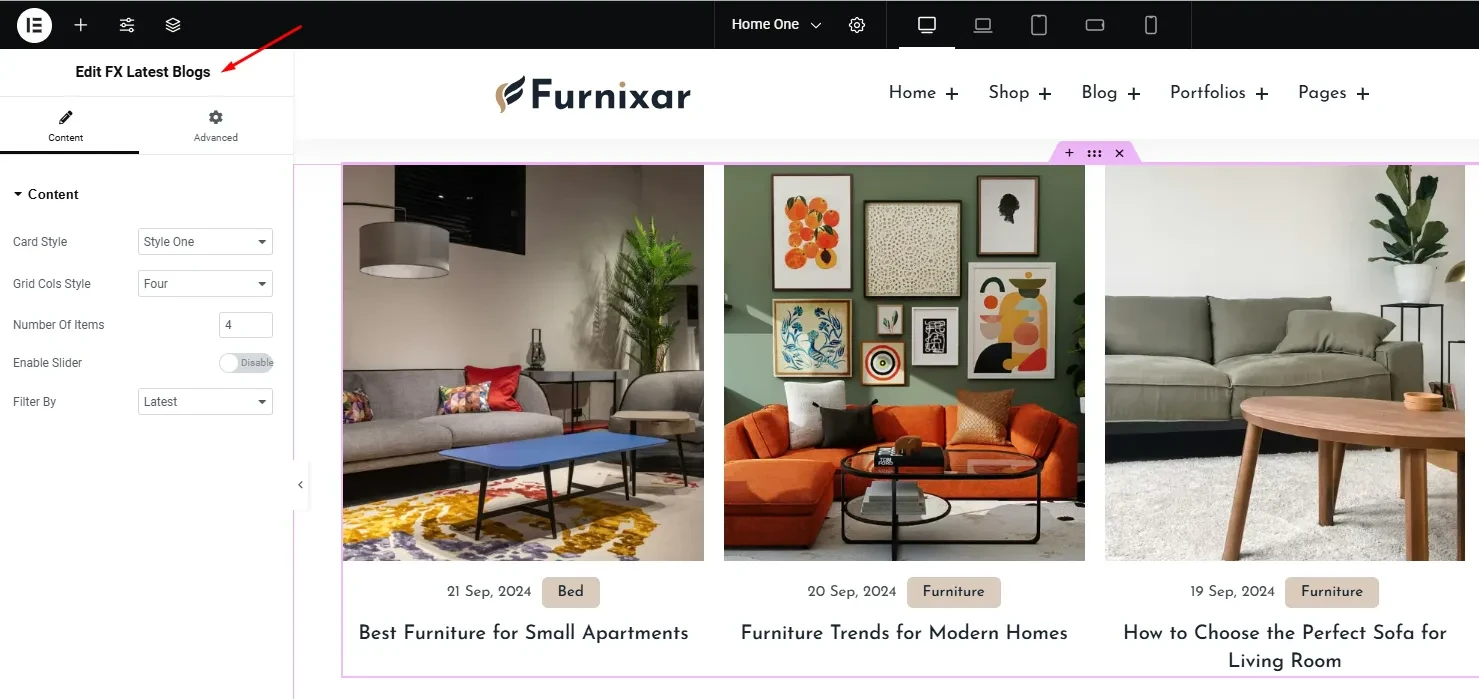
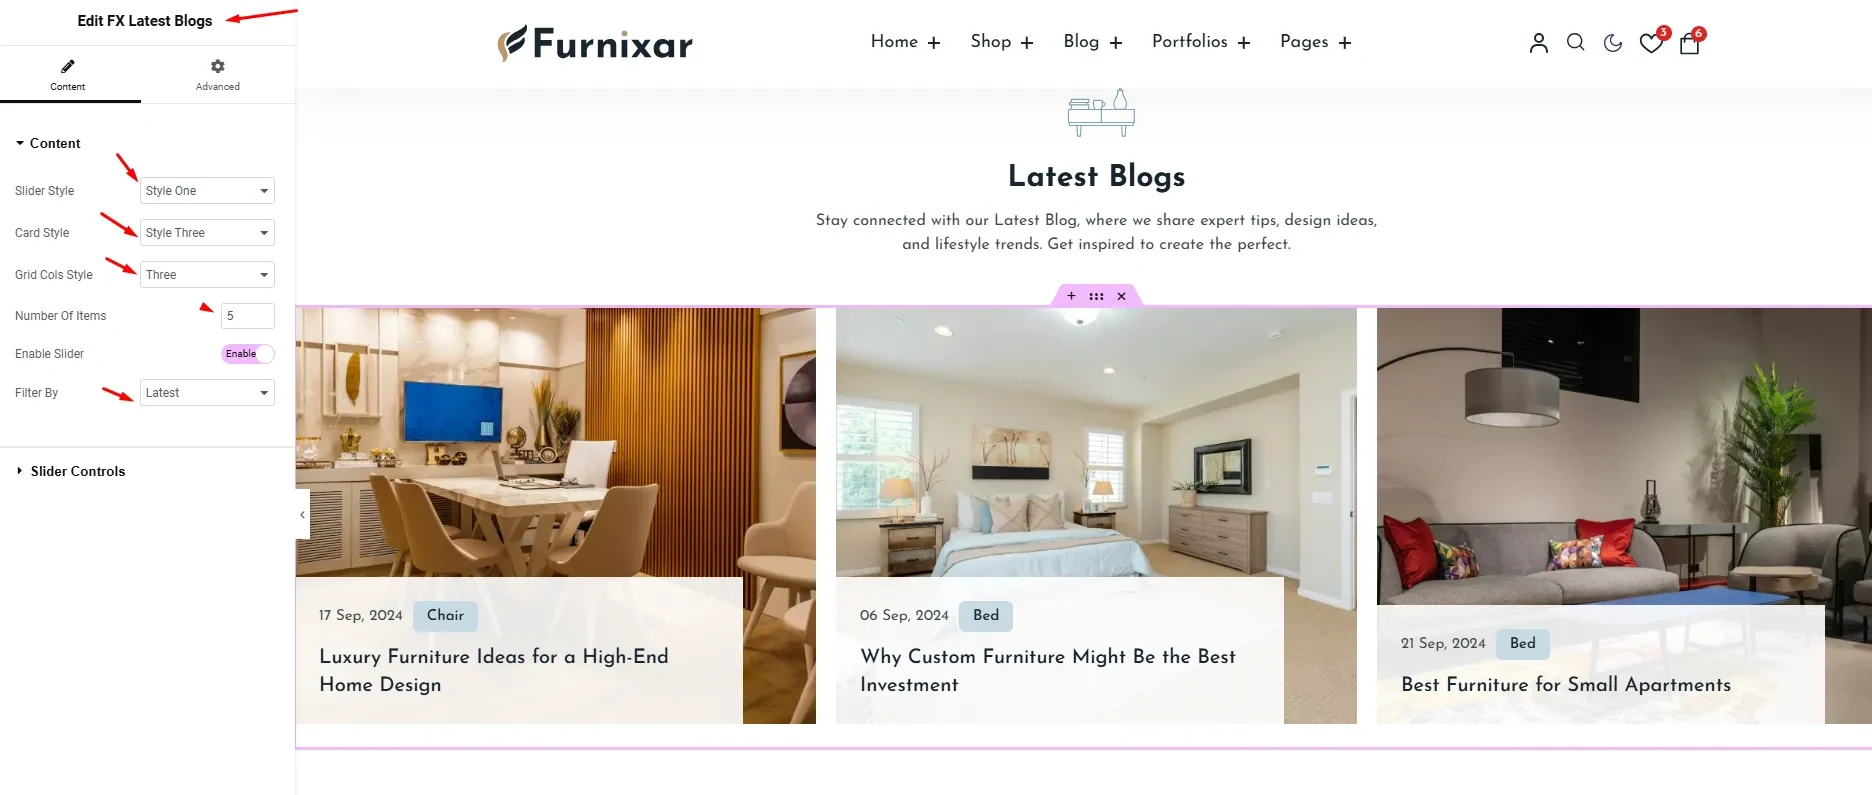
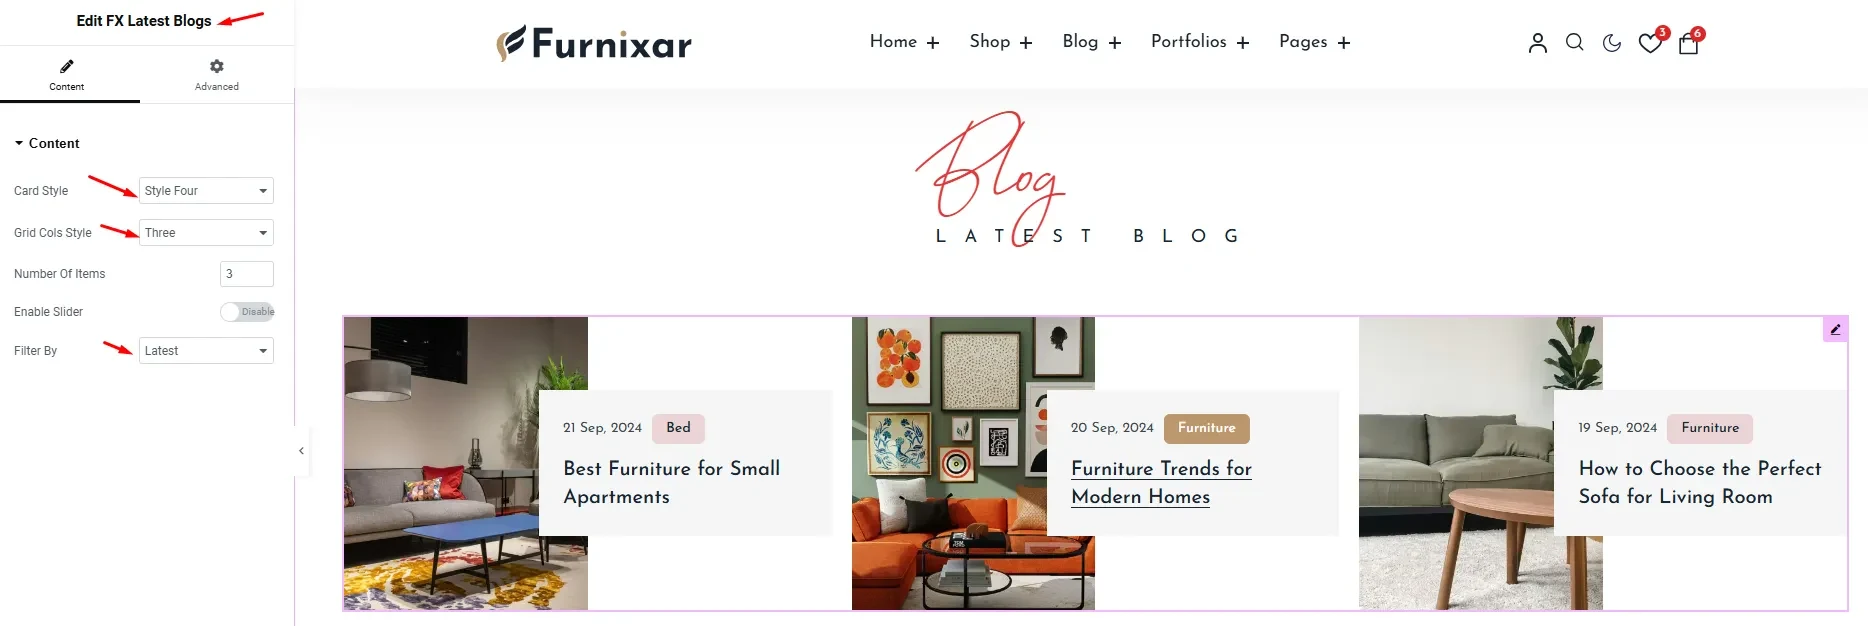
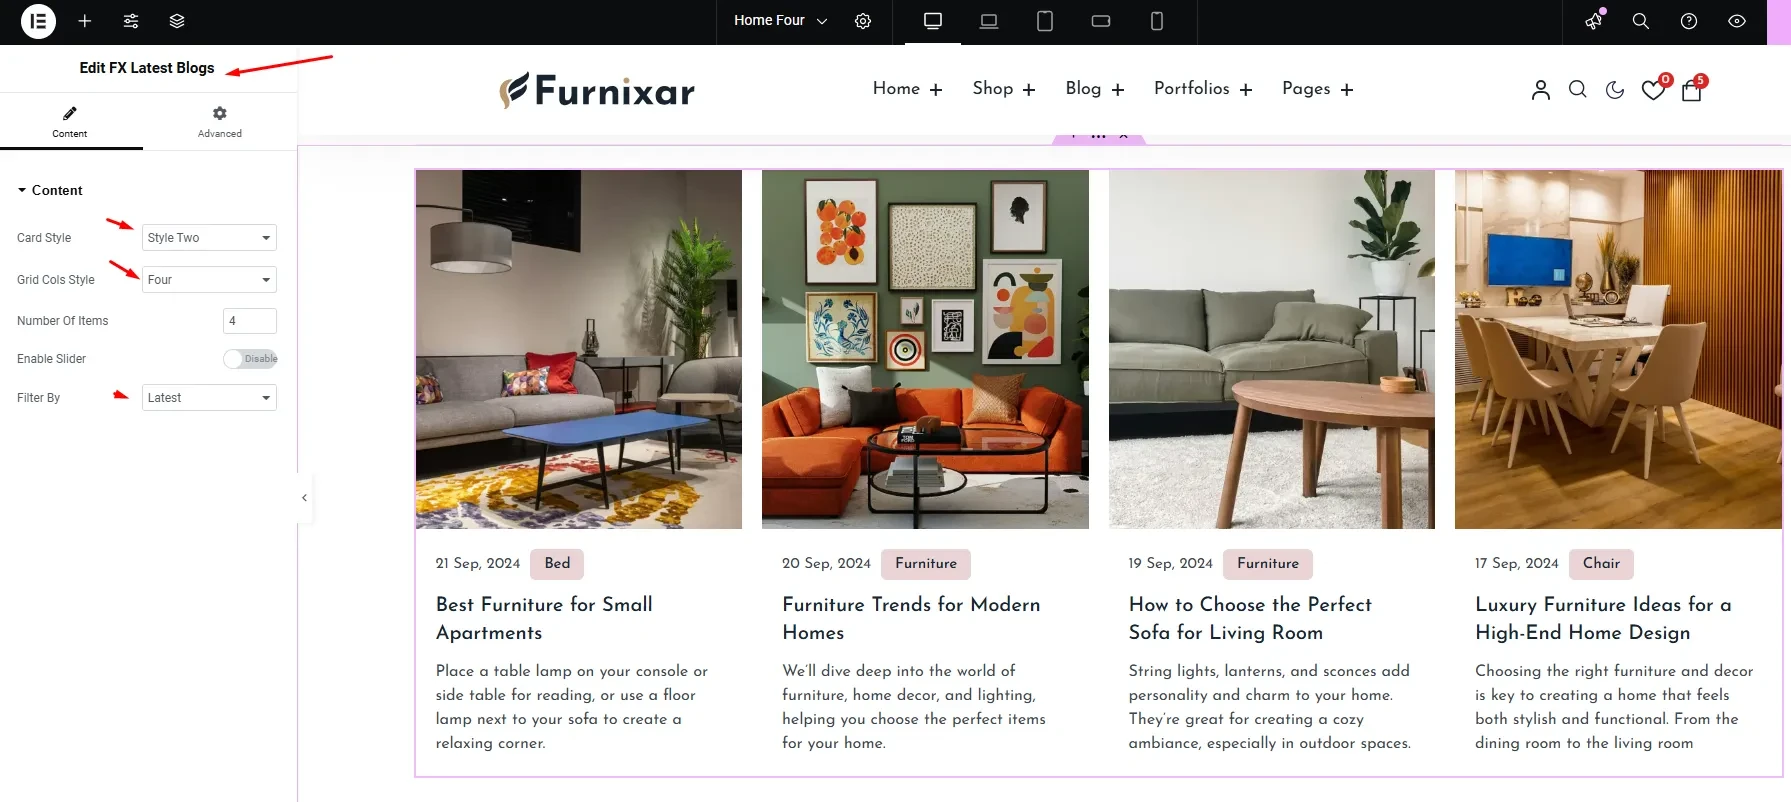
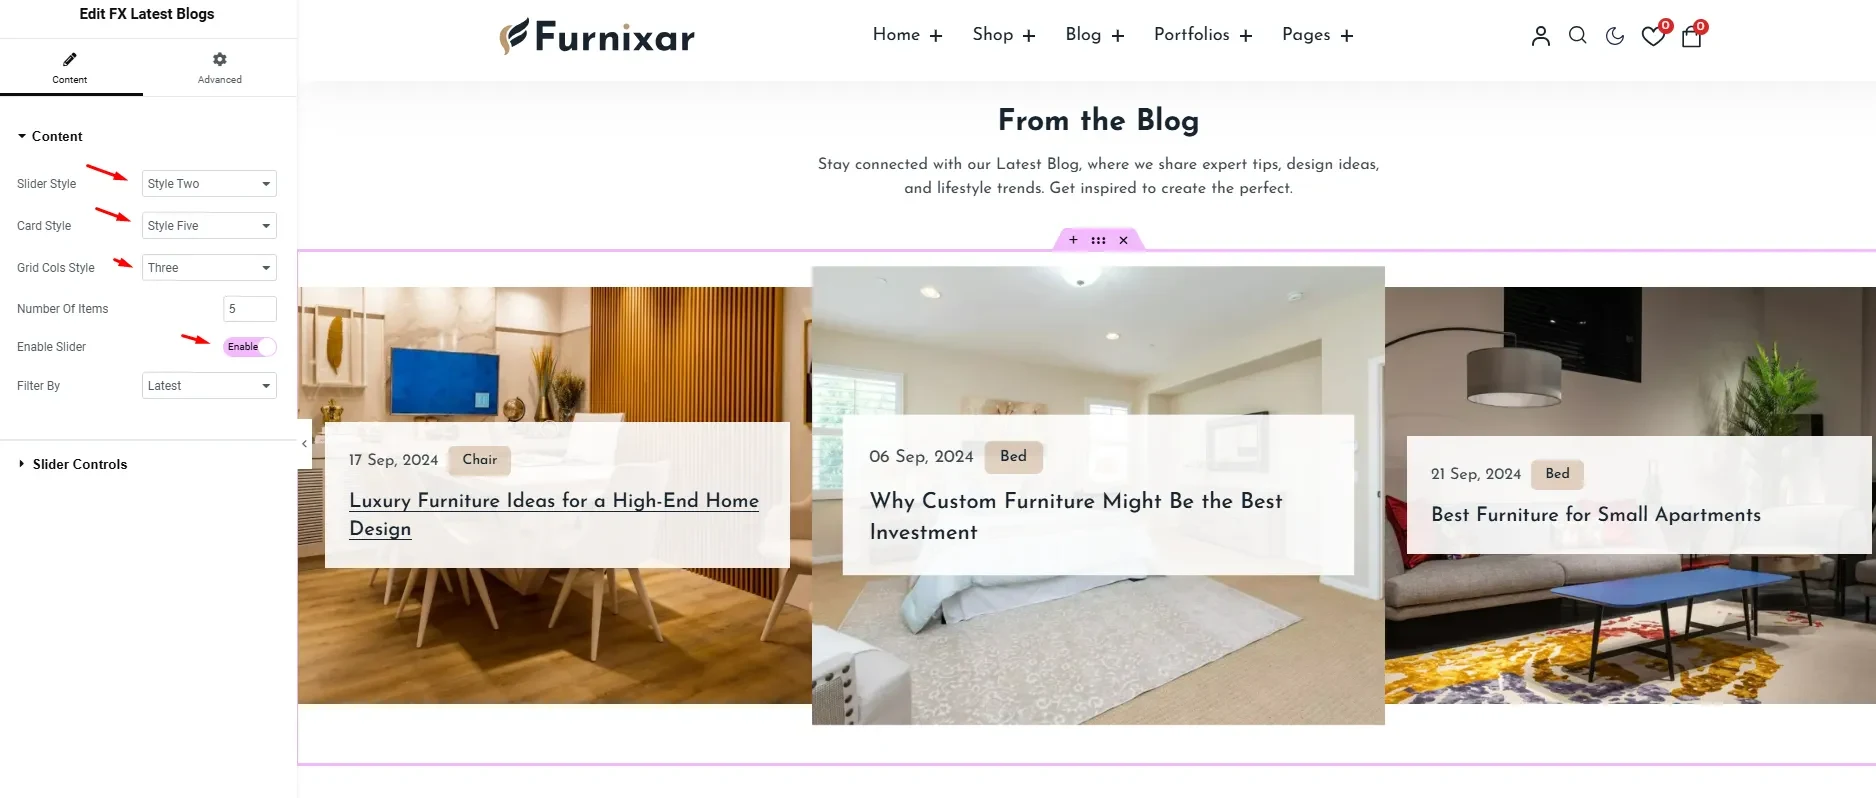
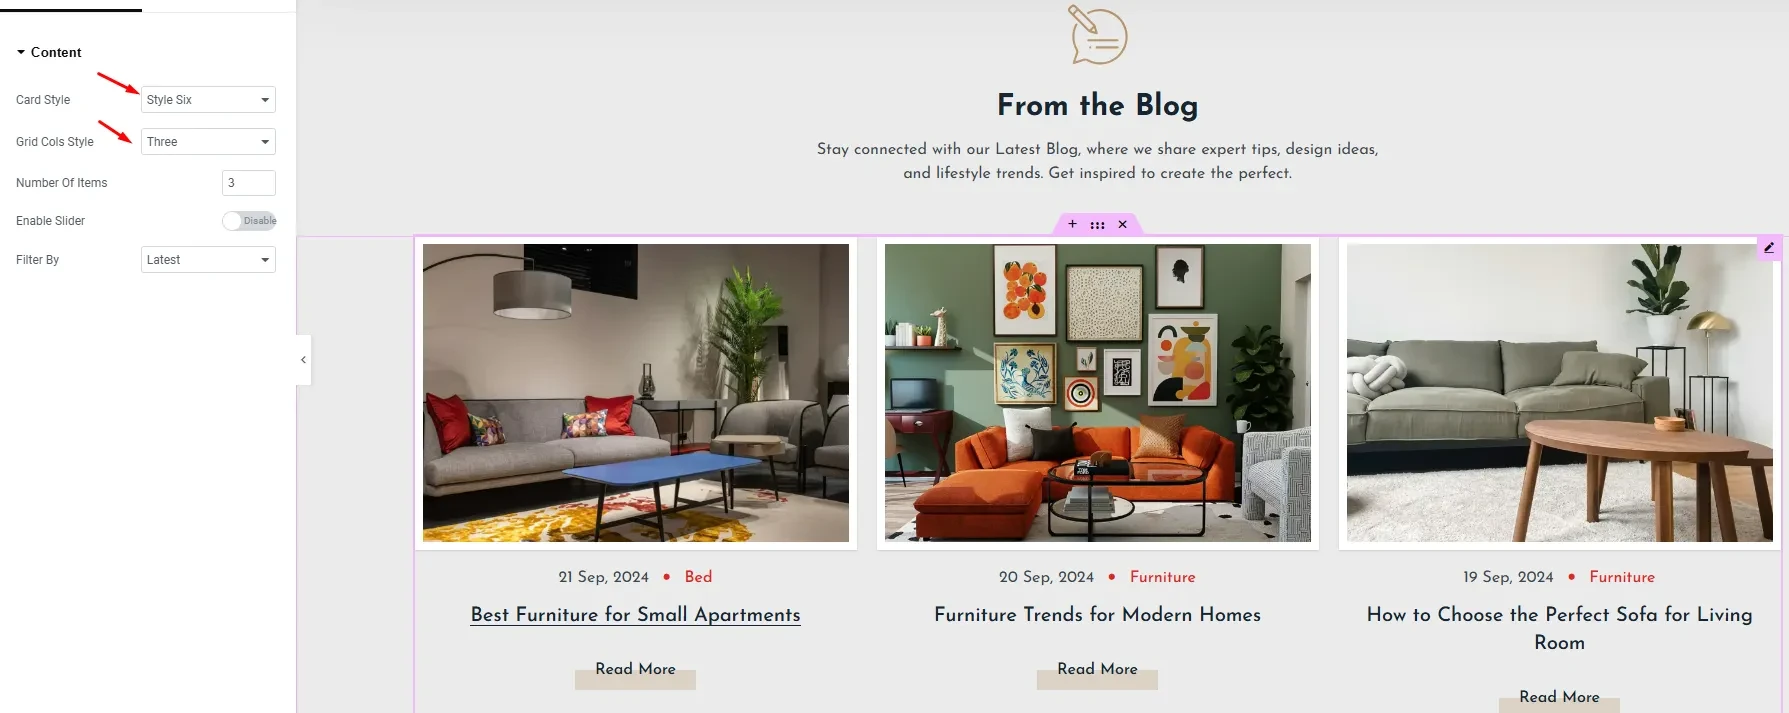
6. FX Latest Blogs
Showcase your latest blog posts in an appealing grid layout. A great way to keep your customers engaged with content. It has 6 Card styles design.
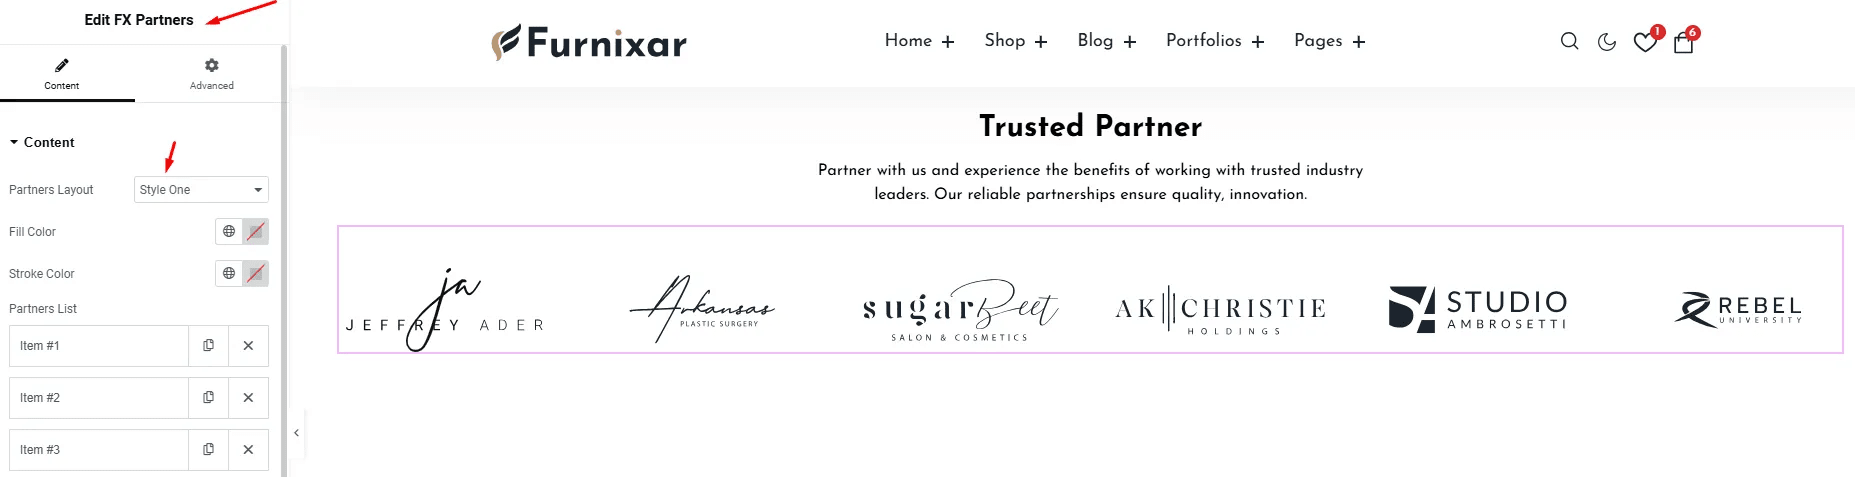
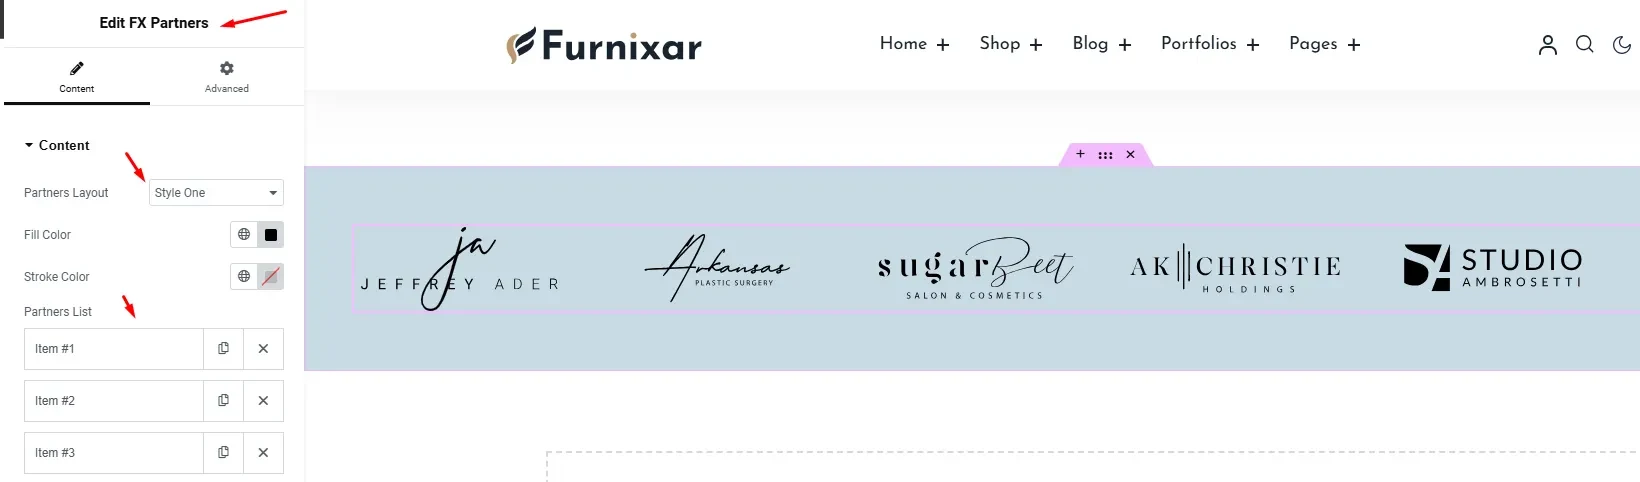
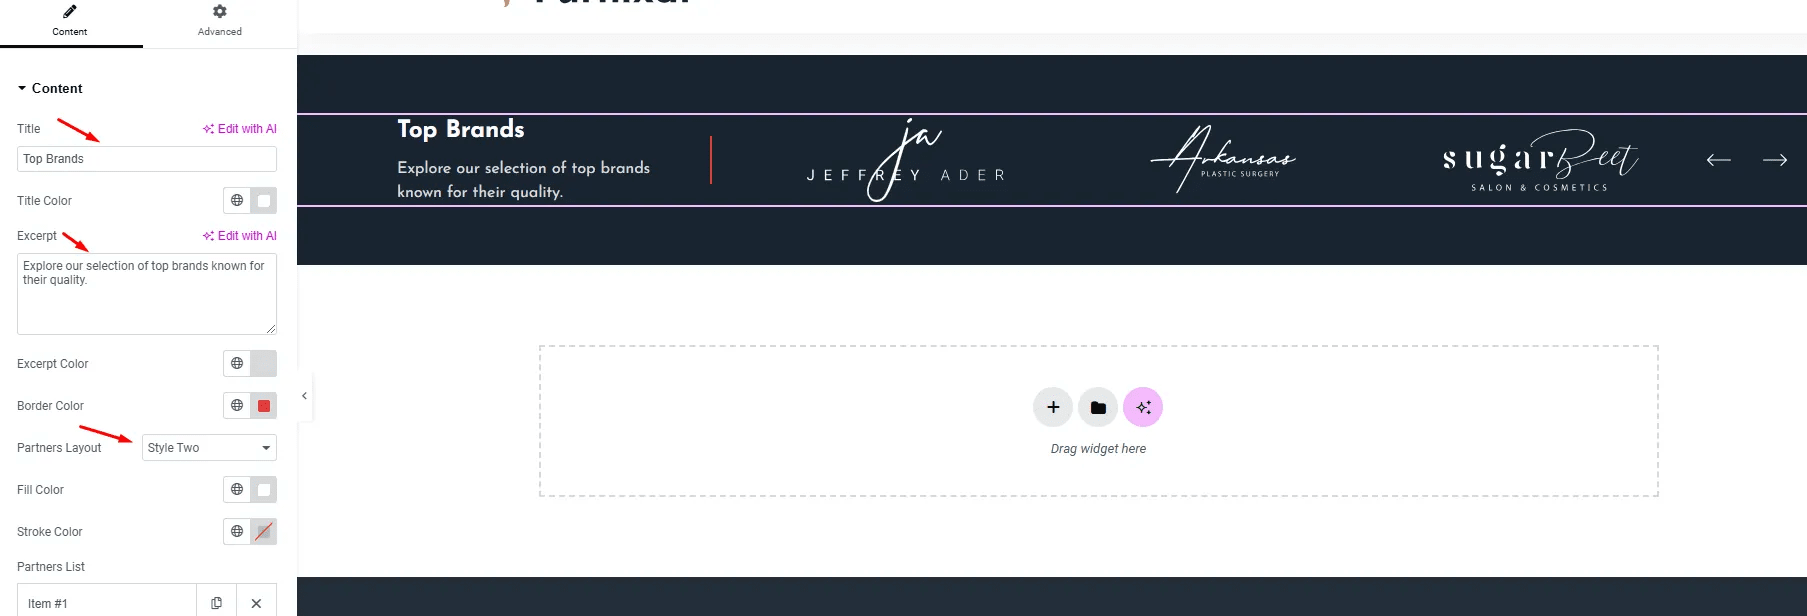
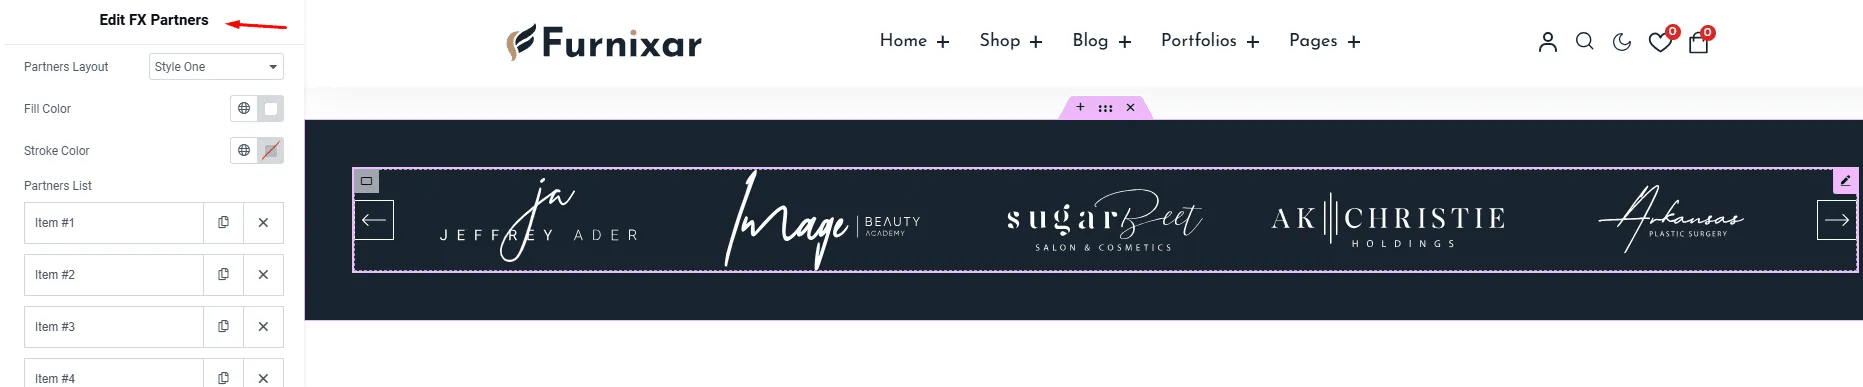
7. FX Partners
Display logos of your business partners or brands you collaborate with in a slider or grid format. The widget has 2 layout designs.
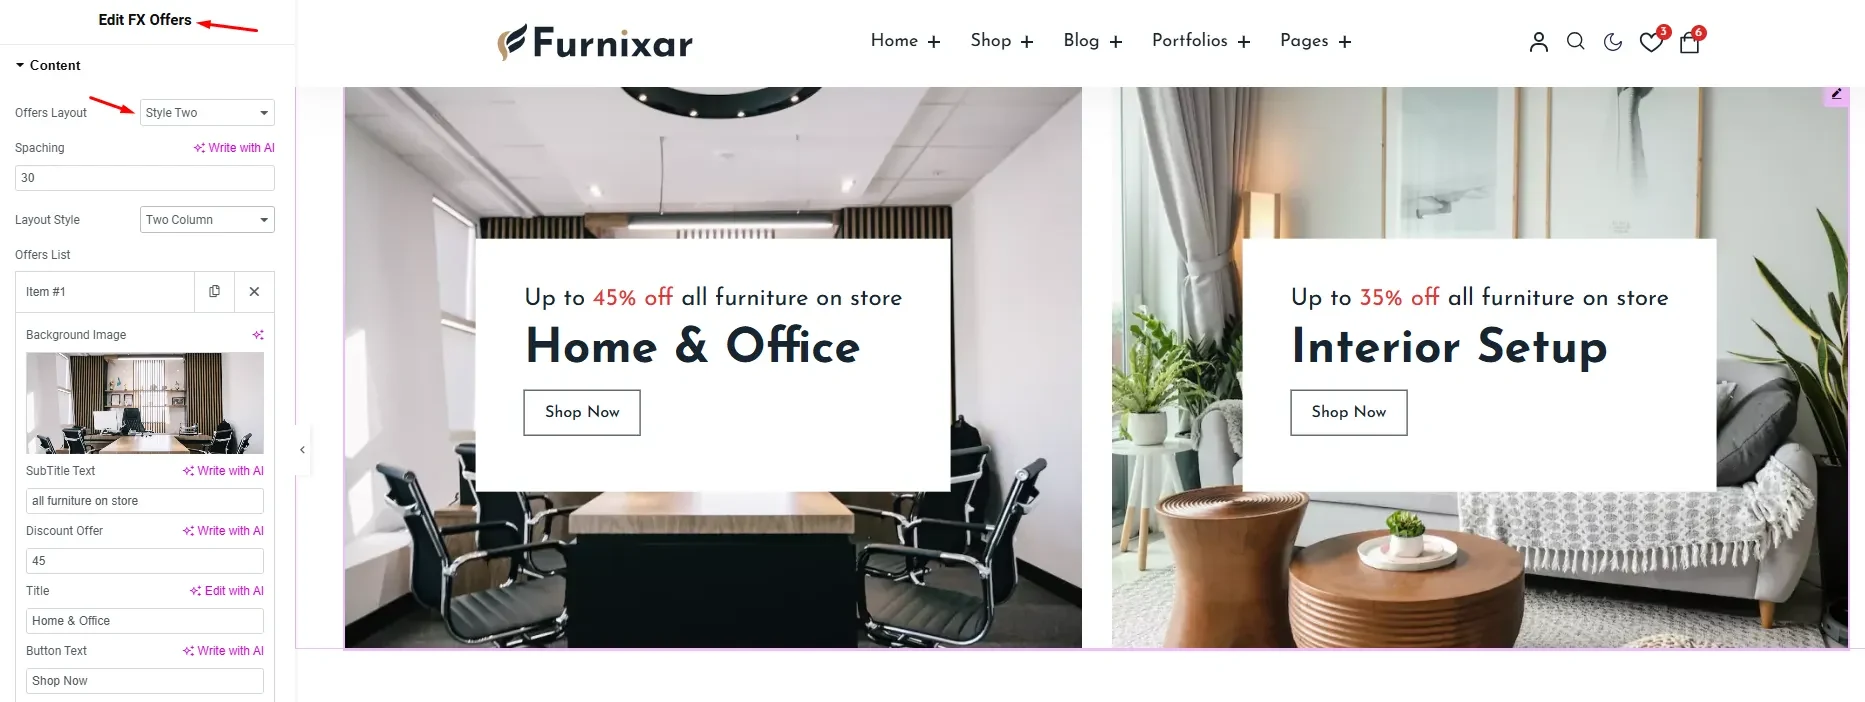
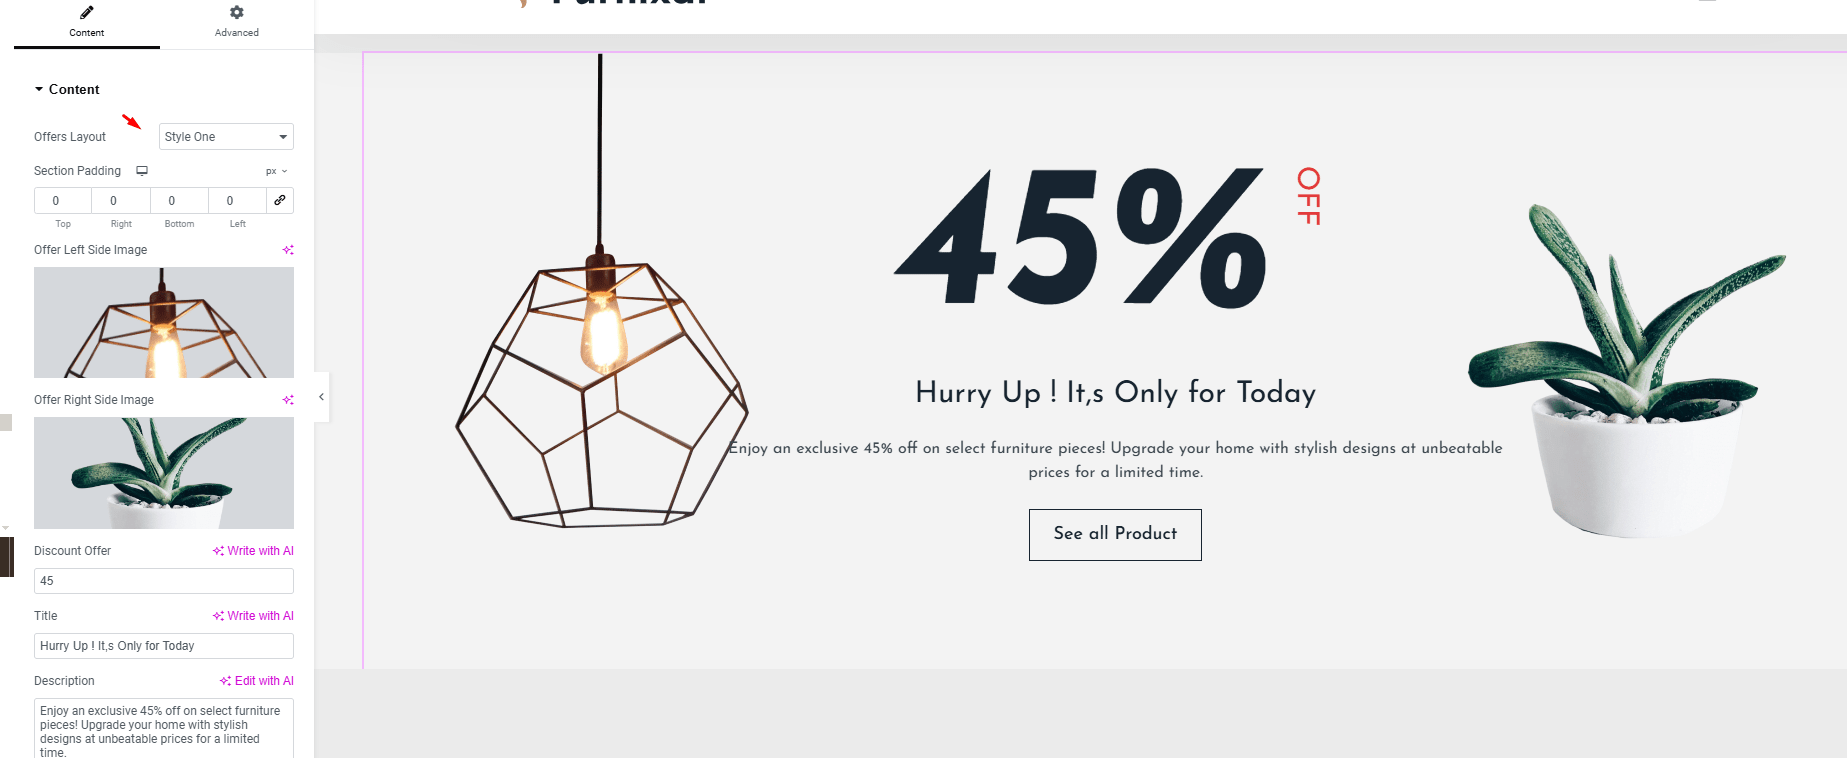
8. FX Offers
Promote special offers, discounts, and deals to encourage customers to shop more.
9. FX Testimonial
Showcase customer reviews and testimonials with elegant design and slider/carousel options.
10. FX Team
Present your team members with profile pictures, names, and designations. Useful for building trust and brand personality.
11. FX Pricing
Display pricing tables for various packages or services offered by your furniture store.
12. FX Coming Soon
Create a coming soon page to announce new products or updates.
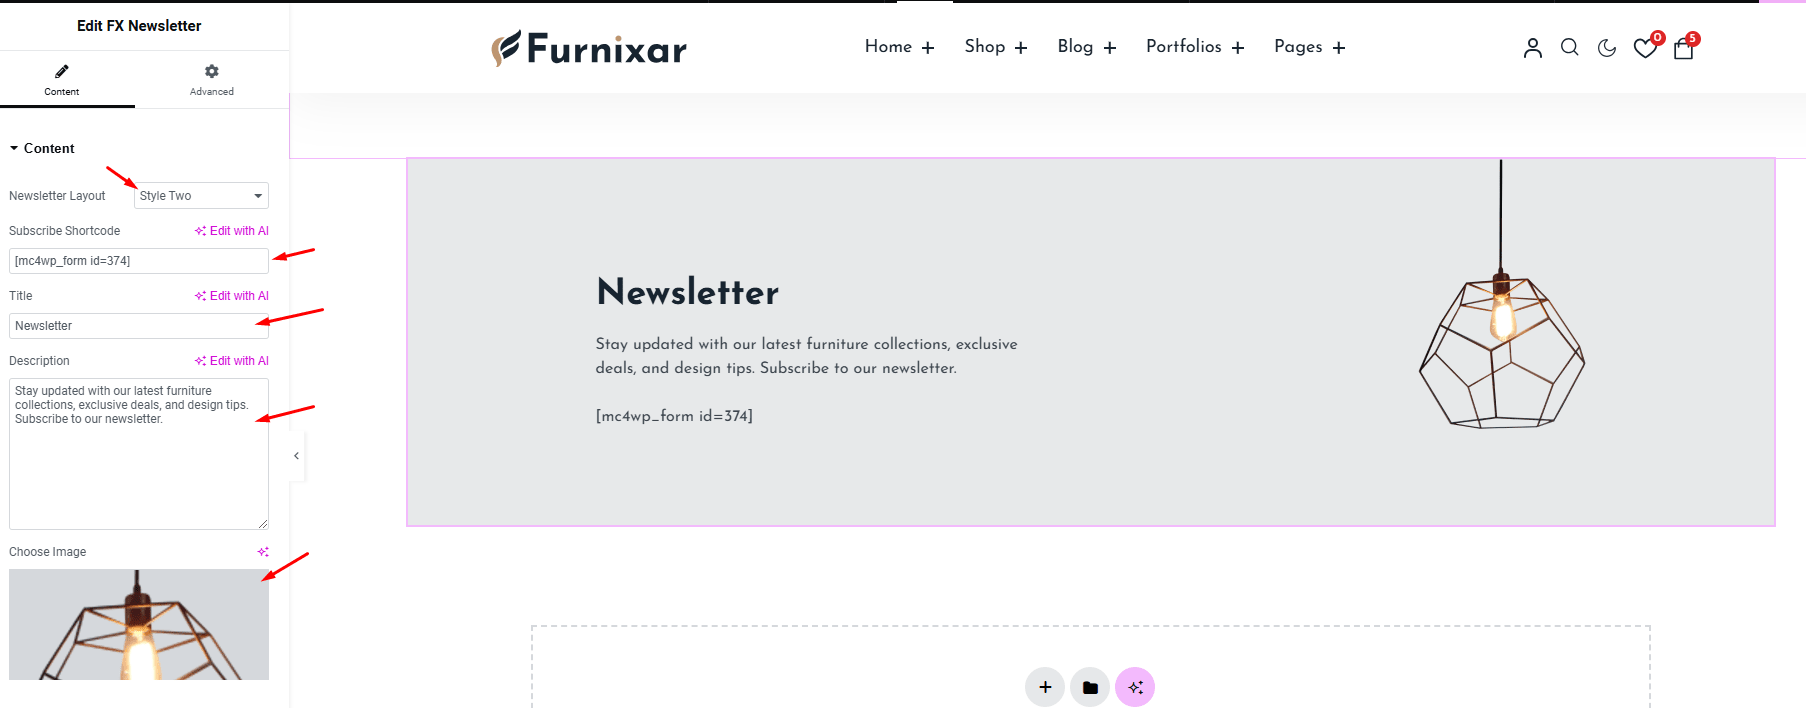
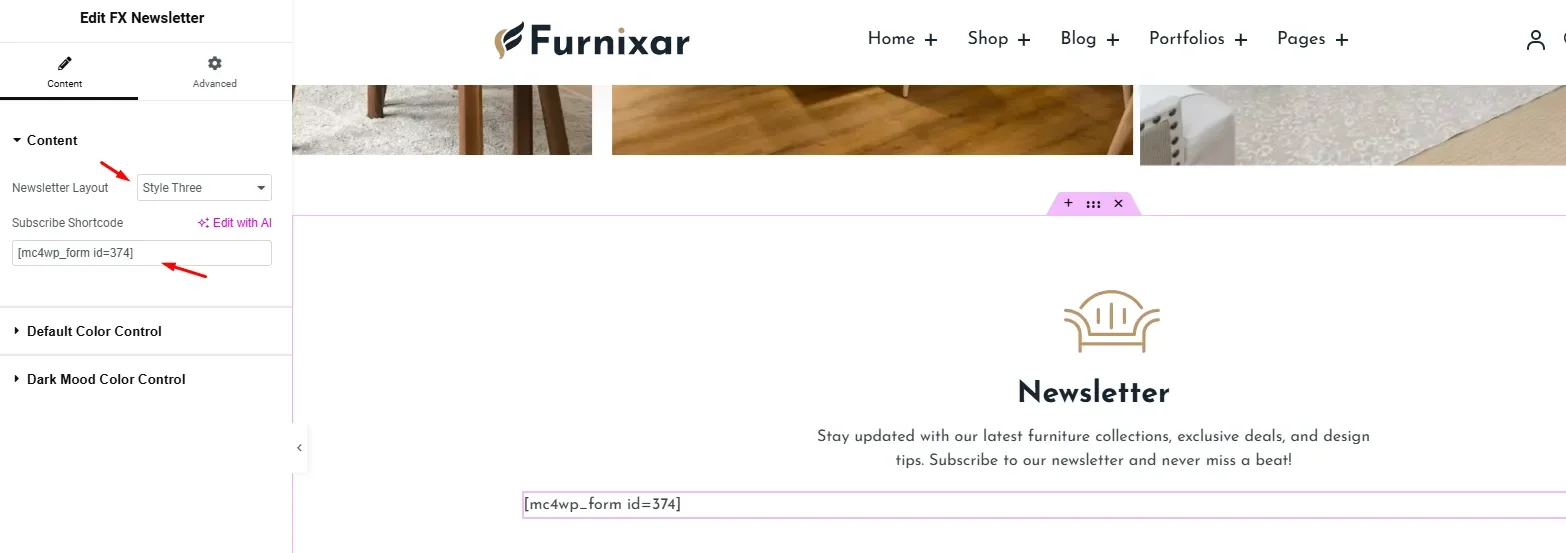
13. FX Newsletter
Integrate your newsletter signup form to collect leads and build your mailing list with Mailchimp.
14. FX Page Banner
Guide your visitors with intuitive, customizable breadcrumb navigation. Easily integrated into pages to enhance user experience and improve site navigation.
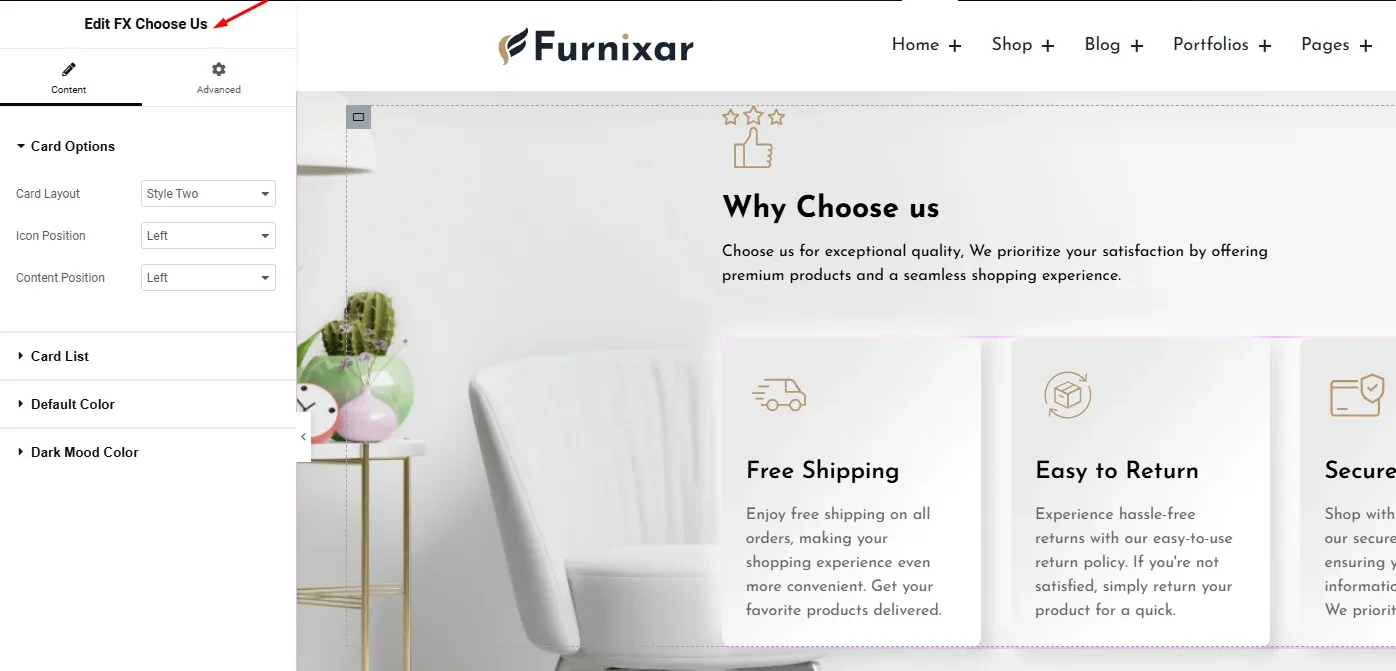
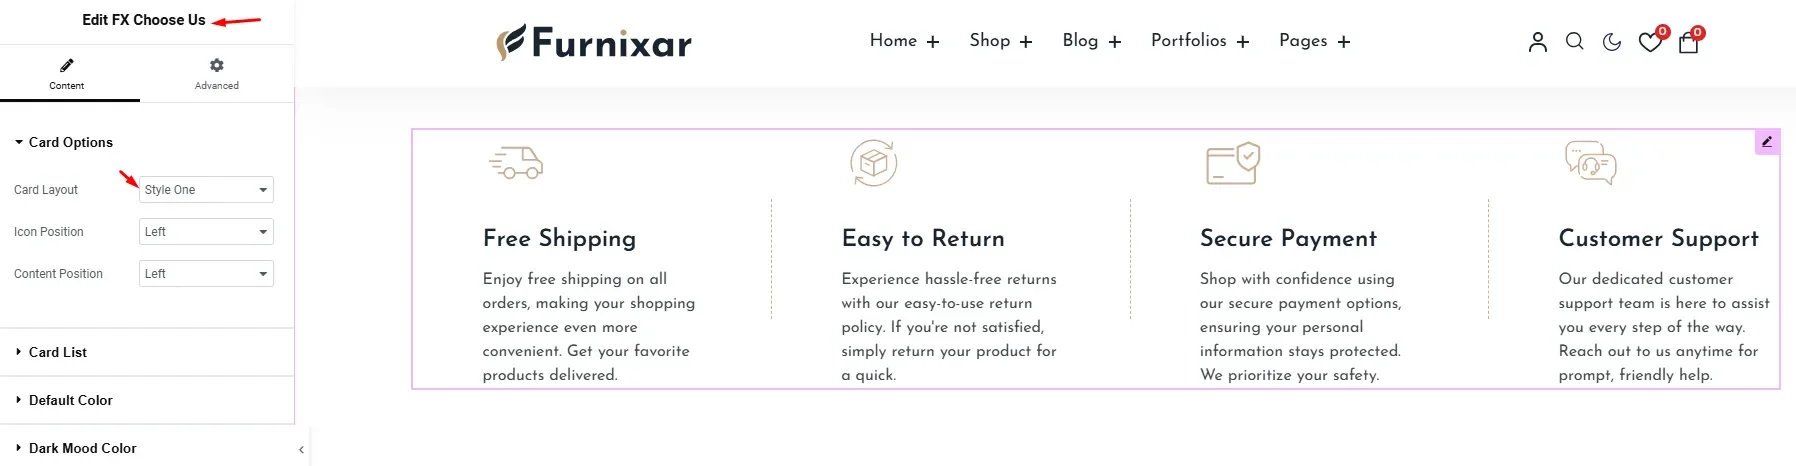
FX Choose Us
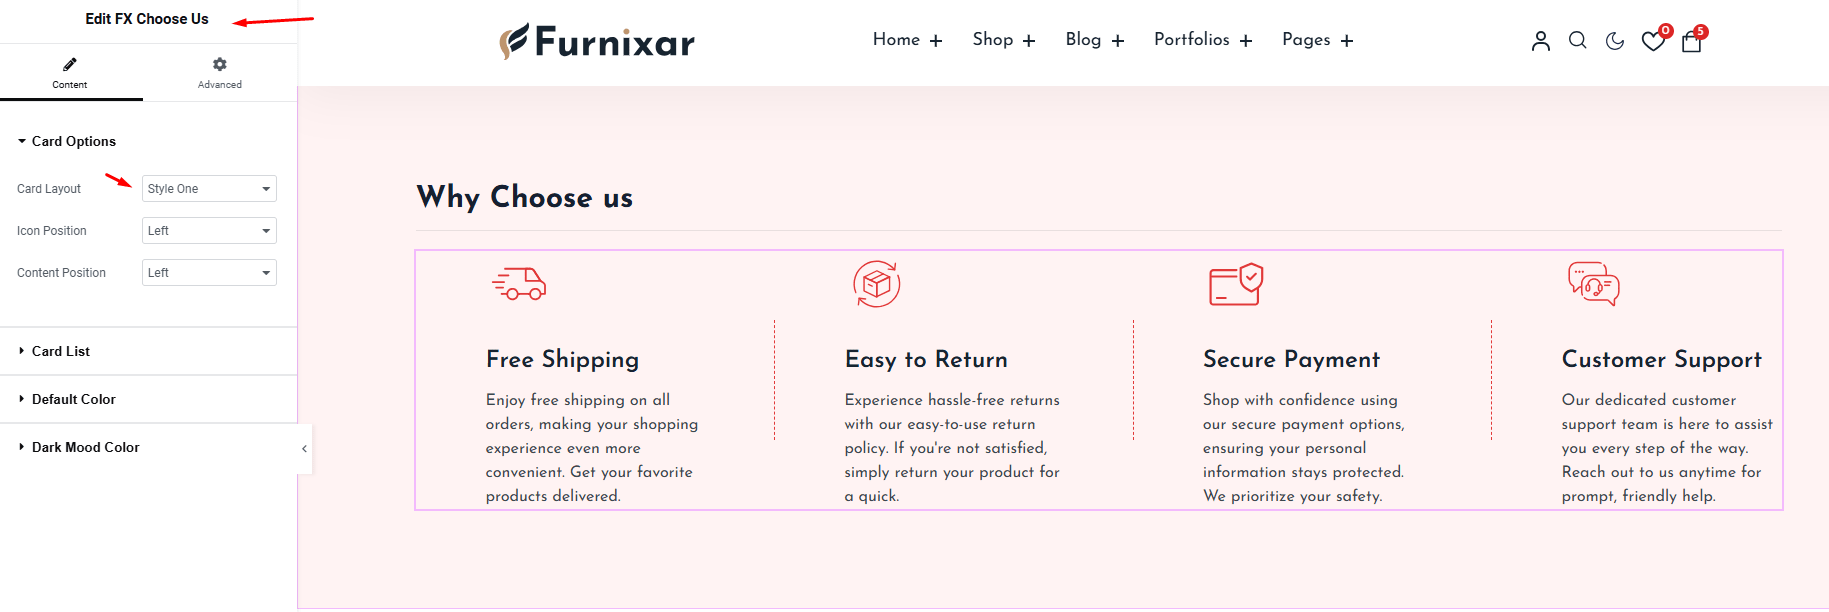
Create a block showcasing why customers should choose your store, highlighting key features like free shipping, return policy, etc. It has 2 card layout design.
Home Page Setup
1. Home Minimal
To design a Home page follow the steps below:
Section 1: Hero Slider
To design the home minimal hero section first Insert the FX Hero Slider widget then select the slider style one and add the slider content like image, write banner text, and customize the color.
Section 2: Product Category section title
To design the product category title insert the FX section title widget then customize the content.
Section 3: Product Category
To insert the product category section insert the FX product categories widget then select the product category style one.
Section 5: Products
FX Products (Product-Card Style One, Product Layout-Style One)
To design the product section first, insert the FX products widget then select the product card style one, and product layout style one.

Section 6: Why Choose Us
To design the Choose Us section insert the FX Choose Us widget and select the card layout style two.
Section 7: Featured Products
Add the FX Products widget to design the featured products option then select the product cards style one and product layout style Two.
Section 8: Latest Blogs
To showcase your latest blog posts, insert the FX Latest Blogs widget.
Section 9: Partners Logo
To display the logos of your partners insert the FX Partners widget then select the layout style one and add the logo item.
2. Home Stylish
To design a Home page stylish follow the steps below:
Section 1: FX Hero
For a home stylish page first insert the FX Hero widget and select style one then customize the content.
Section 2.1: Popular collections
For this section add a section title and button widget for the left side.
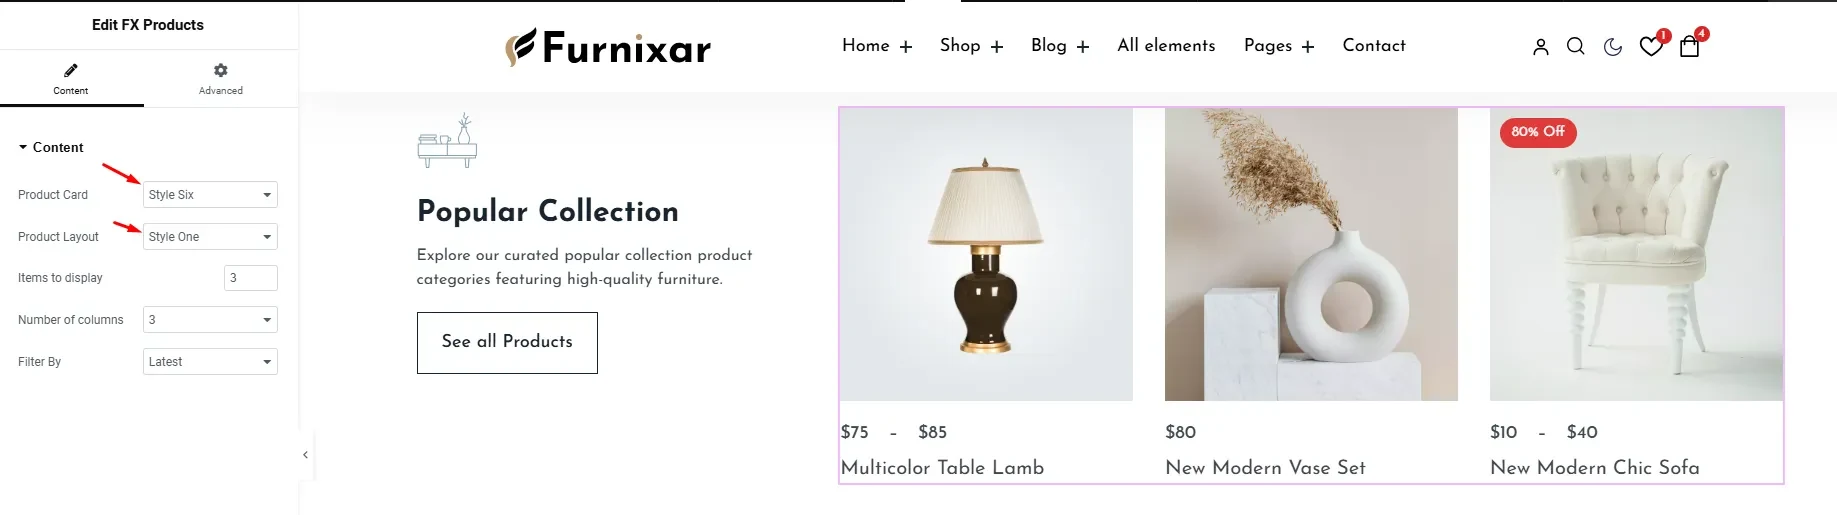
Section 2.2: FX Products
For this section, right side add the FX Products widget and select Product Card: Style Six, and Product Layout: Style One input number 3 for items to display and the number of columns filed.
Section 3: FX Product Categories
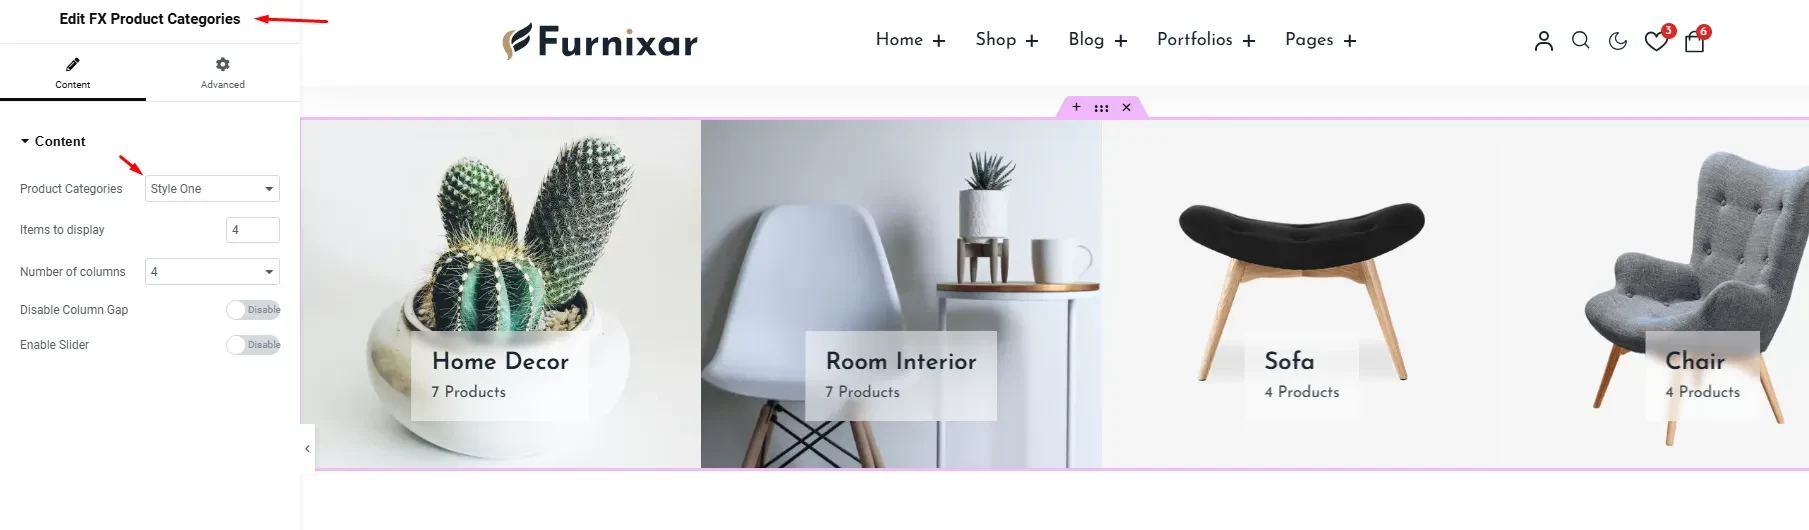
To design the product categories section take the FX Product Categories widget then select the product category style one, set the display item, and column 4.
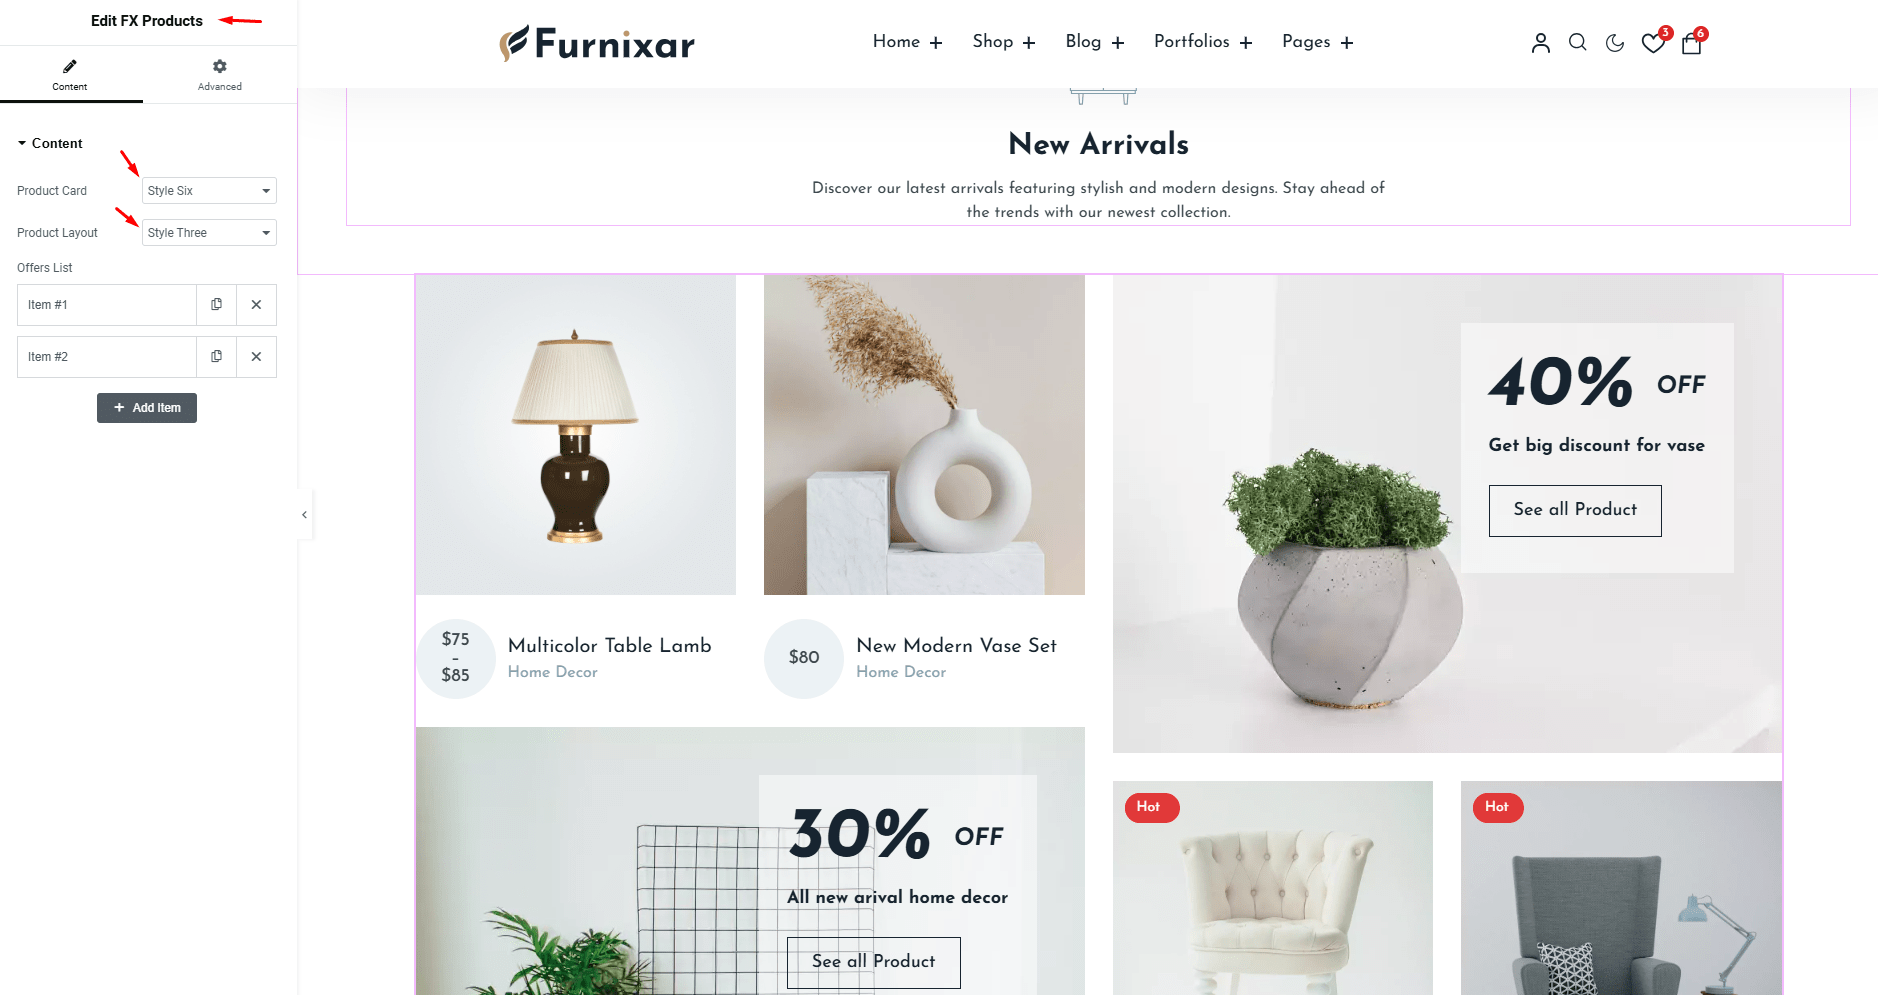
Section 4: New Arrivals
To design the new arrivals section take the FX Products widget and select the product card style six and product layout style three then add 2 offers list items.
Section 5: Testimonials
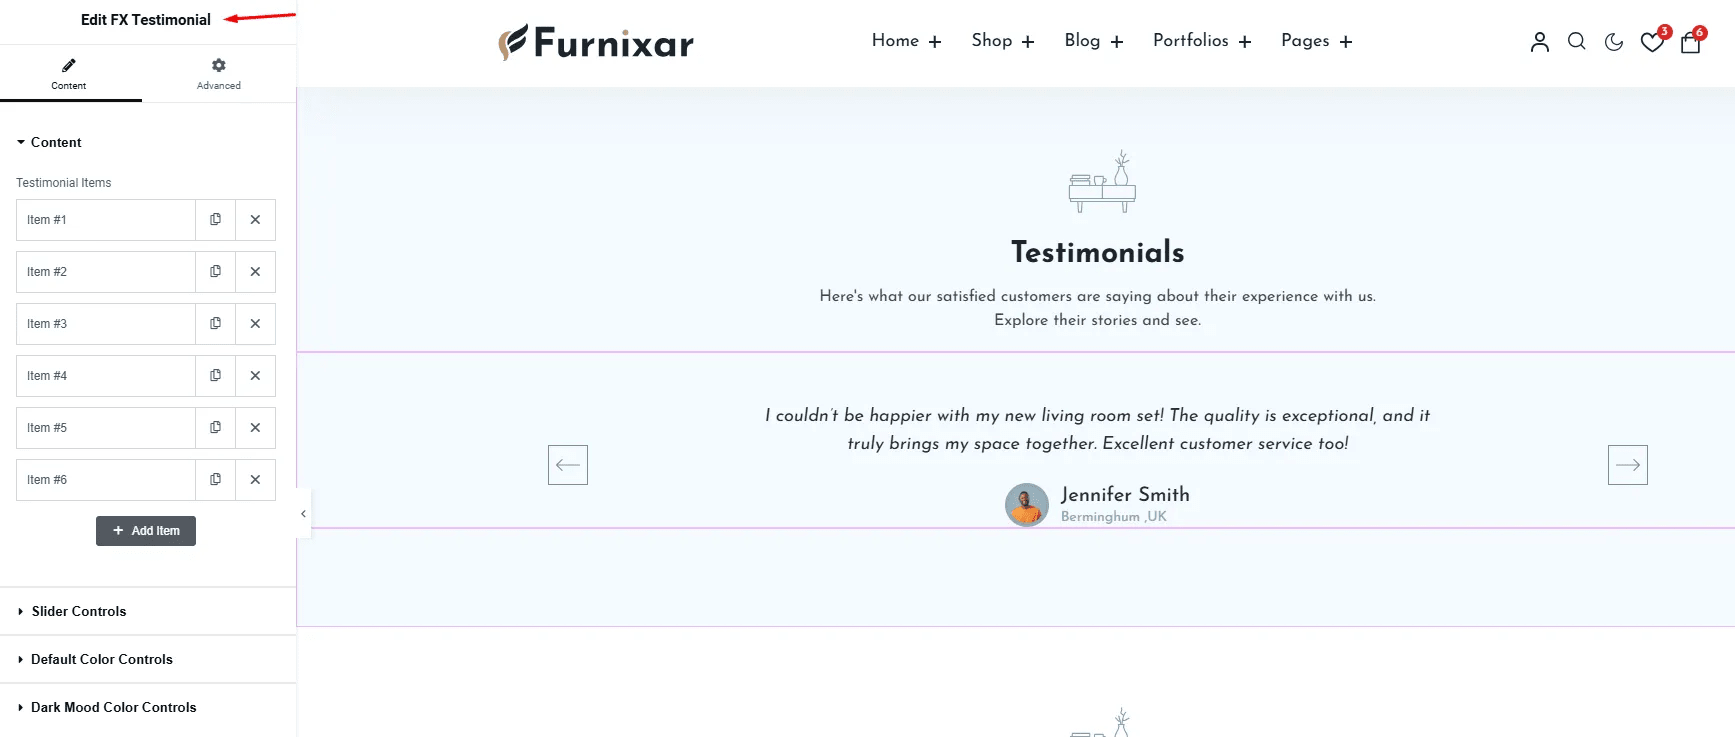
To design the testimonials section insert the FX Testimonial widget and add the testimonial Item the customize the slider controls.
Section 6: Latest Blogs
To design the Latest blogs section add the FX Latest blogs widget and select slider style one, card style three, and grid col style three give the number of items, and how much you want to display, enable the slider, and set the filter by latest post.
Section 7: FX Newsletter
To design a newsletter section insert the FX Newsletter. Then select the newsletter layout style three and paste the Mailchimp form shortcode in the shortcode field.
Section 8: Partners Logo
To display your partner's logo insert the FX partner's widget. Set the Partner layout style one.
3. Home Accessories
Section 1: Hero Slider
To design the Hero Section insert the FX Hero Slider widget and select the slider style Two then customize the content and settings.
Section 2: Product Categories
To design the product category section insert the FX Product Category widget and select the product category style two then customize the content and settings.
Section 3: New Products
To design the new product section first take a section title widget and select the heading layout two alignment center, then insert the FX Products widget select the product card style two and layout style one then set the display item and column number 4.

Section 4: Offers
To design the offers section insert the FX offers widget and select the offer layout style two. Then add the offer item content like image, title, subtitle, discount offers, button text, URL.
Section 5: Latest Blog
To design the Latest blog section add the FX Latest blogs widget select the card style four, and grid col style three, and set the filter by latest post.
Section 6: Partners Logo
To display your partner's logo insert the FX partner's widget. Set the Partner layout style two. Then write the section title and description. Add the partner logo item.
Home Collections
To design the home collection follow the instructions.
Section 1: Hero Section
To design the Hero Section insert the FX Hero widget and select the Banner Style Two then customize the content and settings.
Section 2: Product Categories
To design the product category section insert the FX Product Category widget and select the product category style three then customize the content and settings.
Section 3: New Arrival
To design a new arrival section, insert the FX Products widget then select the product card style three and product layout style one.
Section 4: Why Choose Us
To design the Choose Us section insert the FX Choose Us widget then select the card layout style one.
Section 5: Best Sellers
To design the best sellers section first, insert the FX product section then select the product card style four and layout style two.
Section 6: Trending
To design the trending section first, insert the FX product section then select the product card style three and layout style one.
Section 7: Partners Logo
To design the partner's logo section first take a container, then set padding top and bottom 80px and add background color. After that Insert the FX Partners section then select the Partner Layout one.

Section 8: Latest Blog
To design the Latest blog section add the FX Latest blogs widget select the card style two, and grid col style four, and set the filter by latest post.
Section 9: Newsletter
To design a newsletter section insert the FX newsletter widget then select the newsletter layout style two. after completing it add your Mailchimp form shortcode in the subscribe shortcode field the write the title and description.
Home Luxury
To design the home luxury page follow the steps :
Section 1: Hero Slider
To design the hero slider section insert the FX hero slider then select the slider style three. Then customize the slider content.
Section 2: Choose us
To design the Choose Us section insert the FX Choose Us widget then select the card layout style one.
Section 3: Product Categories
To design the product categories section take the FX Product Categories widget then select the product category style one, set the display item 6, and column 3.
Section 4: Latest Products
To design the Latest product section, take the FX Products widget then select the product card style four and product layout one.
Section 5: Blog
To design the blog section add the FX Latest blogs widget select the slider style two, card style five, and grid col style three, and set the filter by latest post.
Section 6: Newsletter
To design a newsletter section insert the FX newsletter widget then select the newsletter layout style three. after completing it add your Mailchimp form shortcode in the subscribe shortcode field the write the title and description.
Section 7: Partner Logo
To design the partner's logo section first take a container, then set padding top and bottom 80px and add background color. After that Insert the FX Partners section then select the partner layout style one.
Home Retro
To design the home retro follow the steps below:
Section 1: Hero Slider
To design the home retro page hero section use the FX Hero widget, then select the banner style three. Now you should the banner image for the slider.
Section 2: Product categories
To add the product categories section use the Product category widget then select style three.
Section 3: Offer
To design the offer section insert the FX offer widget. Select the offer layout style one. Then add the section content like images, discount offers, and text.
Section 4: Latest Products
To design the latest products section insert the FX product widget, select the product card style five, and layout style one.
Section 5: Offers
To design the offers section insert the FX offers widget and select the offer layout style two.
Section 6: Blog
To design the blog section use the FX Latest Blogs widget and select the blog card style six.

Section 7: Partner Logo
To design the partner's logo section first take a container, then set padding top and bottom 55px. After Insert the FX Partners section then select the partner layout style one.

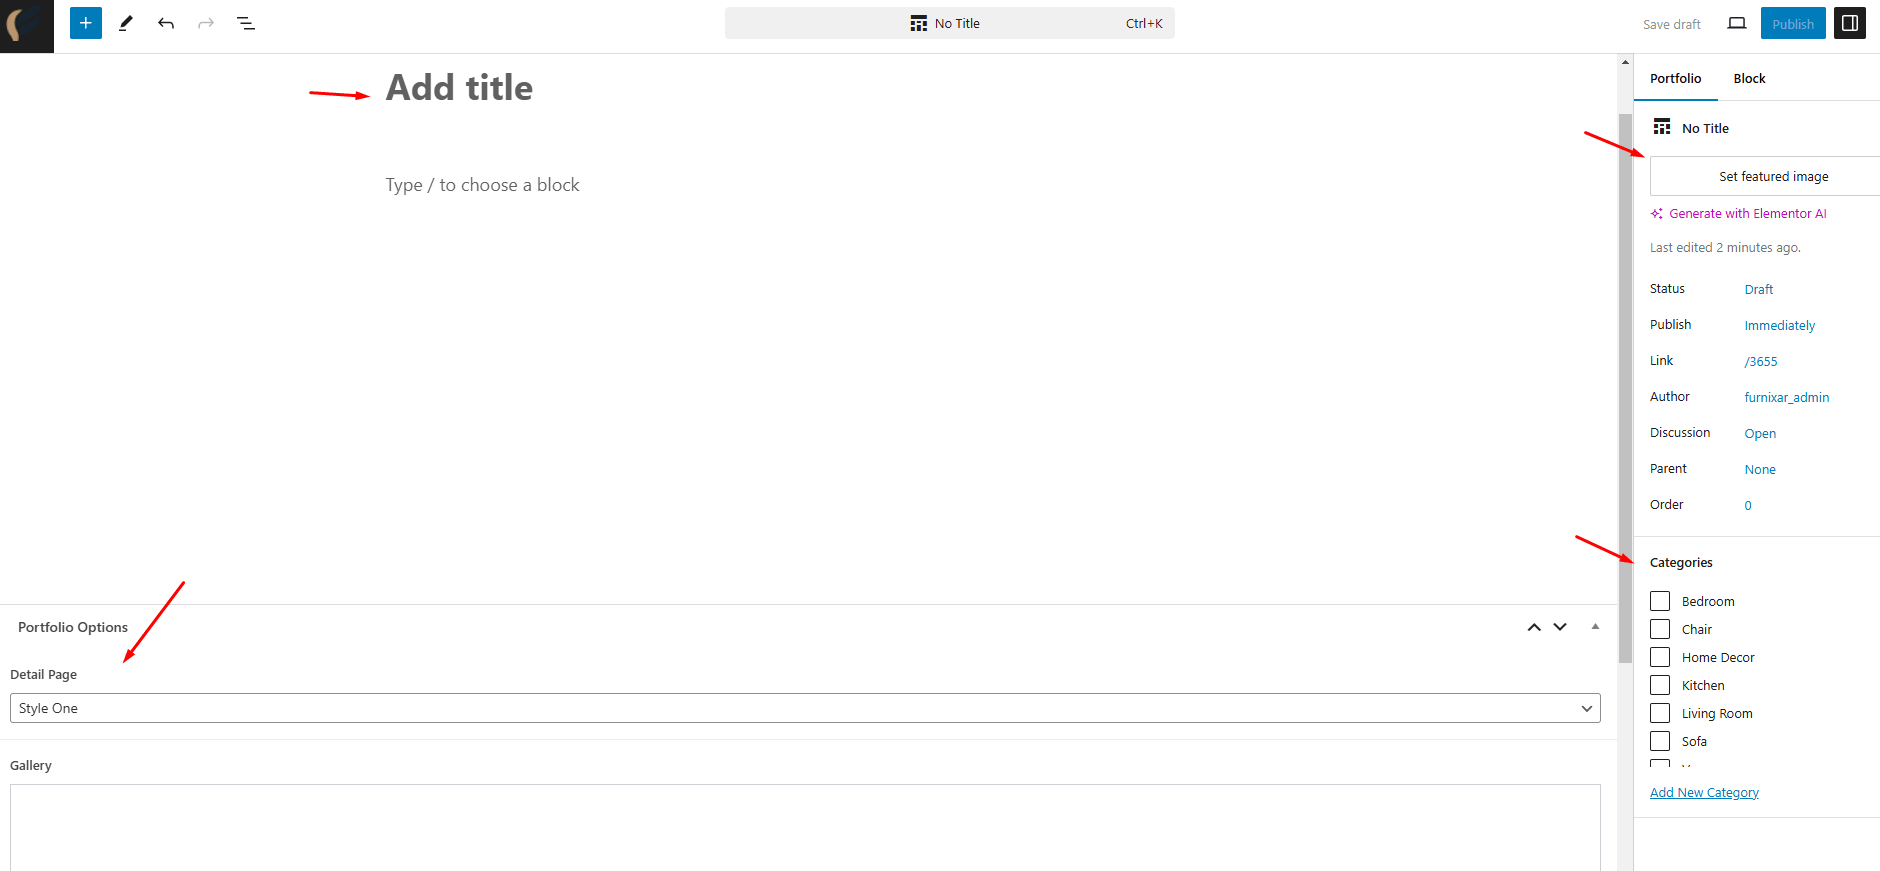
Create Portfolios Page
Create your main portfolios page and assign it properly so your portfolio items will populate this page automatically.
To create a new portfolio item: Go to Dashboard > Portfolio > Add New Portfolio
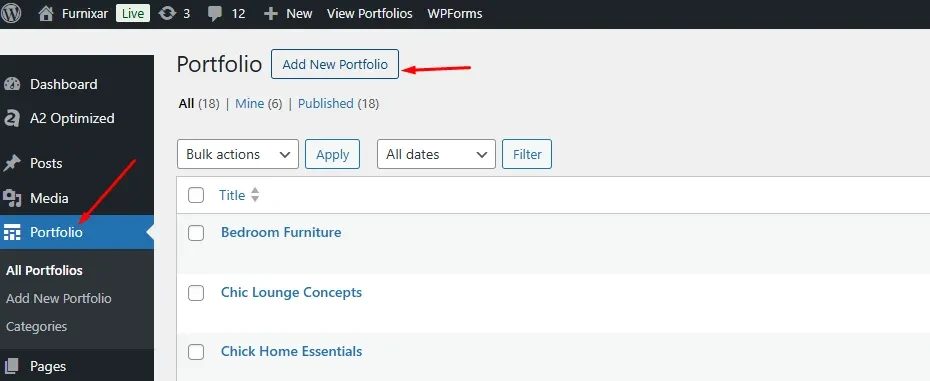
Write portfolio title, and description, set the featured image, categorize, add portfolio gallery
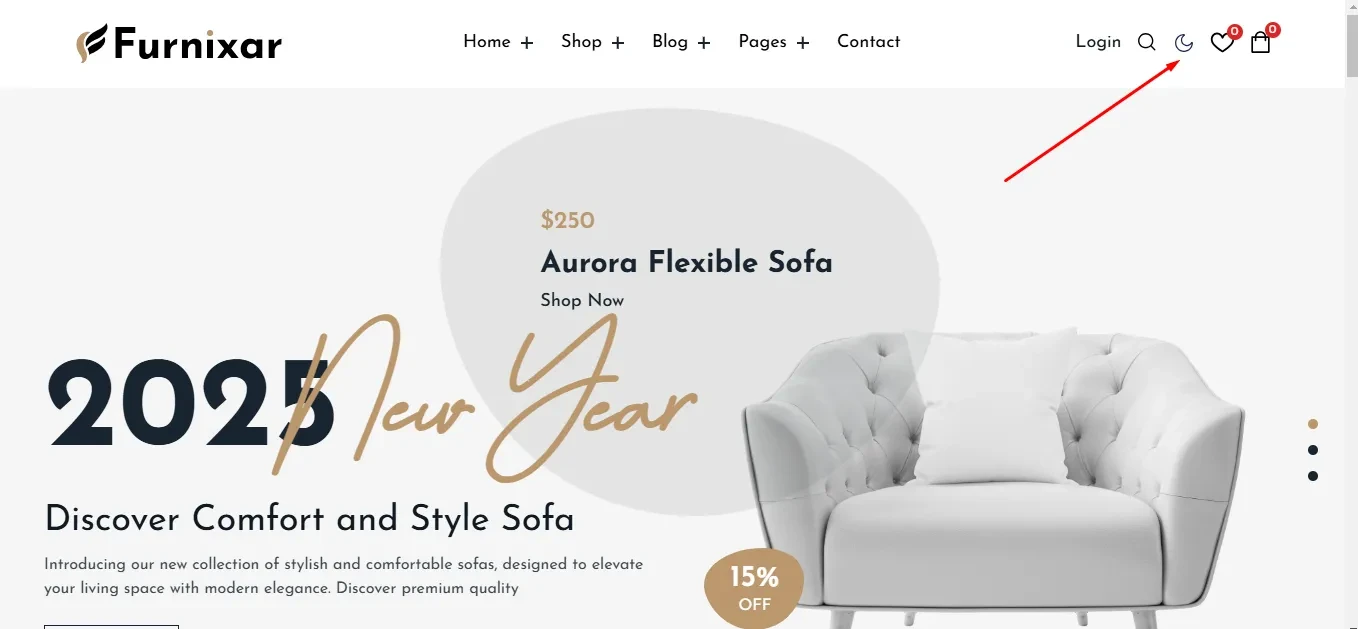
Dark version setup
To enable the dark version, click on the moon button on the right side of the main menu.
After enabling the dark mode if you see a missing section's background to change in dark mode then you can use the custom CSS class in the CSS classes field of that section.
.bg-dark-woram
.bg-dark-indigo
.bg-pure-black
.dark-border
.dark-heading
How to use custom class for dark mode
Customize options of Furnixar
The Furnixar theme customization panel will help you to customize theme options, logo, colors, and Typography and see all the changes in the live preview before saving.
- Go to
Advanced Settings
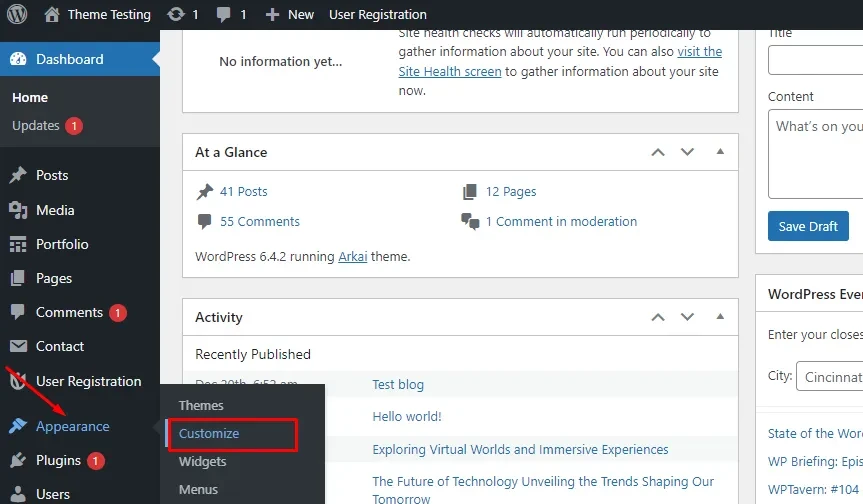
Theme Options
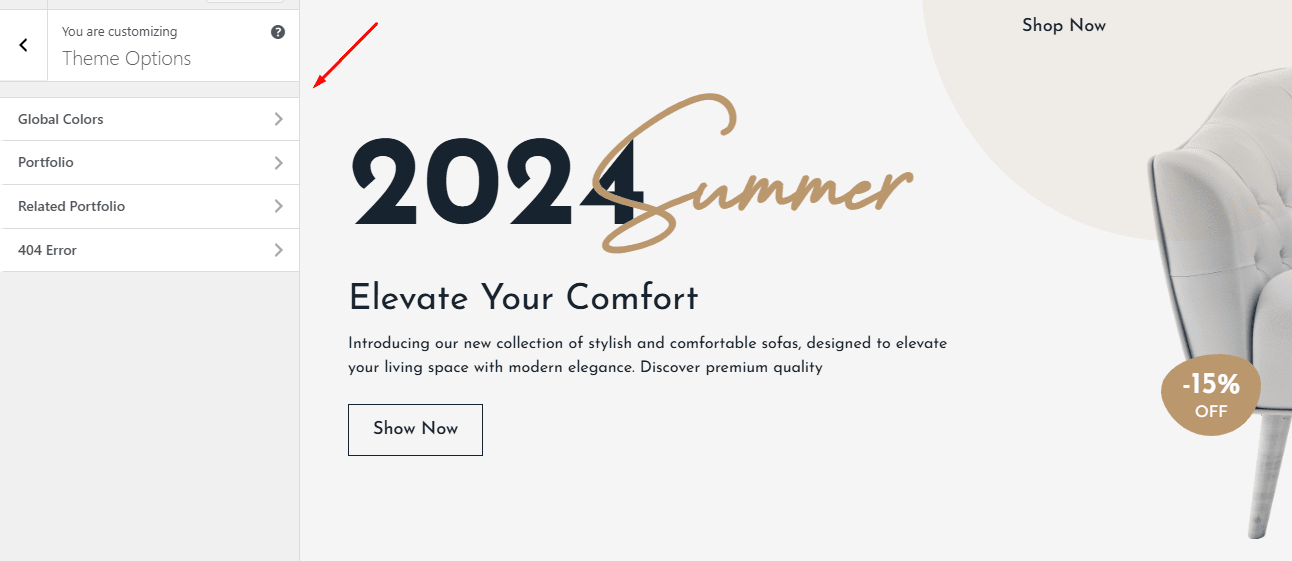
- Global Colors: To change the primary color Go to the
Appearance > Customize > Theme Options > Global Color - Portfolio: To customize the portfolio page title, alignment, and filter style go to the
Appearance > Customize > Theme Options > Portfolio - Related Portfolio: To change the related portfolio section icon image, title, and description go to the
Appearance > Customize > Theme Options > Related Portfolio - 404 Error: To change the 404 error page image, title, and description go to the
Appearance > Customize > Theme Options > 404 Error
Shop
To customize the shop page, product details page, and cart page content go to Dashboard > Appearance > Customize > Shop
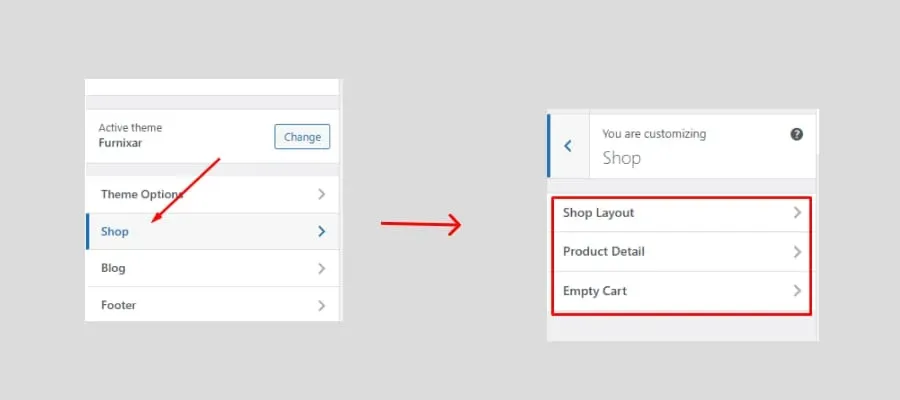
- Shop Layout: To change the shop page layout design like category, sidebar, product card style, and pagination type. Go to
Dashboard > Appearance > Customize > Shop > Shop Layout. - Product Detail: To customize the product details page sidebar, the related product section sidebar, items display number then go to the
Dashboard > Appearance > Customize > Shop > Product details - Empty Cart: To change the Empty cart page content like title and description go to the
Dashboard > Appearance > Customize > Shop > Empty Cart
Blog
To customize the blog list page and blog details page design go to the Dashboard > Appearance > Customize > Blog. You will see the options for changing the design on the Blog page, Post Details page, and Related post section.
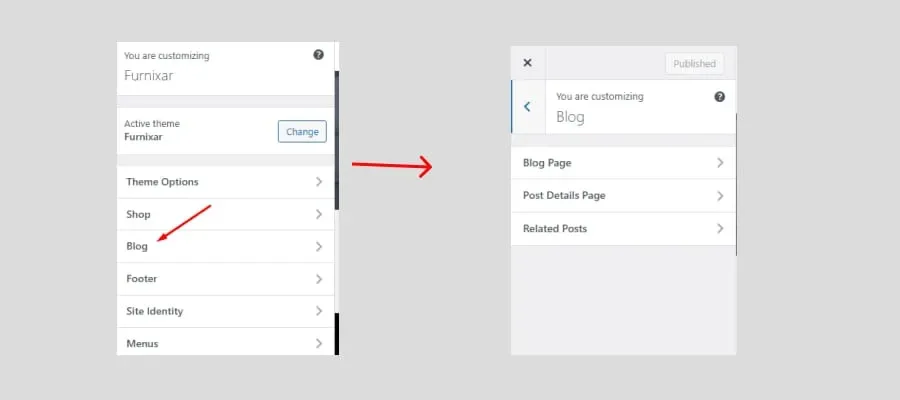
- Blog Page: To change the blog page featured post display options show or hide, change the postcard layout style, number of columns, postcard image ratio, and pagination type. Go to
Dashboard > Appearance > Customize > Blog > Blog Page. - Post Details Page: To change the sidebar visibility (show or hide), and sidebar position (left or right) Go to
Dashboard > Appearance > Customize > Blog > Post Details Page. - Related Posts: To change the related post section icon image, section title, and description. Go to
Dashboard > Appearance > Customize > Blog > Related Posts.
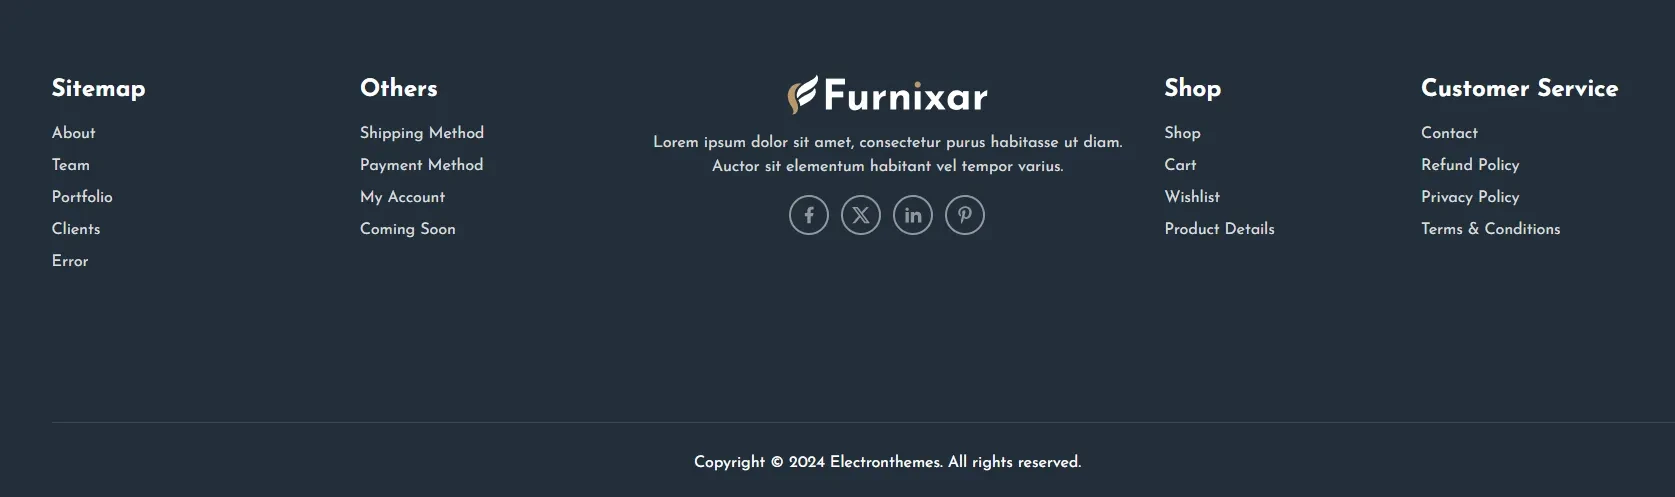
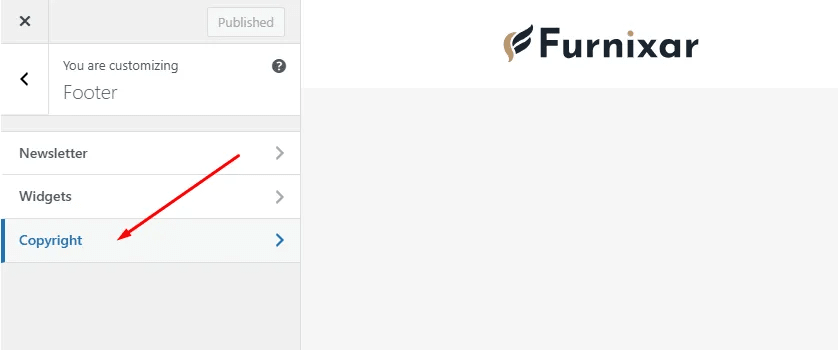
Footer
To customize the footer section Dashboard > Appearance > Customize > Footer. You will see 3 options for customizing the footer (newsletter, widgets, and copyright)
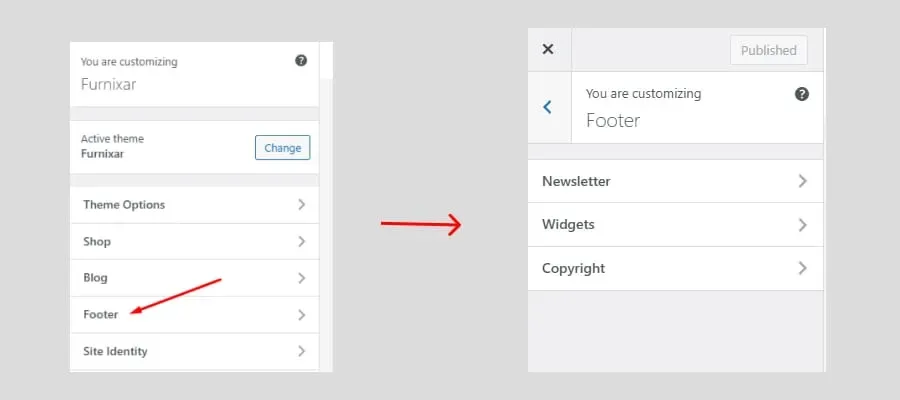
- Newsletter: To change the footer newsletter section visibility and content go to the
Dashboard > Appearance > Customize > Footer > Newsletter. - Widget: To change the footer widget's position and size then go to the
Dashboard > Appearance > Customize > Footer > Widgets - Copyright: To change the copyright section content go to the
Dashboard > Appearance > Customize > Footer > Copyright Text
WooCommerce
To customize the blog list page and blog details page design Go to Dashboard > Appearance > Customize > Blog.
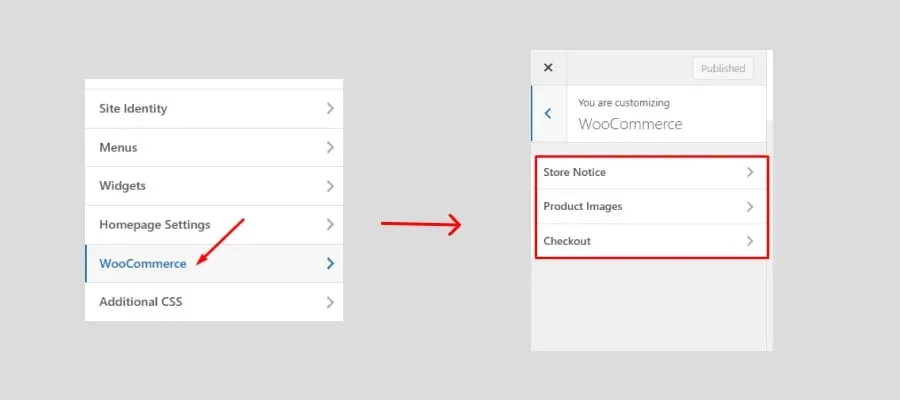
- Store Notice: To change the store notice text and keep enable or disable go to the
Dashboard > Appearance > Customize > WooCommerce > store notice - Product Images: To change the product image size go to the
Dashboard > Appearance > Customize > WooCommerce > Product Images - Checkout: To change the checkout page content go to the
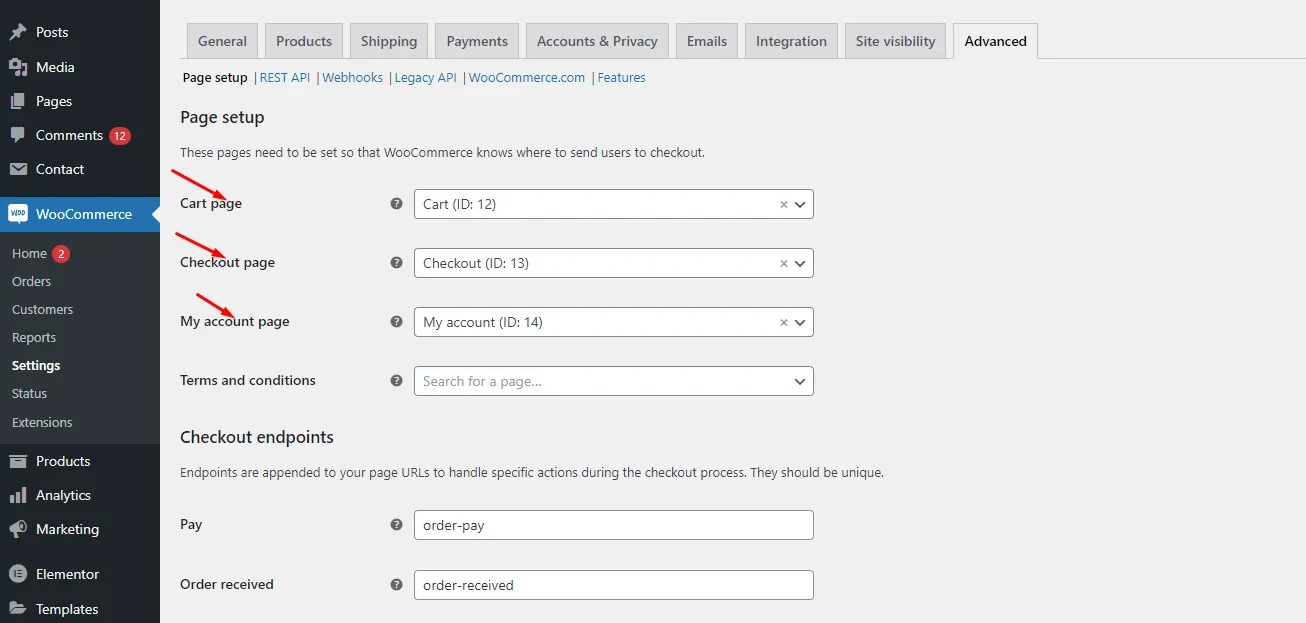
Dashboard > Appearance > Customize > WooCommerce > Checkout
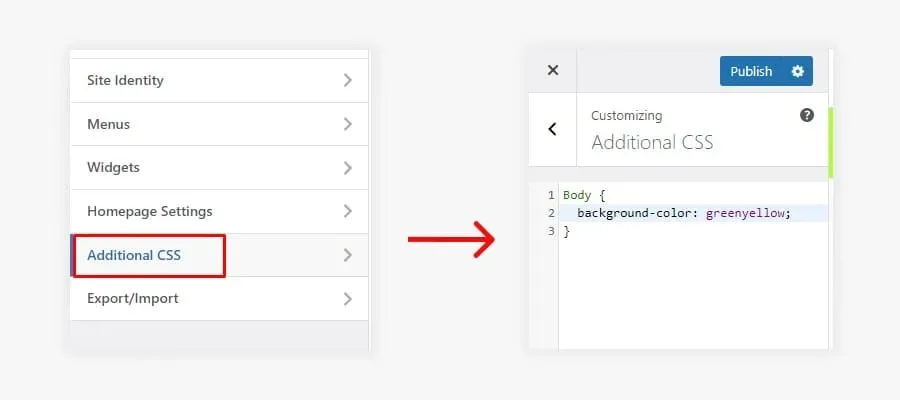
Additional CSS
Suppose you need to use custom CSS. You can do it very easily.
To add Additional CSS go to Dashboard > Appearance > Customize > Additional CSS. Just enter your CSS code and Publish it.
Footer Customization
To Customize footer options:
- Go to
Dashboard > Appearance > Customize > Footer
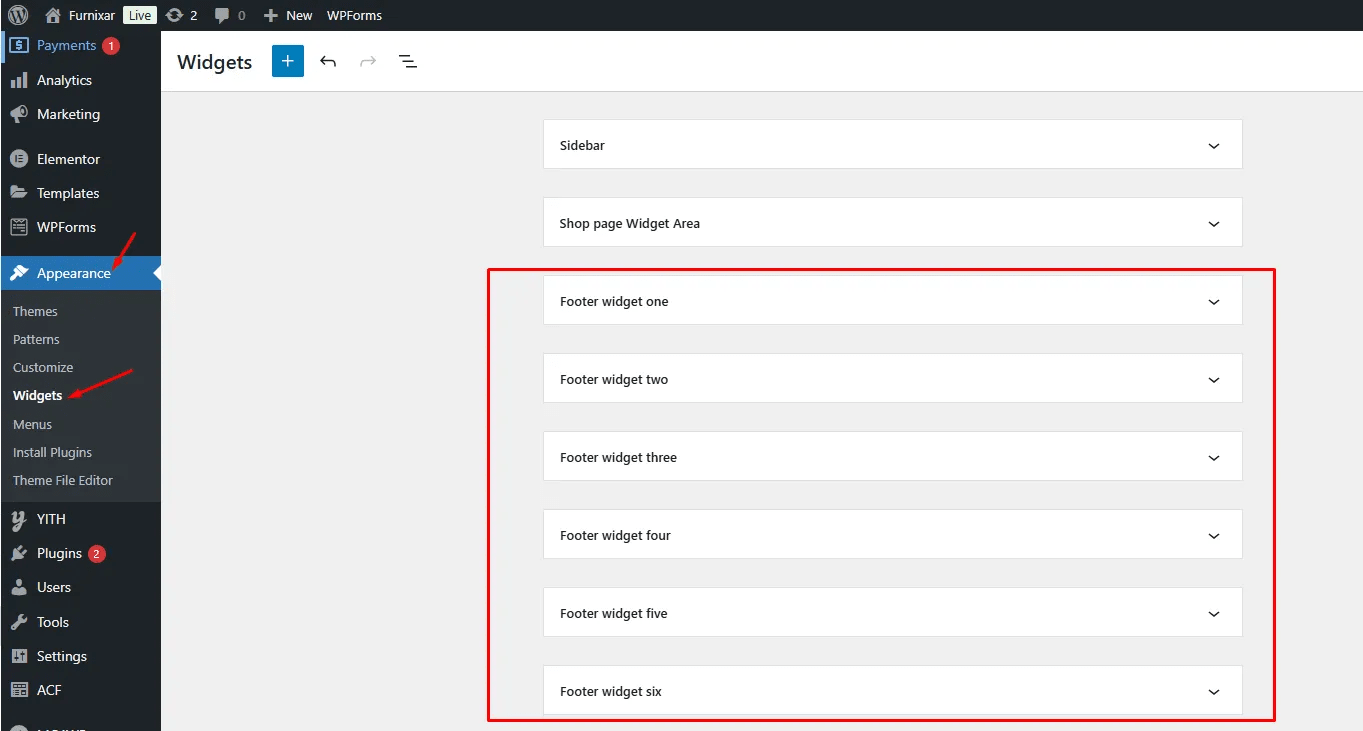
To add footer widgets go to Dashboard > Appearance > Widgets
Footer Copyright
To add-footer copyright text follow the instructions:
Go to Dashboard > Appearance > Customize > Footer > Footer Copyright
Child Theme
The Furnixar - eCommerce WordPress Theme package includes a Child Theme, which is essential for customizing your website safely and efficiently. By using the Child Theme, you can make changes to the theme’s design and functionality without affecting the core theme files.
Why Use a Child Theme?
- Safe Customization: Modify the layout, and styles, or even add new functionality without altering the main theme’s code.
- Easy Updates: When the Furnixar theme receives updates, you can apply them without losing any of your custom changes.
- Best Practice: Using a child theme is considered the best practice when working with WordPress themes, especially if you plan to make extensive modifications.
How to Install and Use the Child Theme:
- Upload the Child Theme:
- In your downloaded theme package, locate the Furnixar Child Theme file (
furnixar-child.zip). - Navigate to your WordPress dashboard and go to Appearance > Themes > Add New.
- Click on Upload Theme, select the
furnixar-child.zipfile, and click Install Now.
- In your downloaded theme package, locate the Furnixar Child Theme file (
- Activate the Child Theme:
- After installation, click Activate to make the child theme live on your website.
- Start Customizing:
- With the child theme activated, any modifications you make (e.g., custom CSS, template file changes) will be applied to the child theme, ensuring that your core Furnixar theme remains untouched.
What Can You Customize with the Child Theme?
- Custom CSS: Easily add your own styles to modify the look and feel of your site.
- Template Overrides: Create new templates or modify existing ones (e.g., header, footer, product pages) by copying them from the parent theme into the child theme and editing them.
- Additional Features: Add custom functions or integrate third-party features via the
functions.phpfile in the child theme.
How to Update the Theme
The Furnixar theme may be updated periodically to add new features and fix bugs. You have two methods to update the theme.
Envato update
Envato has developed the Envato Market Plugin for WordPress. This plugin automatically alerts you on your dashboard when a new version of the theme is available and you can update it automatically from your WordPress dashboard. Follow the upcoming steps to install and use it.
- Go to Envato Market Plugin.
- Follow the instructions to download, install, and activate it.
Updating Manually
- Download the latest theme version from ThemeForest > Downloads.
- Extract the ZIP theme Package to the normal folder.
- Go to
Appearance > Themes - Click on
Add New > Uploadthen install furnixar.zip.
Support
Again Thank you for purchasing our theme. If you have any questions that are beyond the scope of this help file, please feel free to send your questions to our support email: support@electronthemes.com.** Our support team will reply to you within 6 hours.
If you find any bugs or issues or just having some problems with the theme, use our ticket system: https://electronthemes.com/contact
Support includes
- Responding to questions or problems regarding the item and its features
- Fixing bugs and reported issues
- Feature Request
- Providing updates to ensure compatibility with new software versions
Item support does not include
- Customization and installation services. (You can ask for paid support; at enamul@electronthemes.com)
- Support for third-party software and plug-ins
Wish You All the best. Take Care!